返回
-
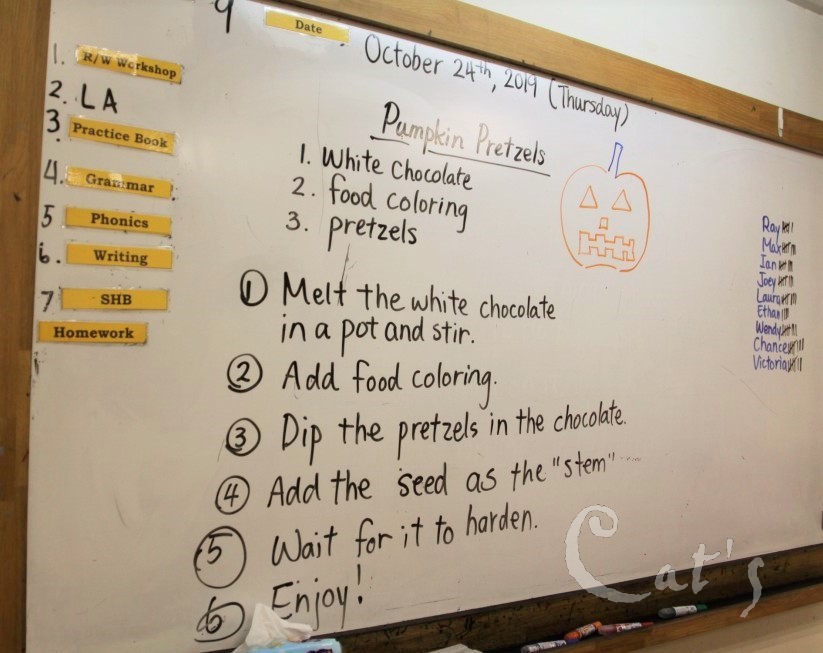
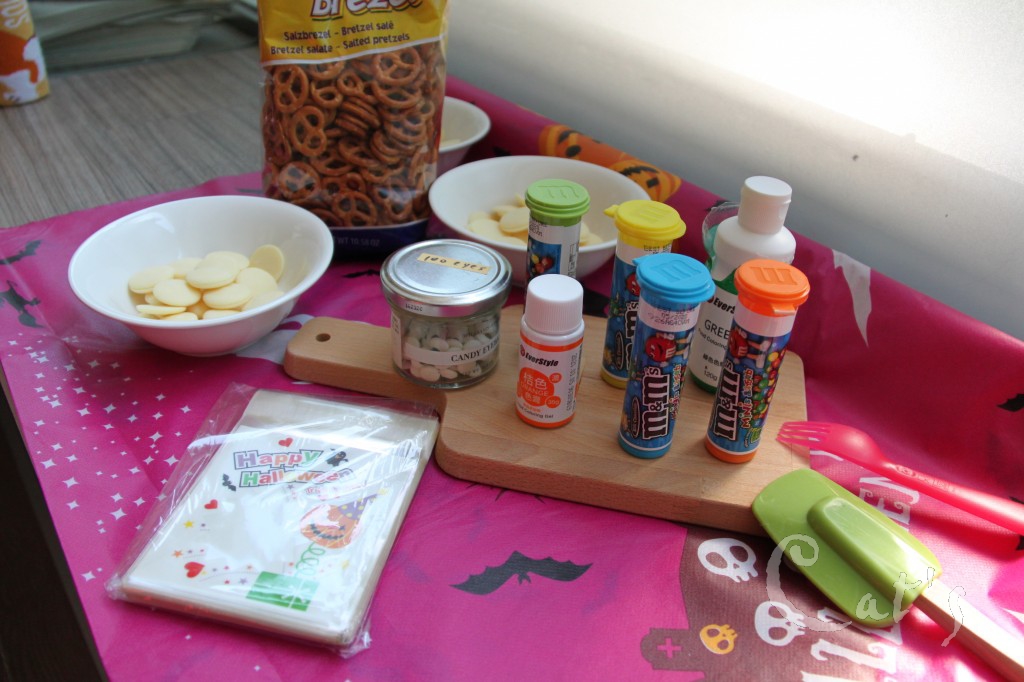
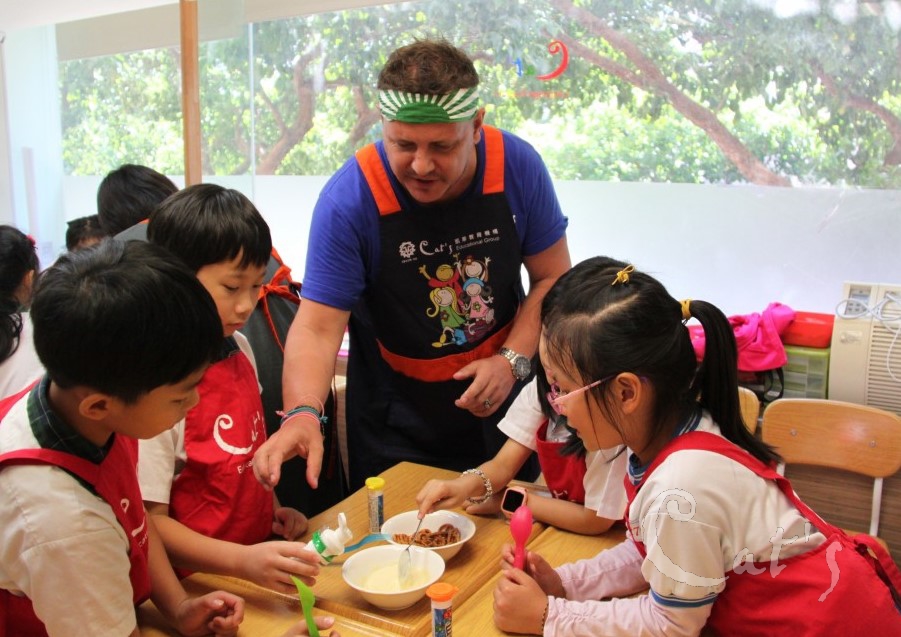
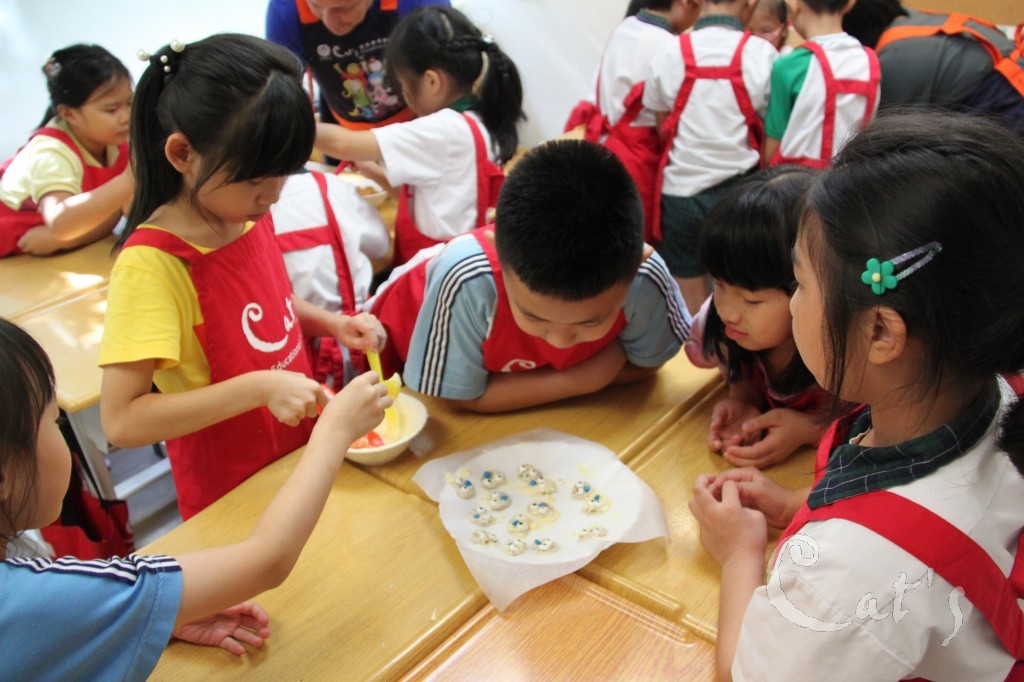
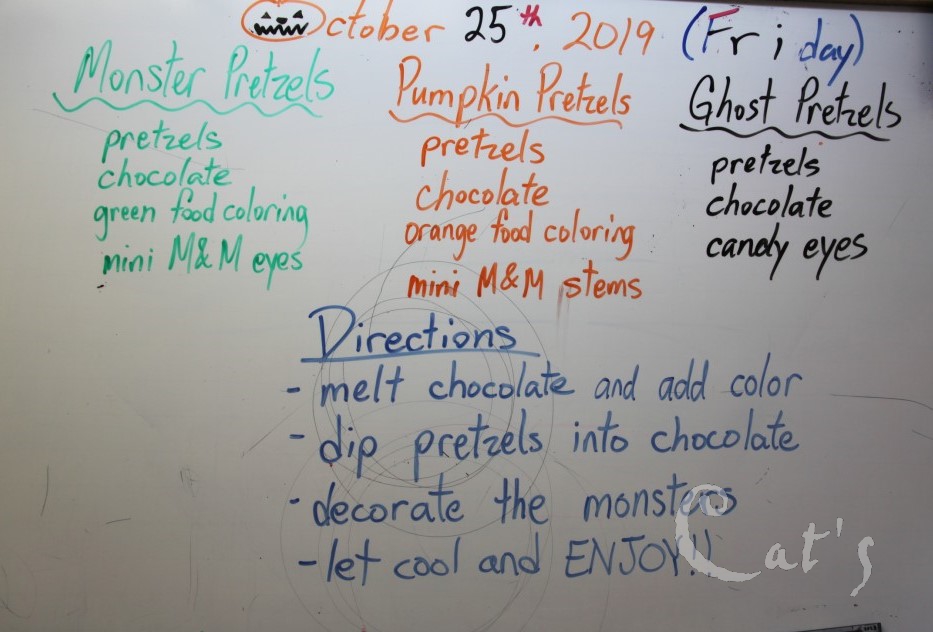
今天的材料有~~~巧克力和餅乾
-
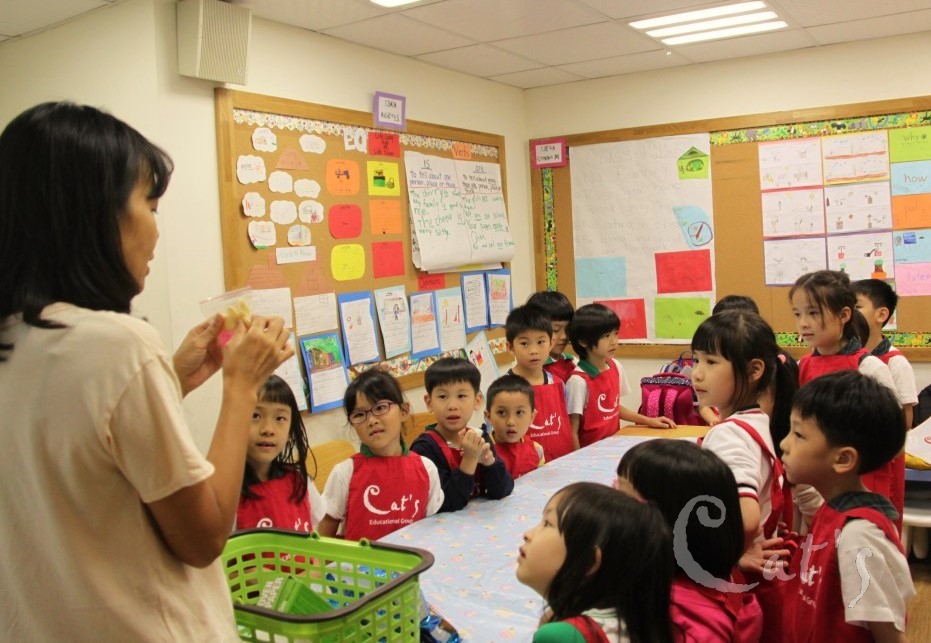
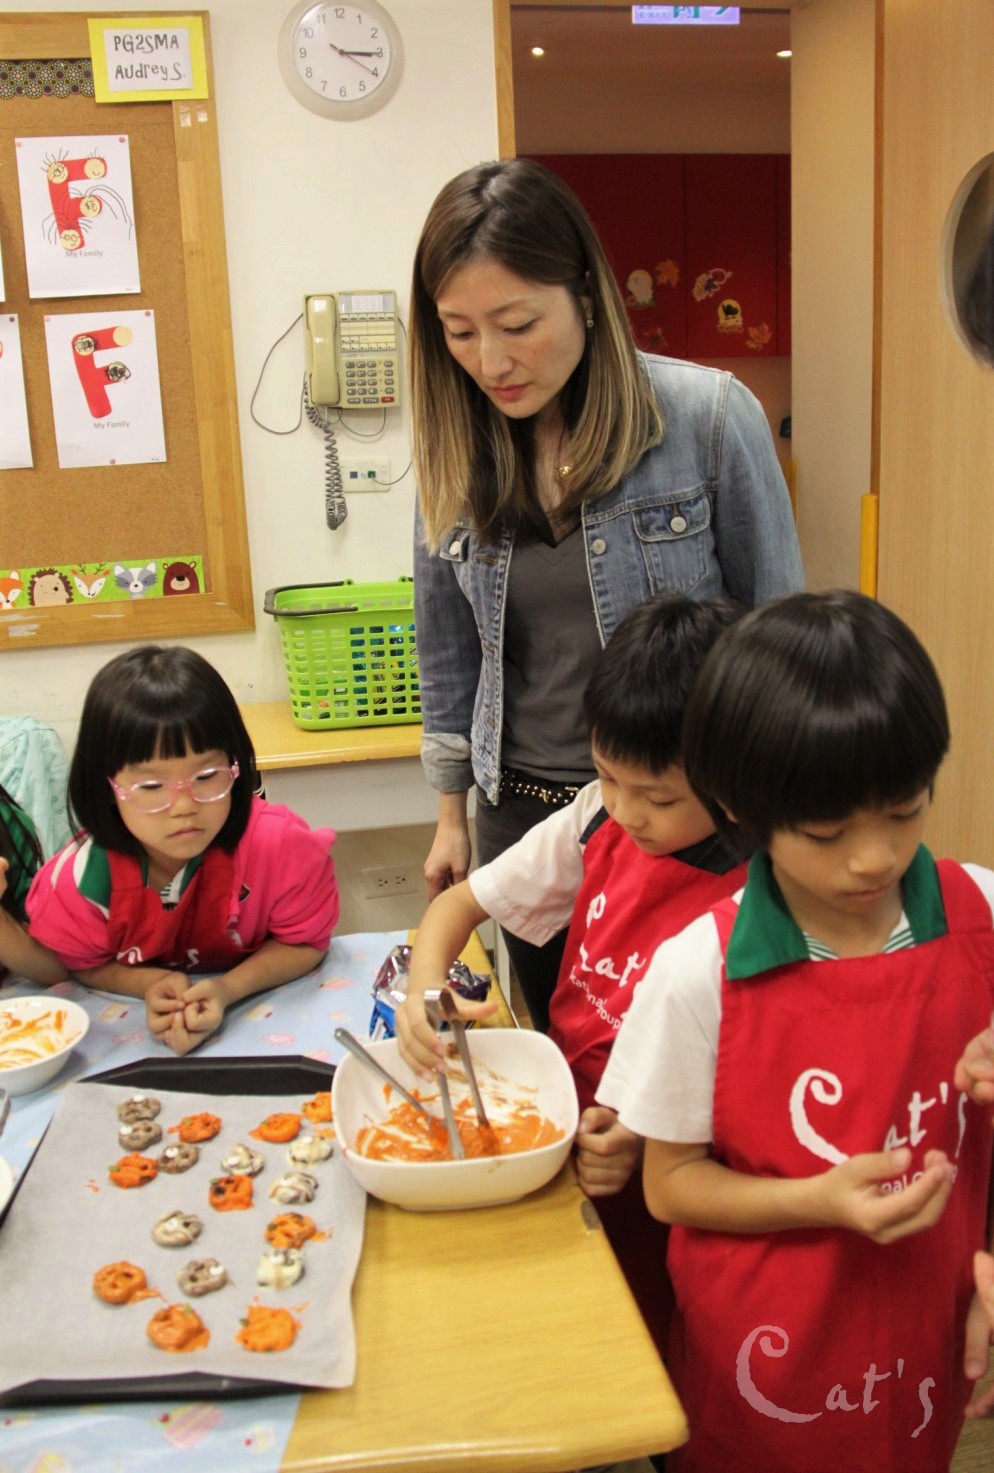
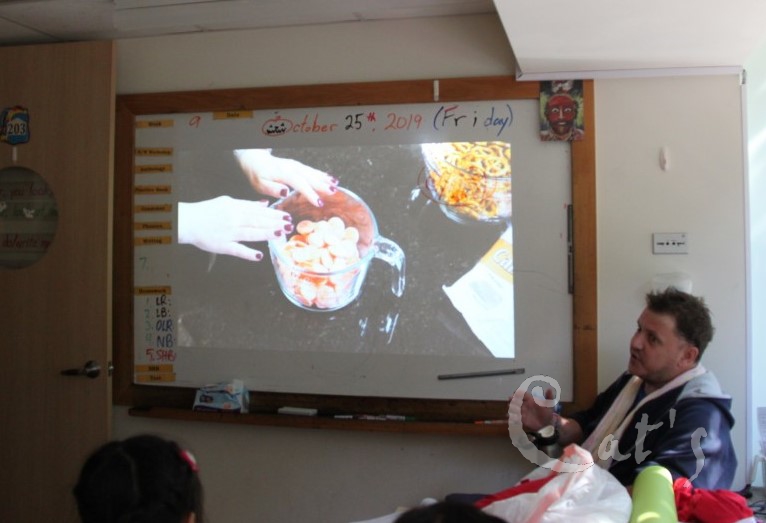
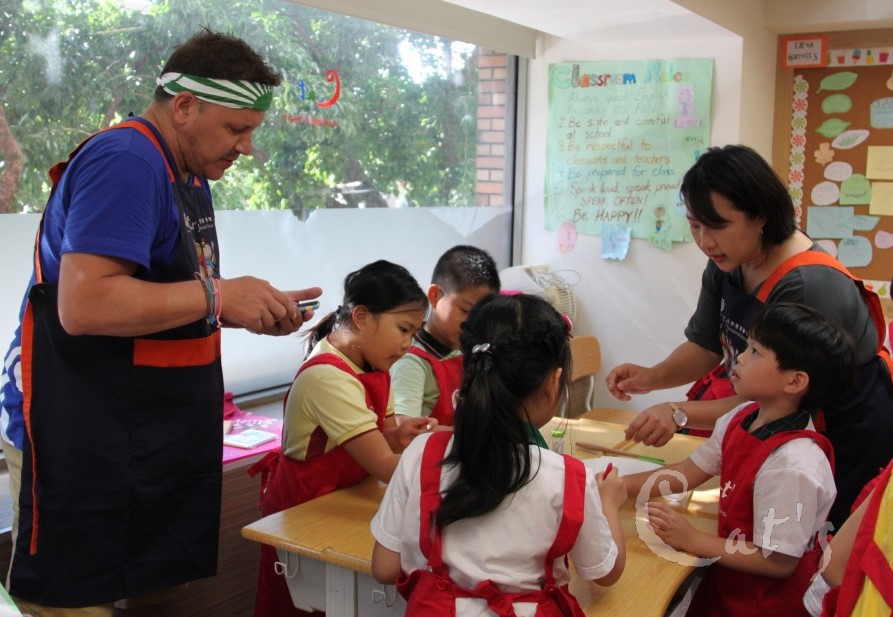
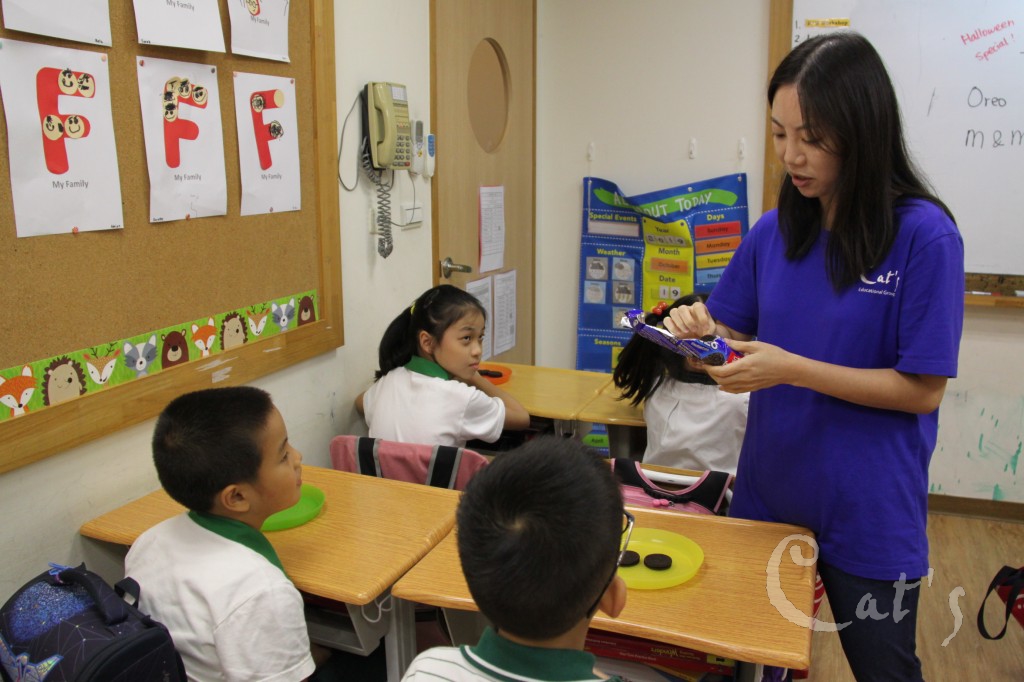
Ms. Eunice 向大家說明今天的製作流程
-
先融化白巧克力囉~
-
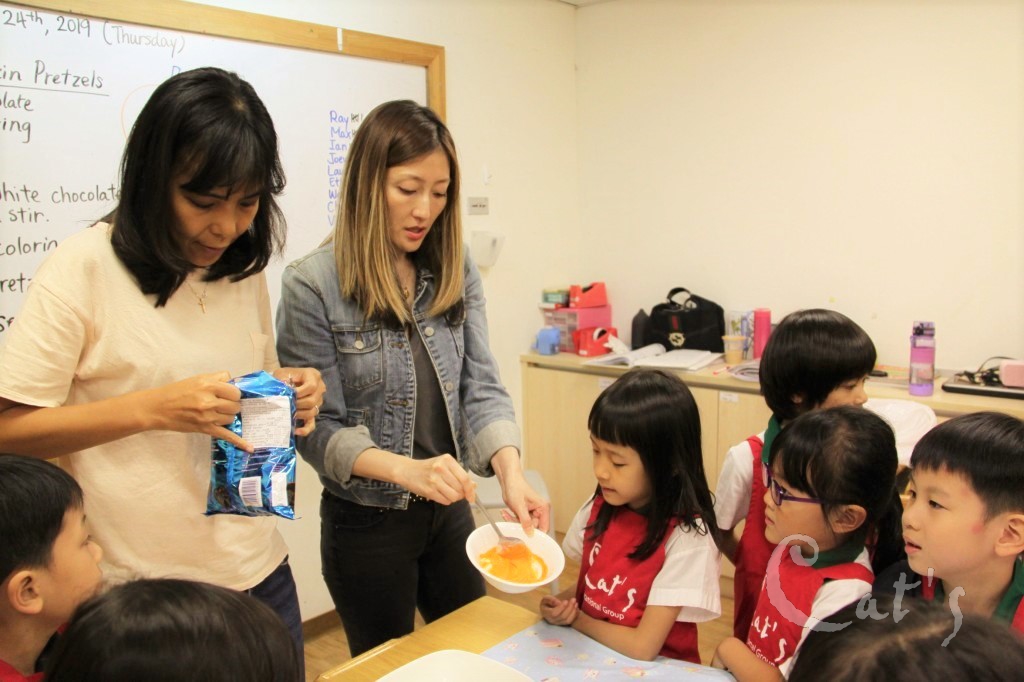
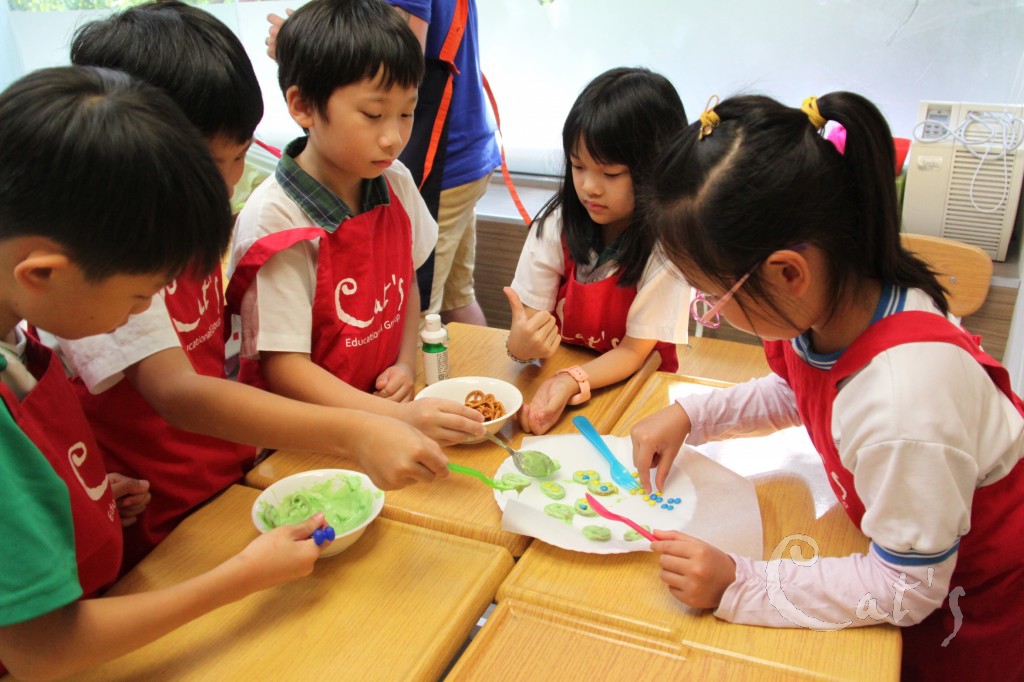
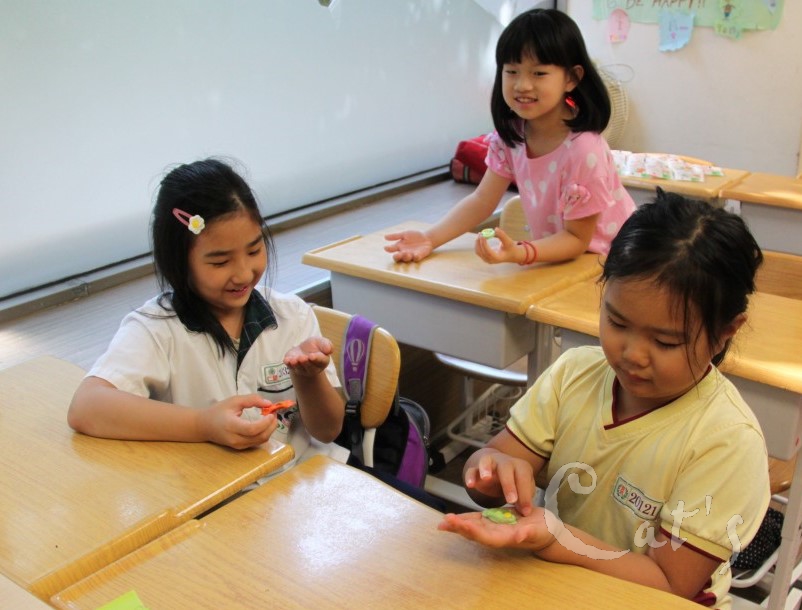
接著調和成需要的顏色
-
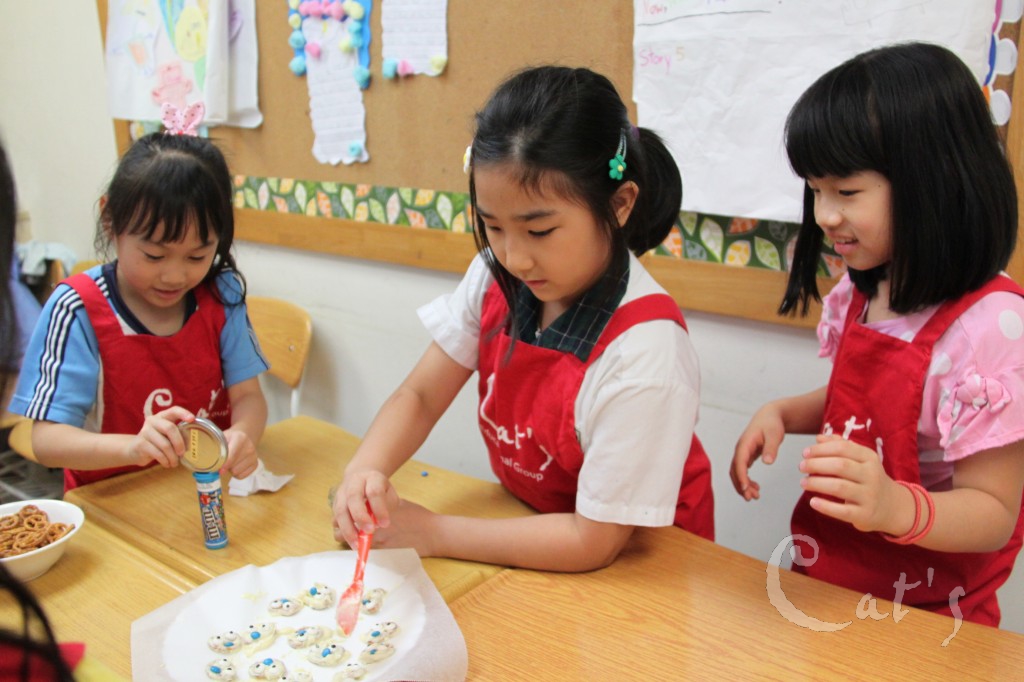
如果是橘色~我猜是要做南瓜唷!
-
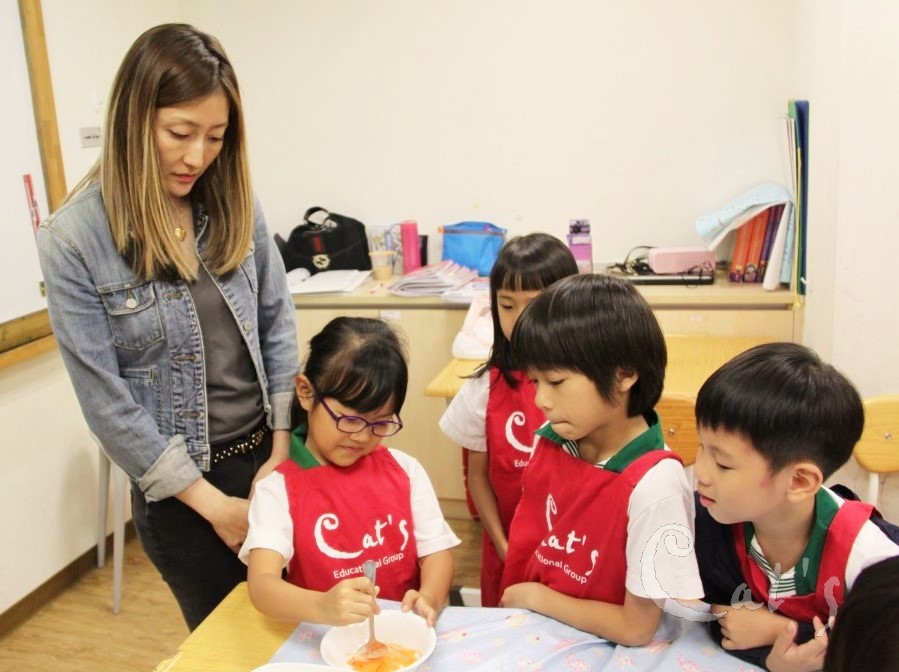
這個顏色大家還滿意嗎?
-
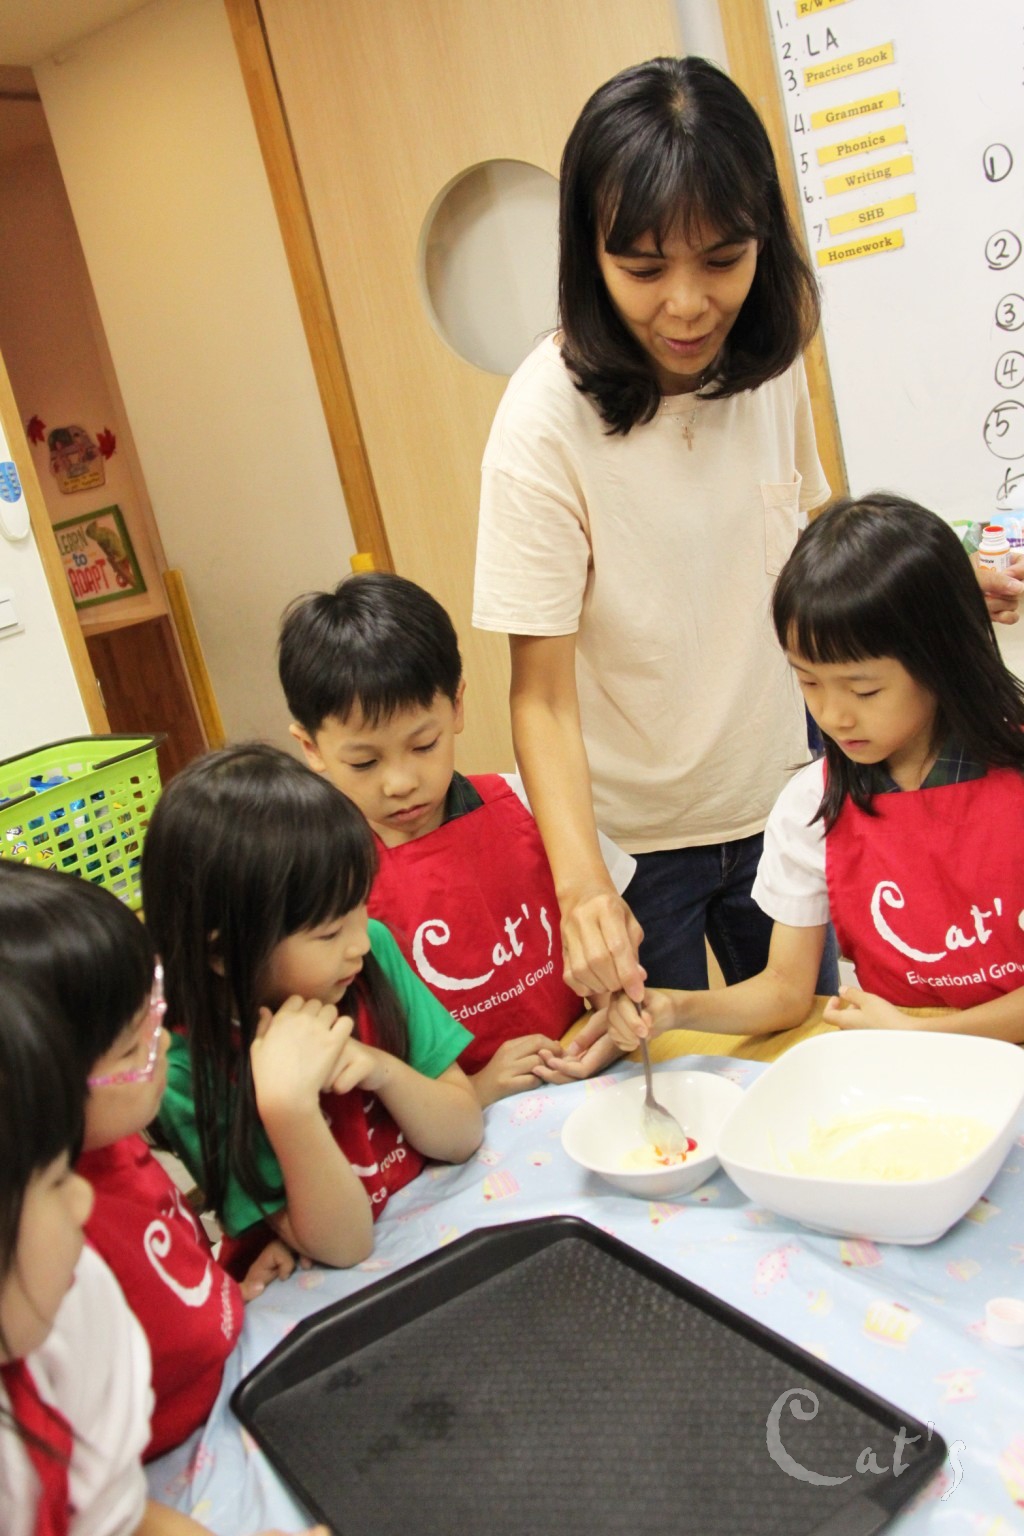
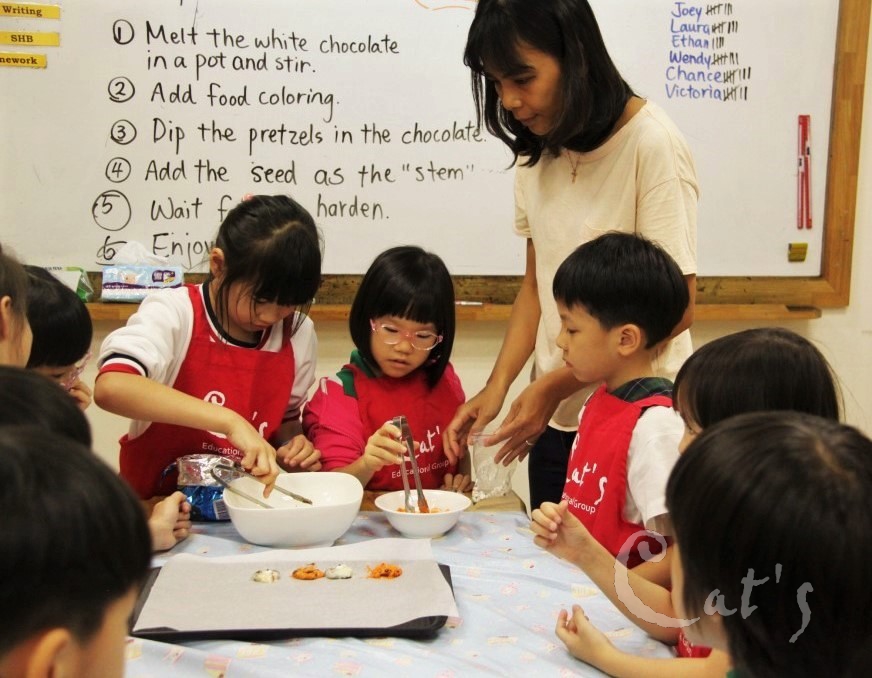
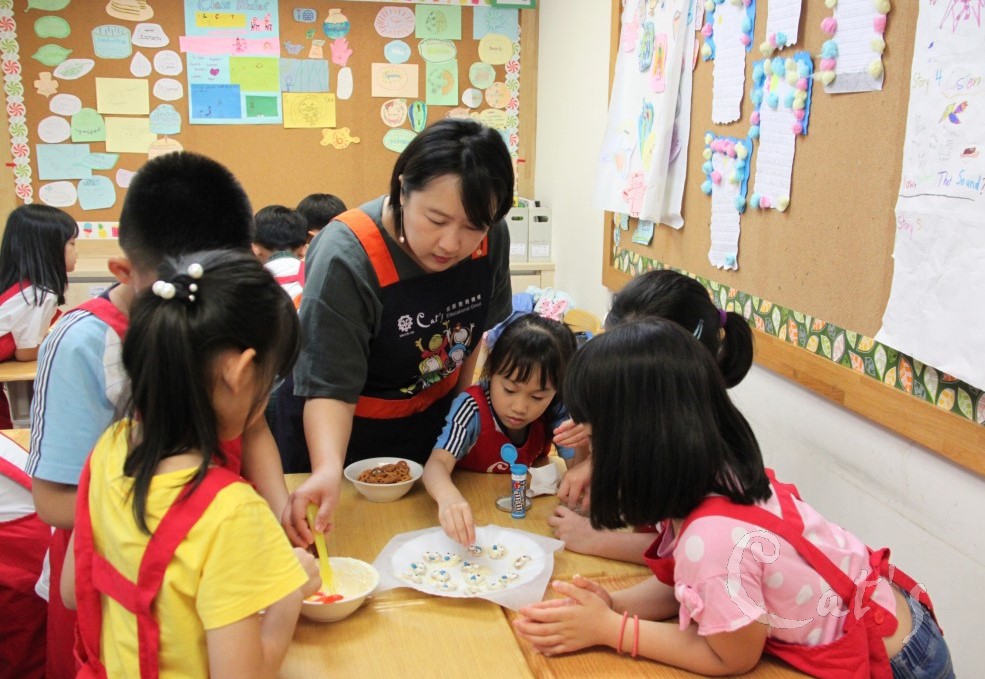
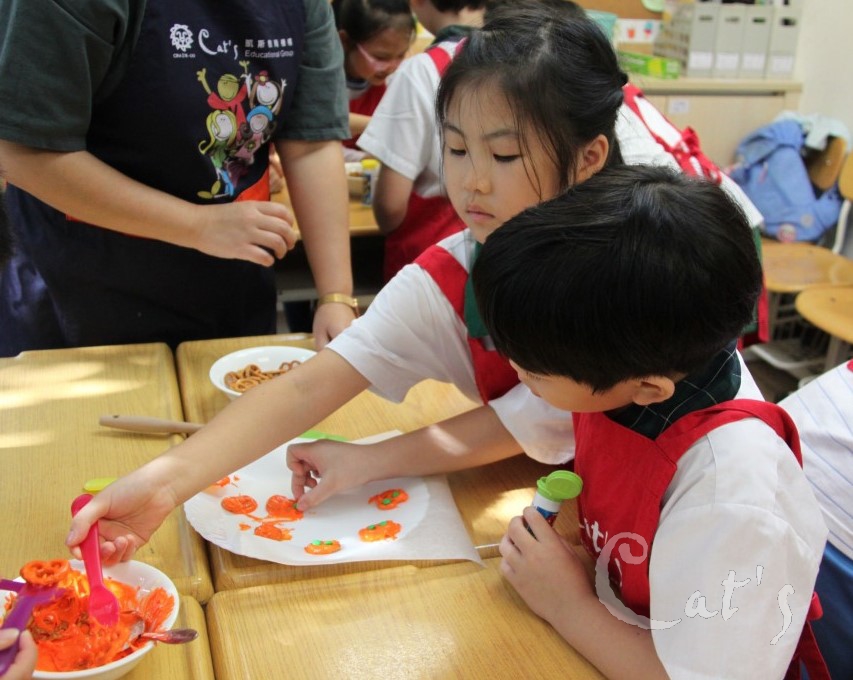
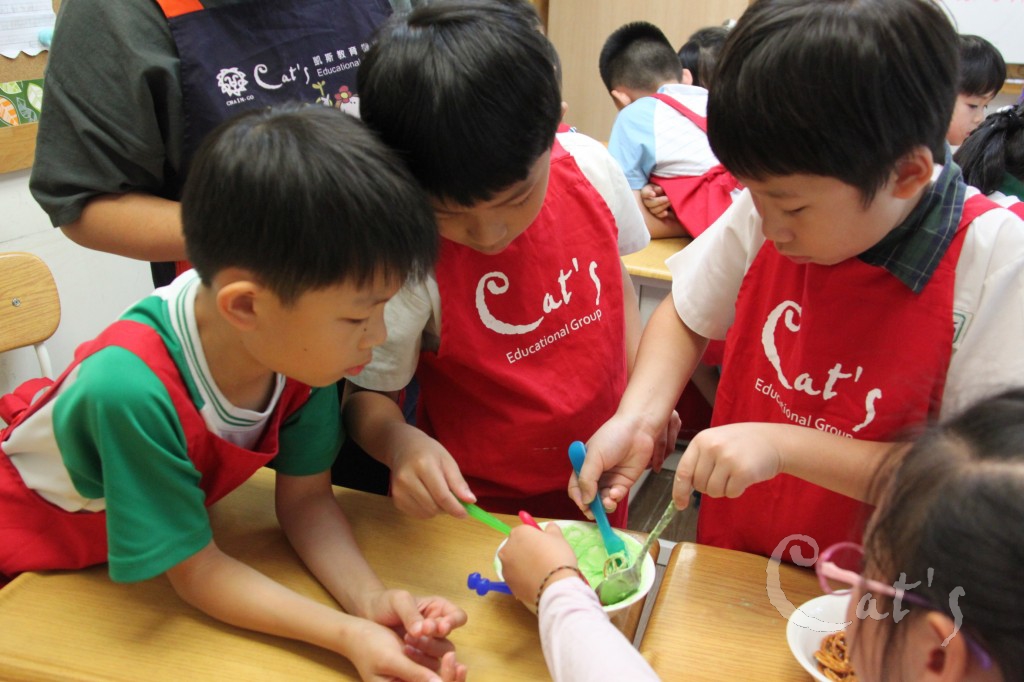
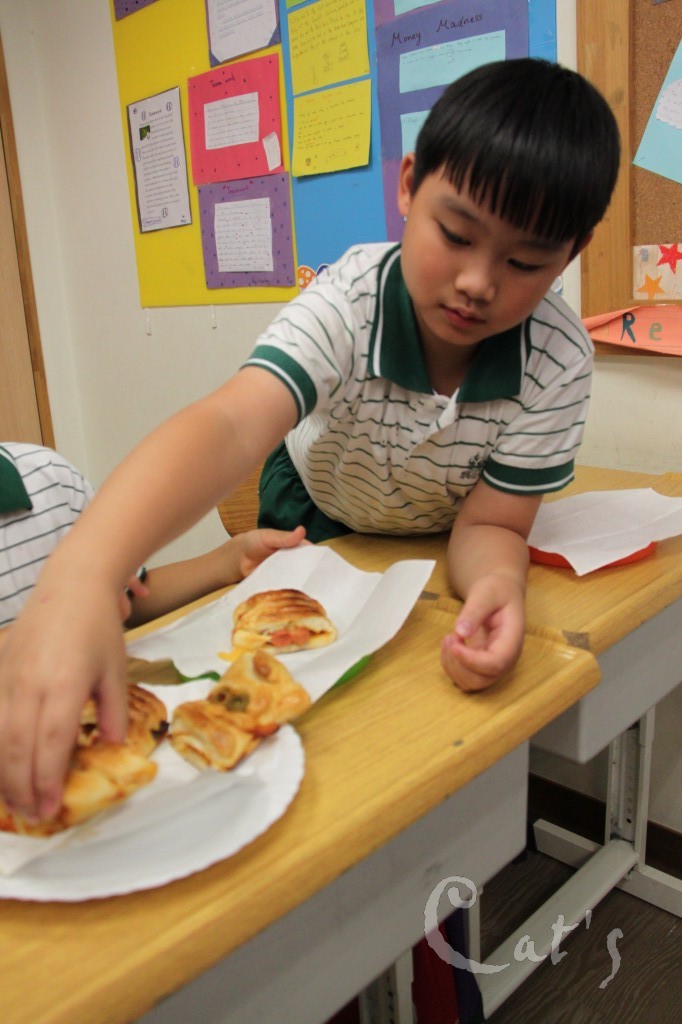
開始加工了喔!
-
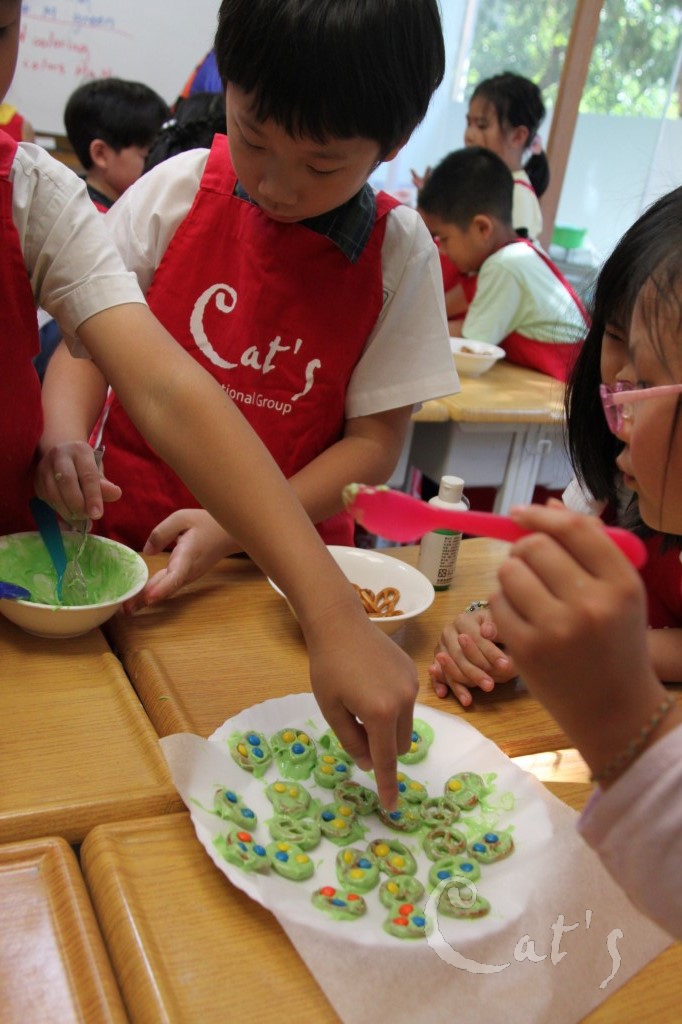
裹巧克力中~
-
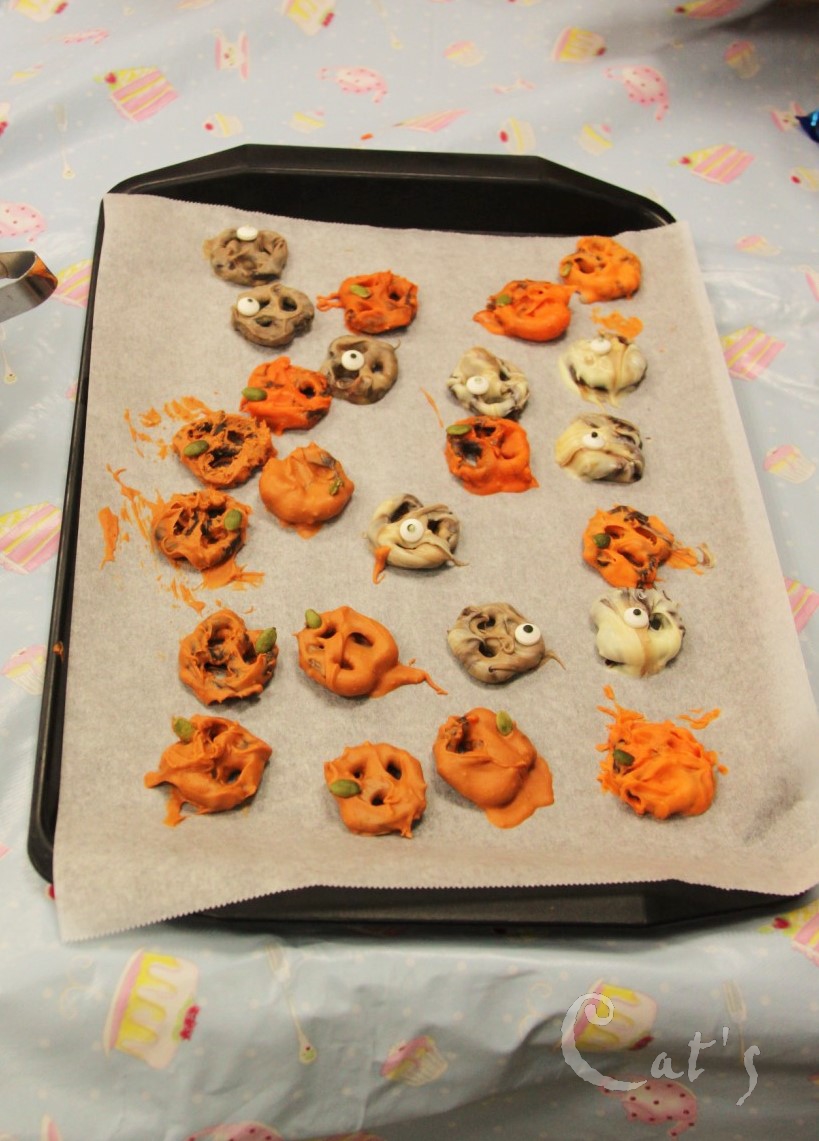
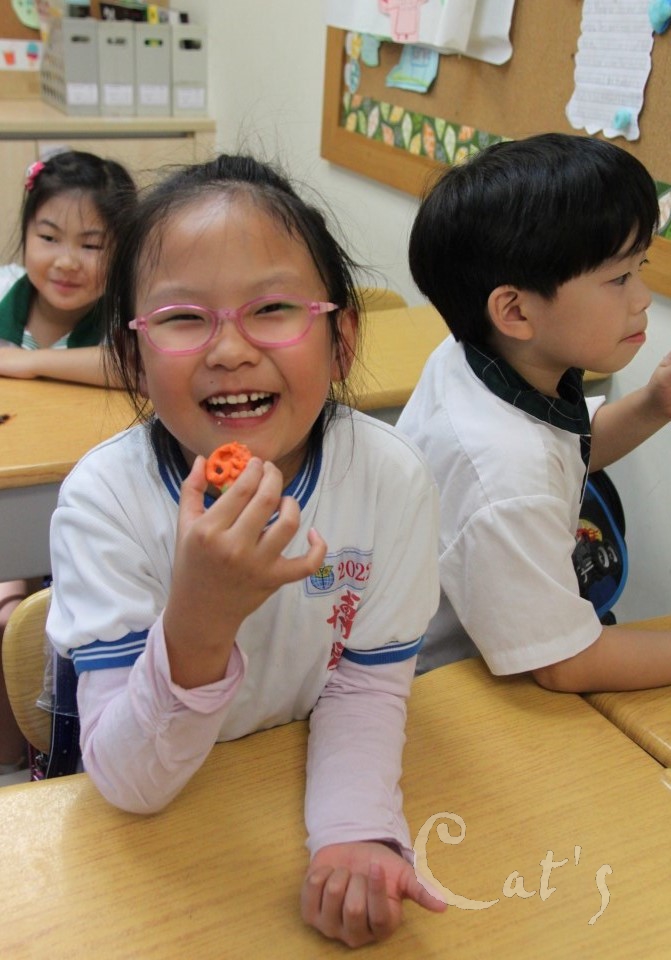
第一批南瓜等晾乾
-
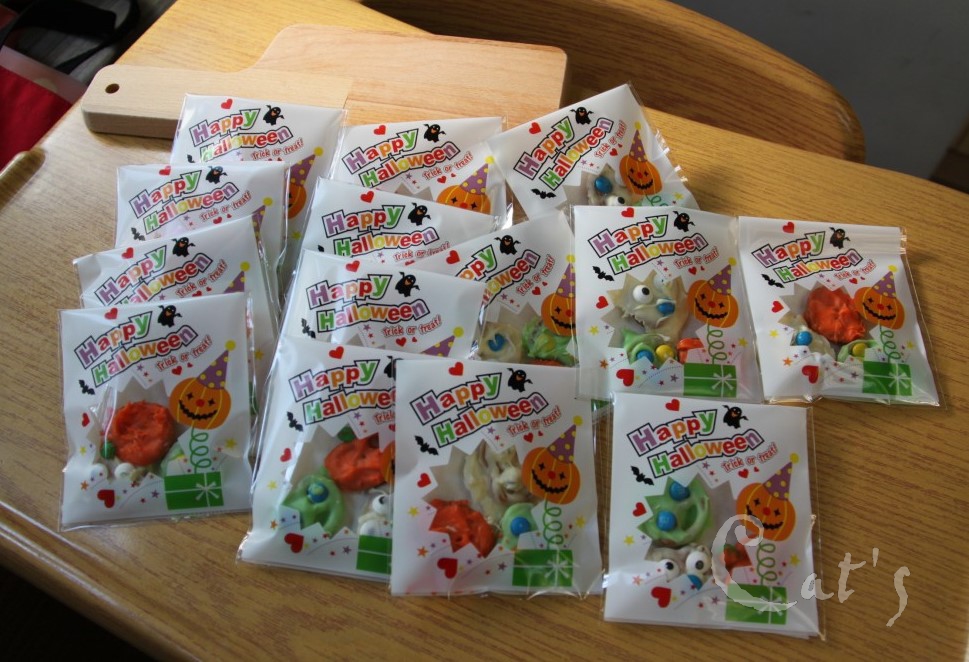
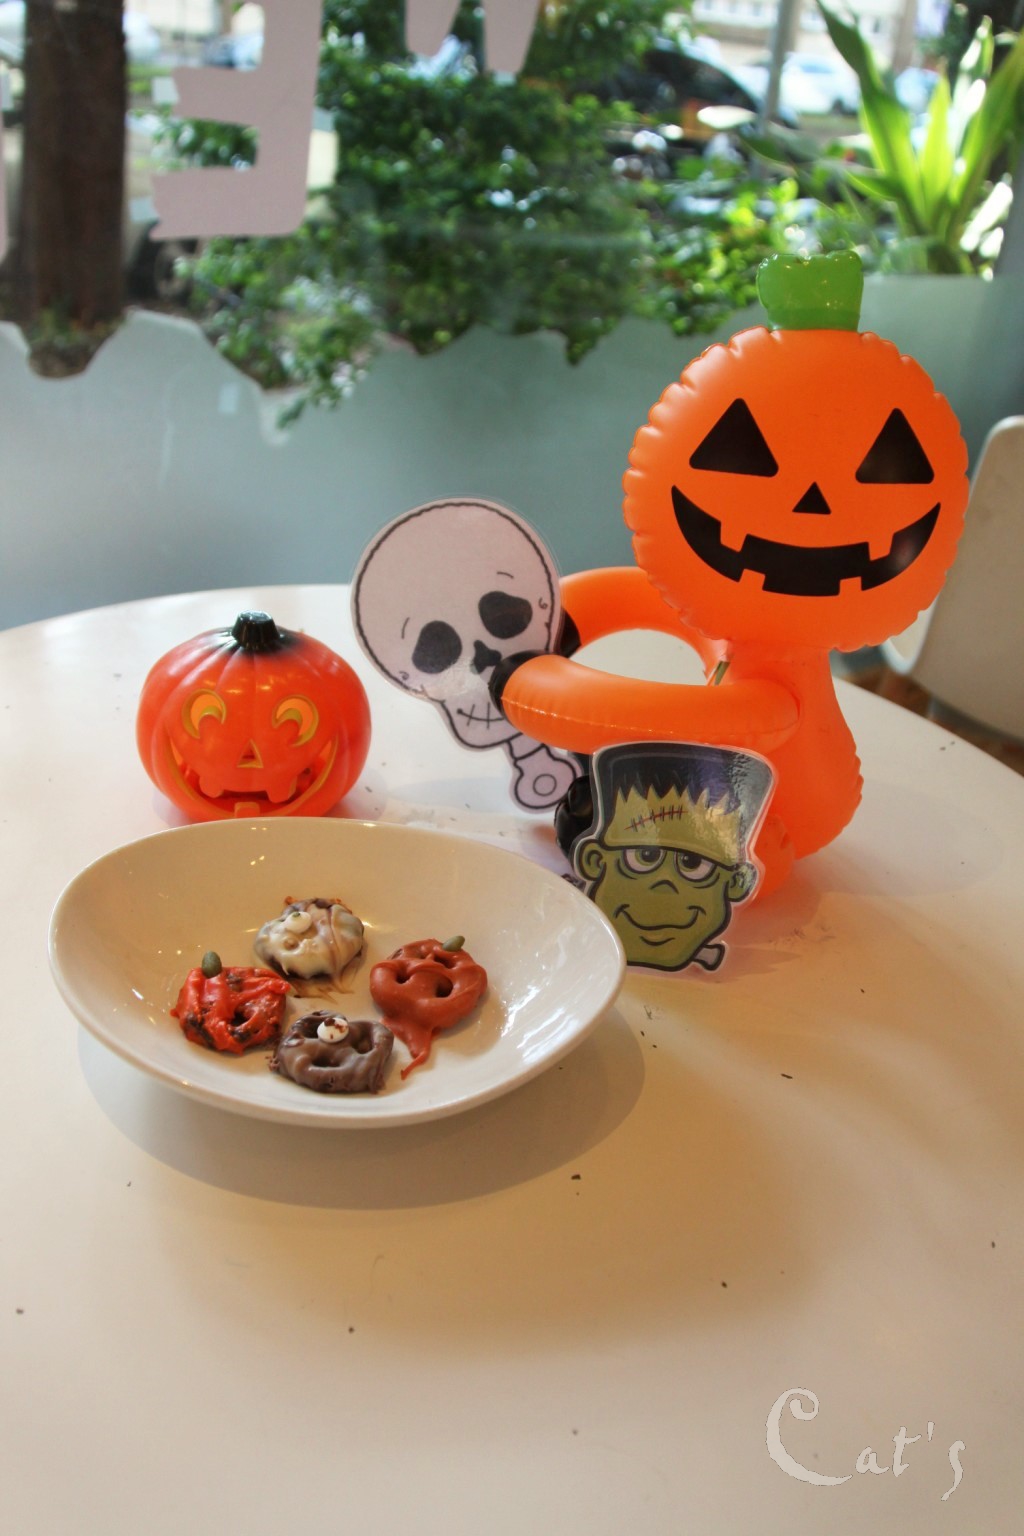
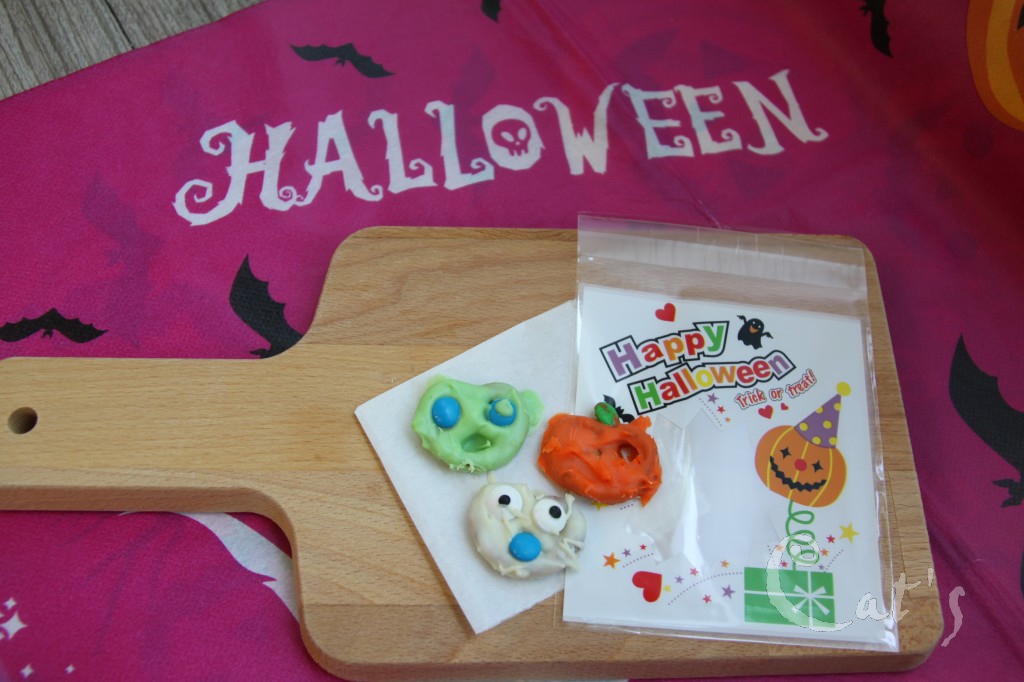
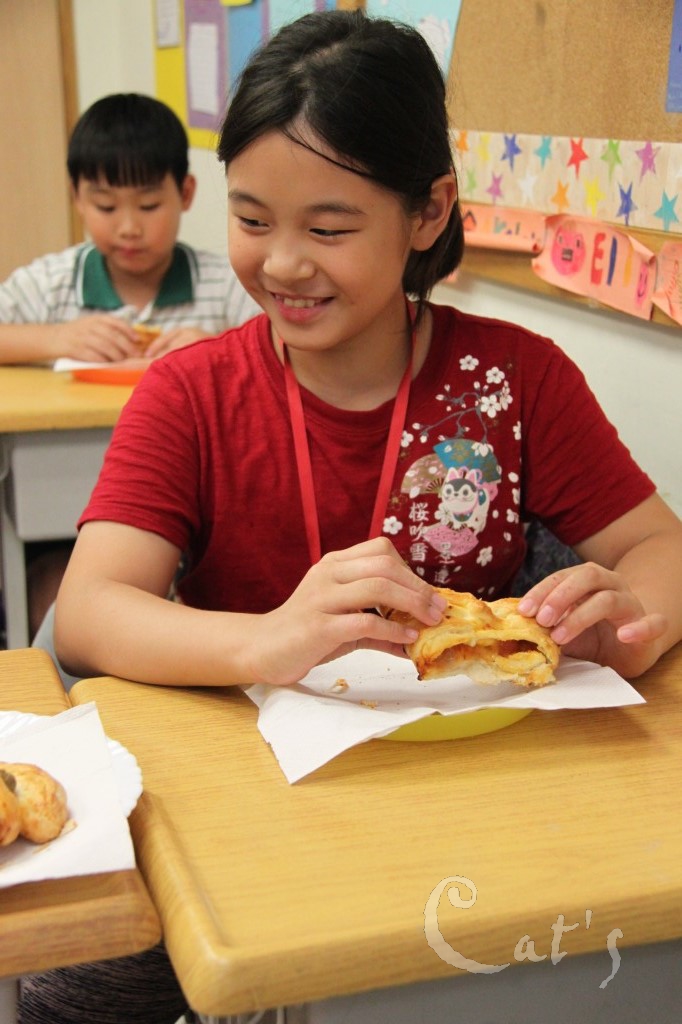
成品亮相
-
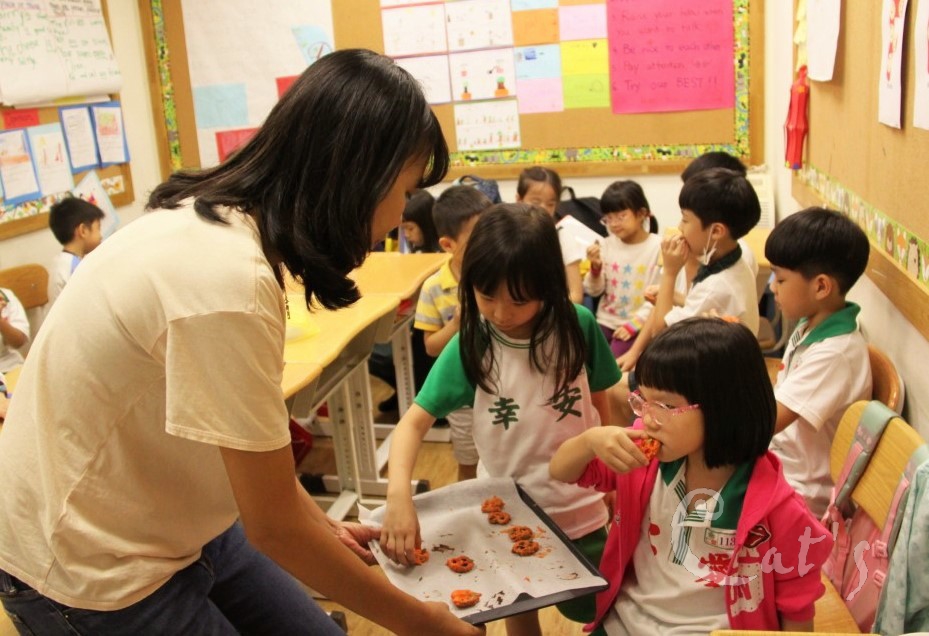
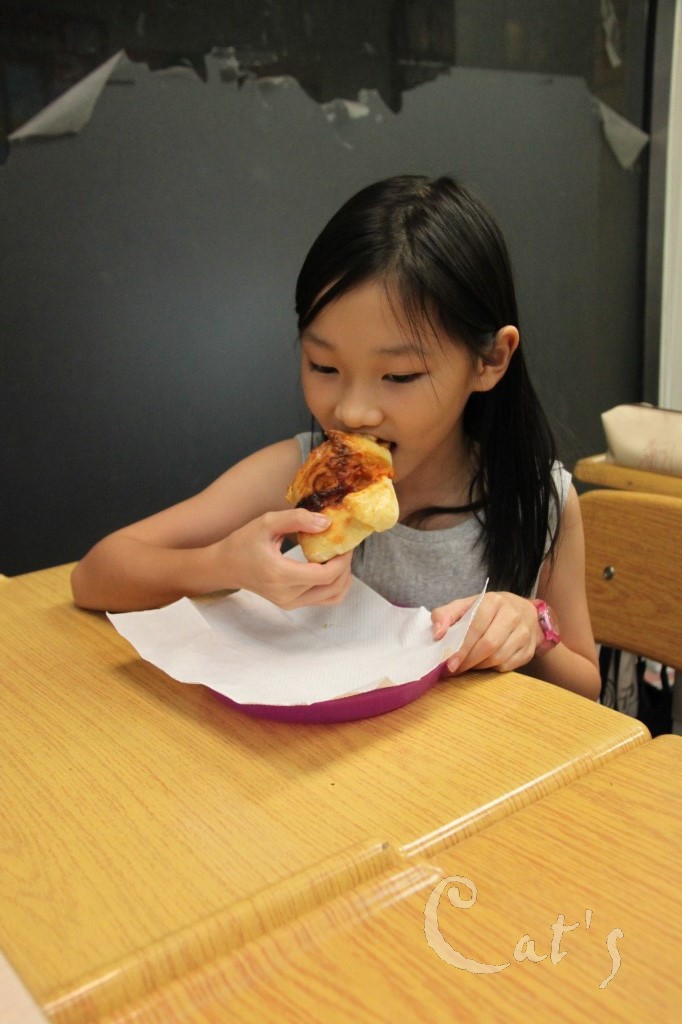
可以吃囉!!
-
-
-
-
-
-
-
-
-
-
-
-
-
-
-
-
-
-
-
-
-
-
-
-
-
-
-
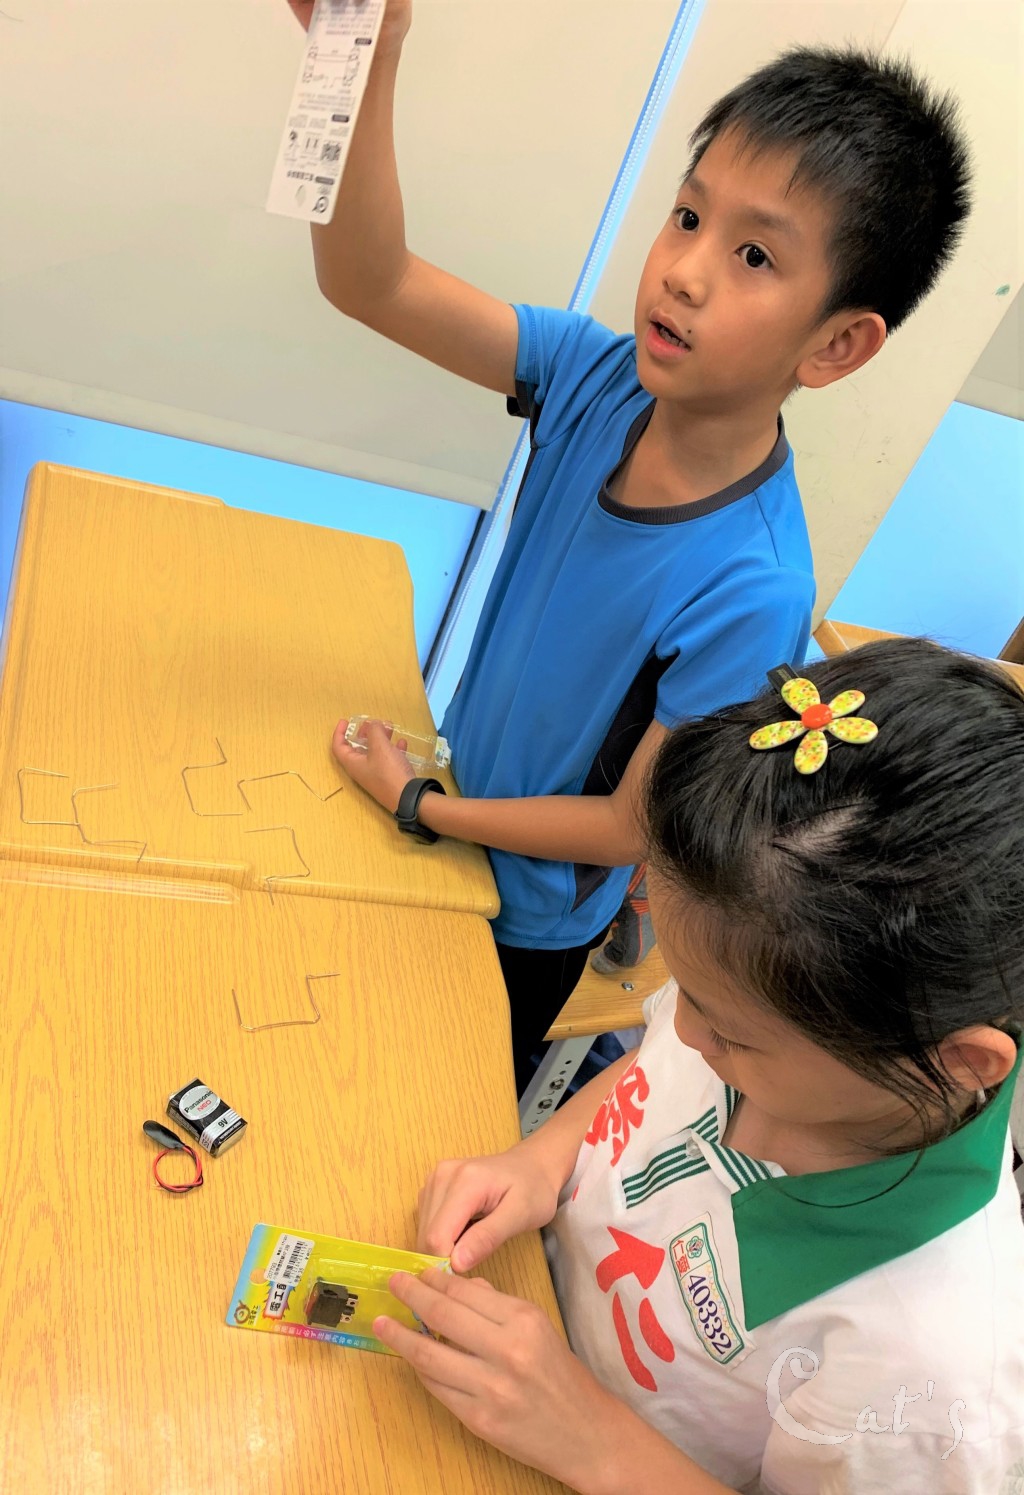
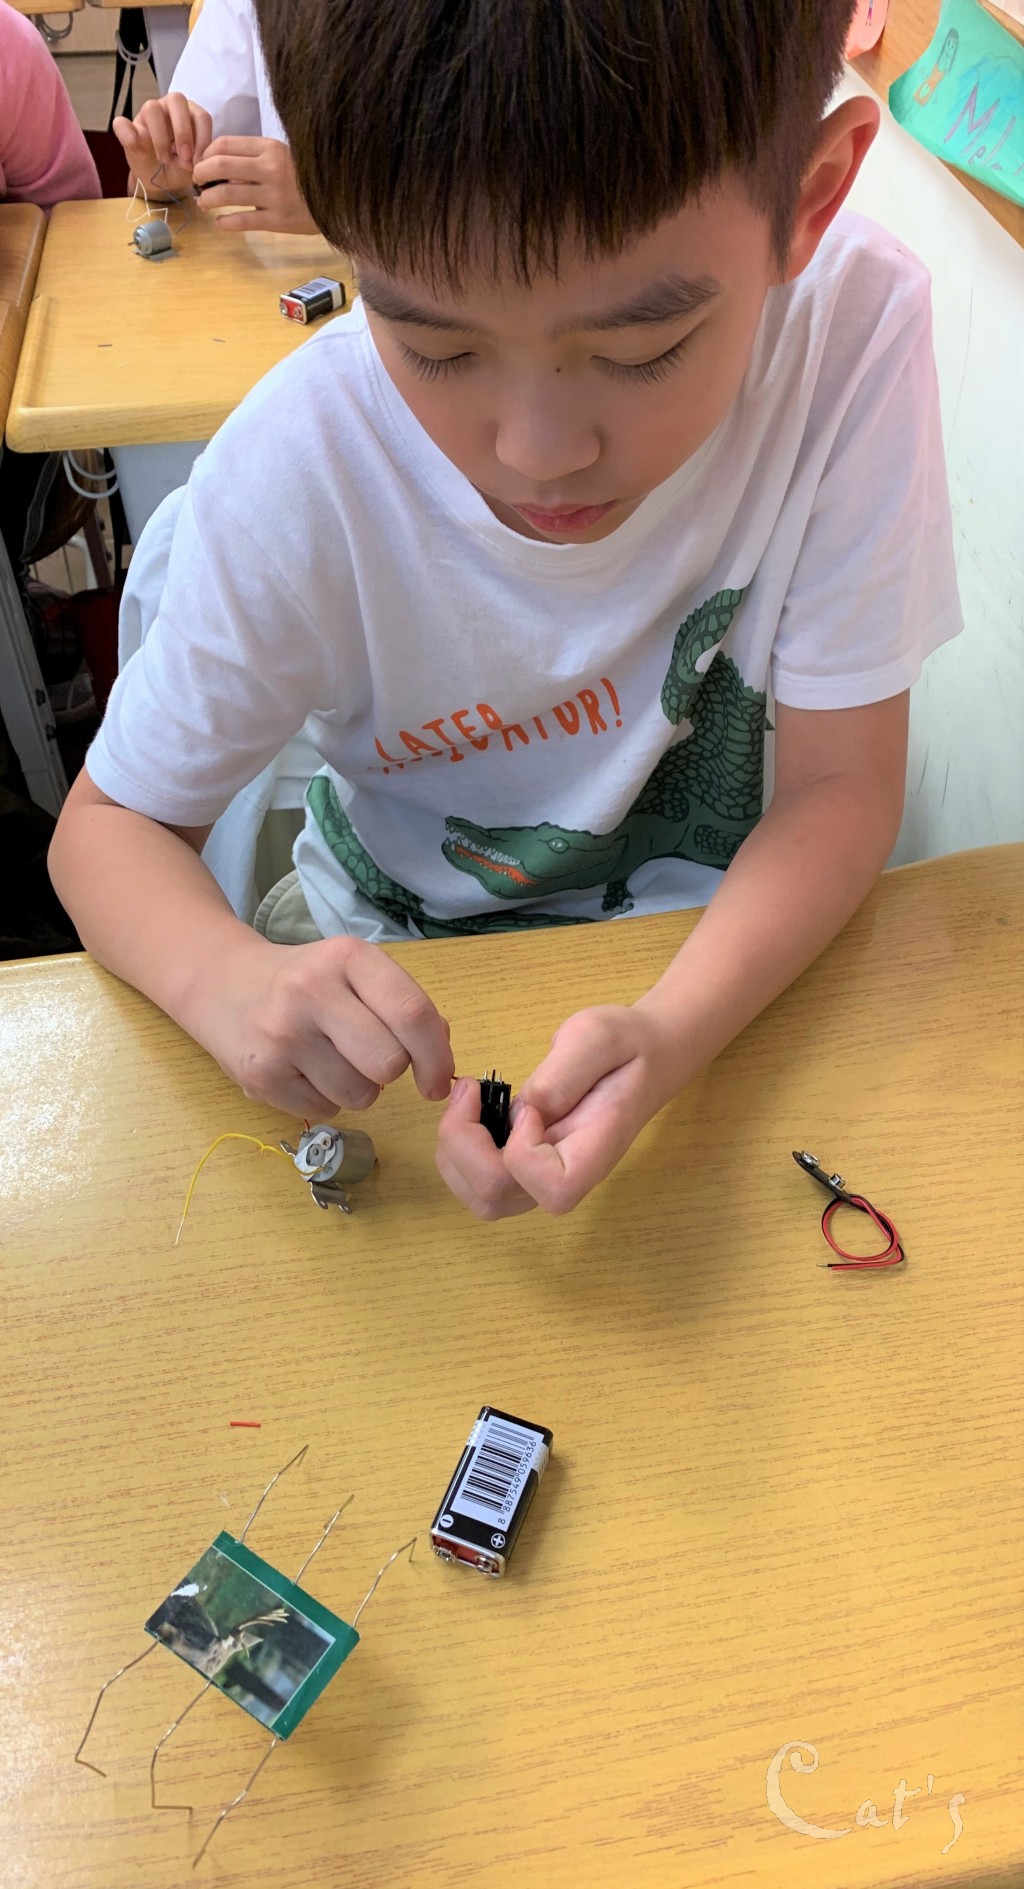
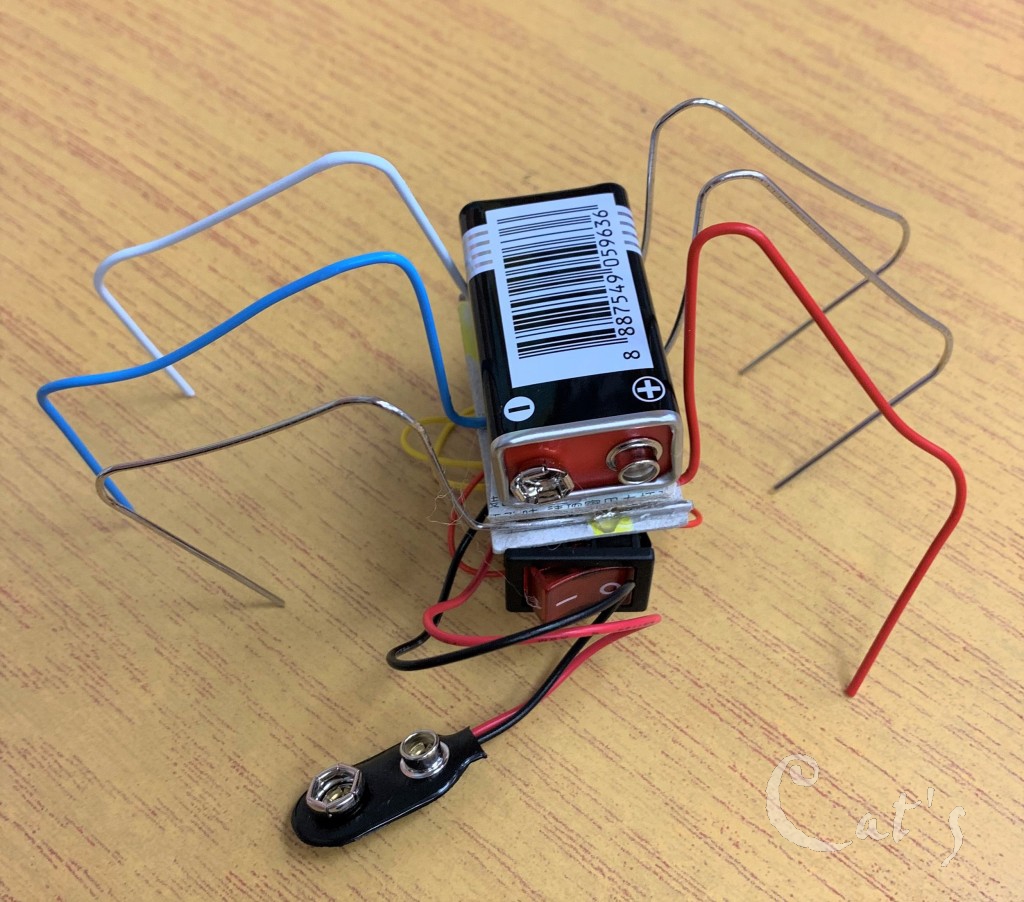
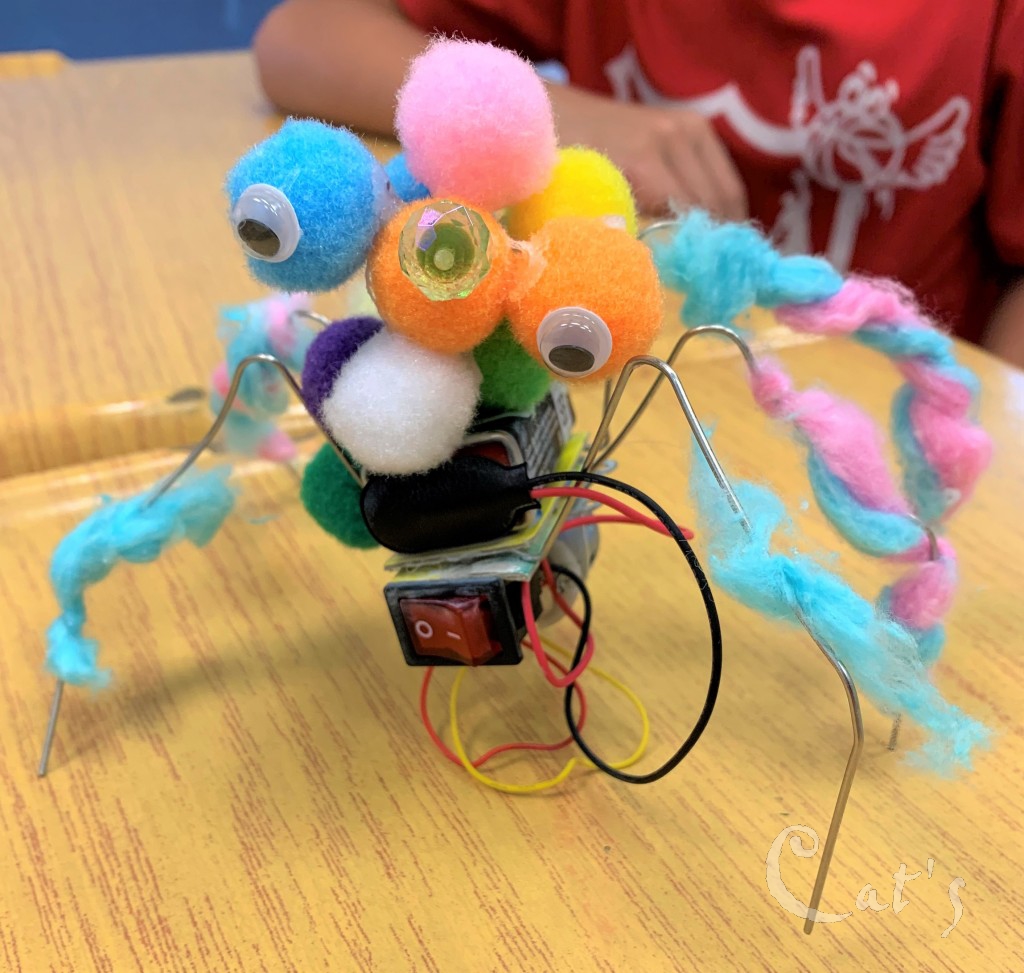
使用迴紋針做為螞蟻的腳
-
注意彎折的角度
-
電池包裝的紙板也可以利用
-
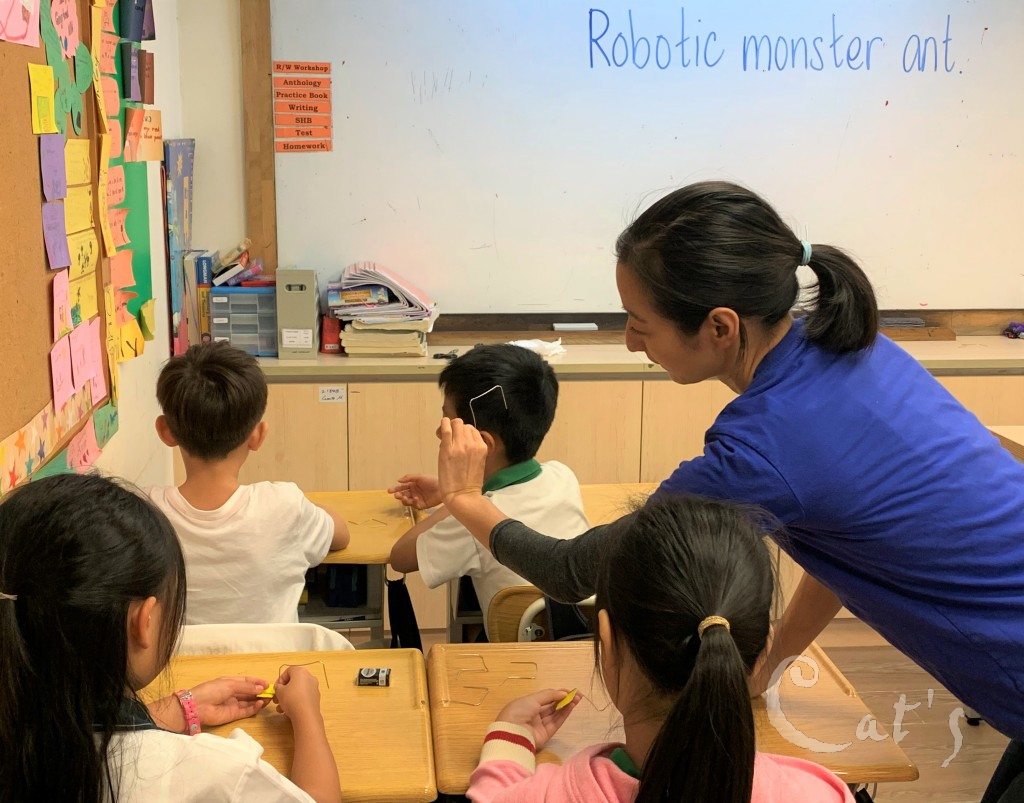
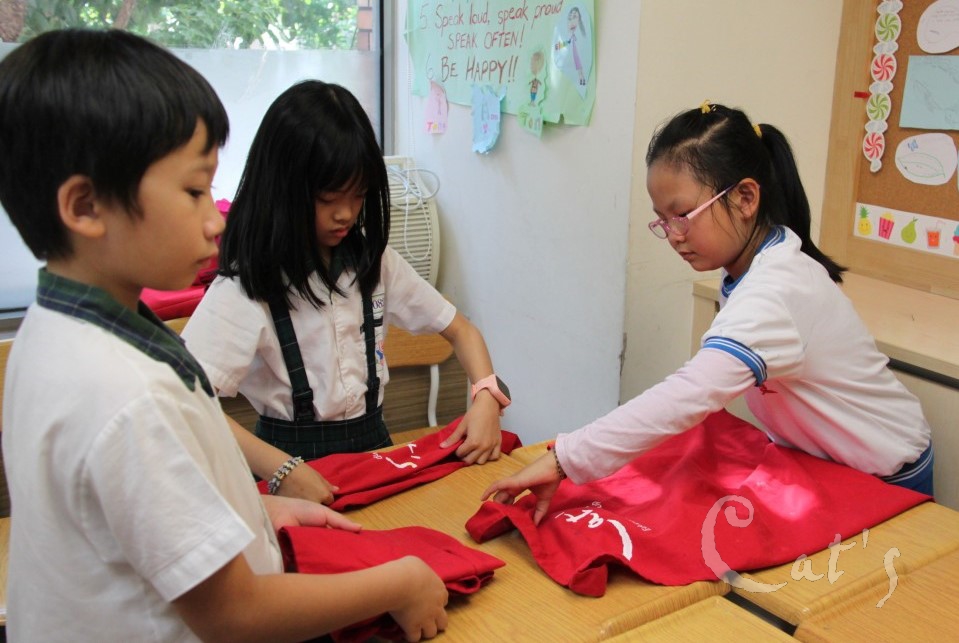
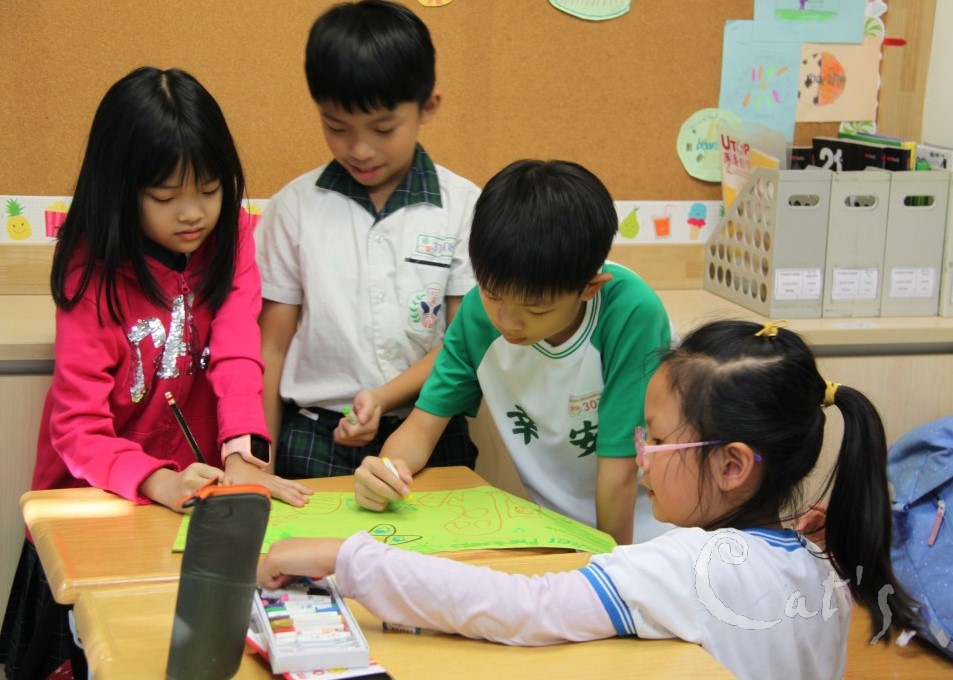
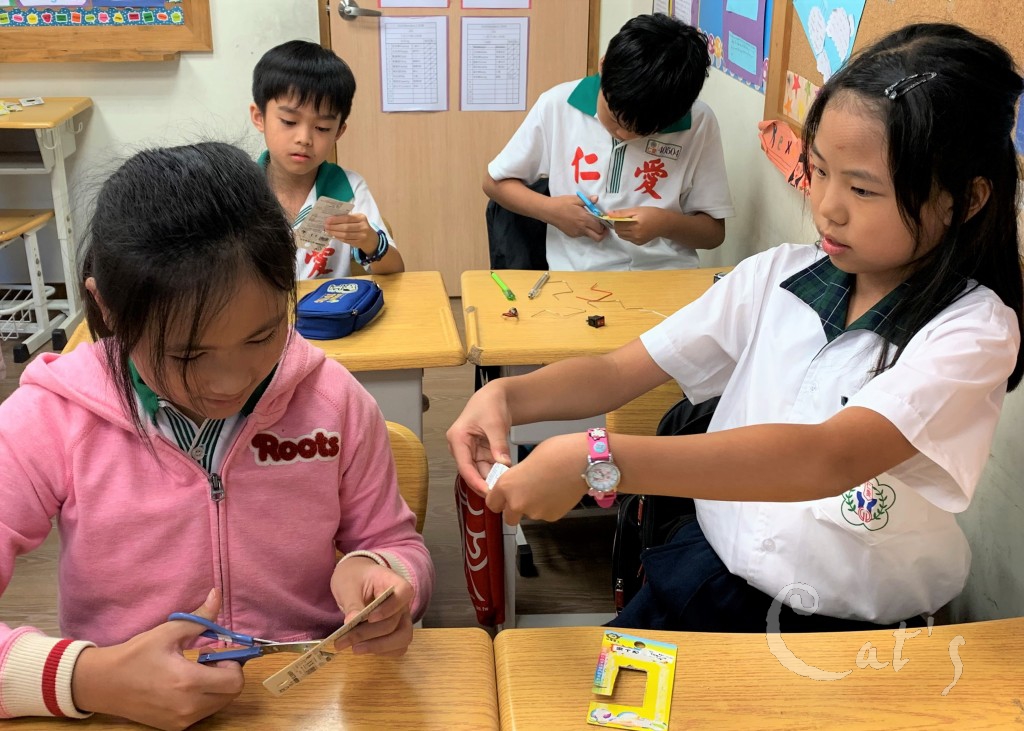
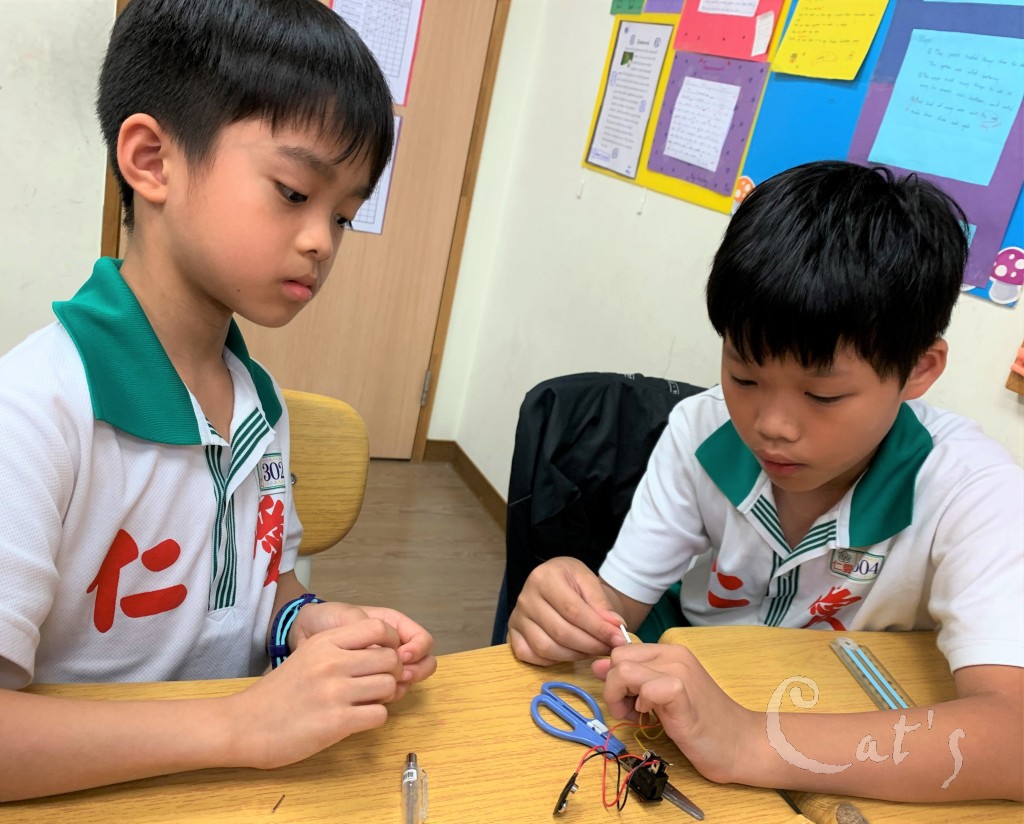
互相協助合作
-
螞蟻的身體及六隻腳
-
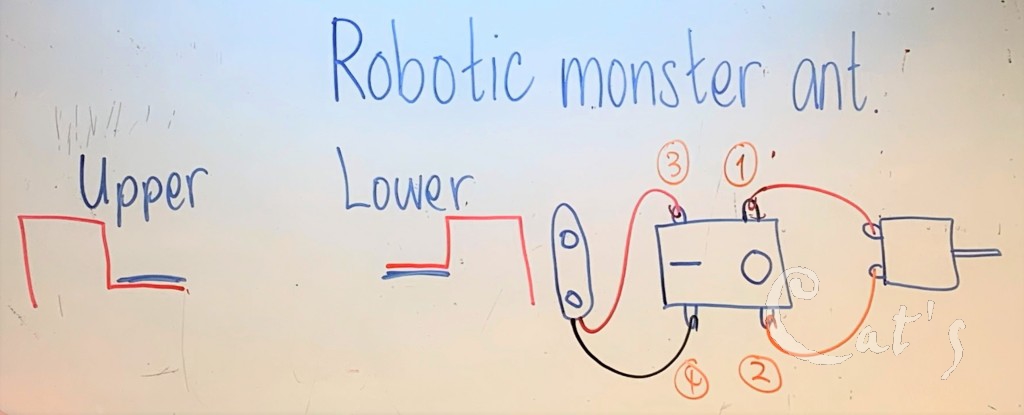
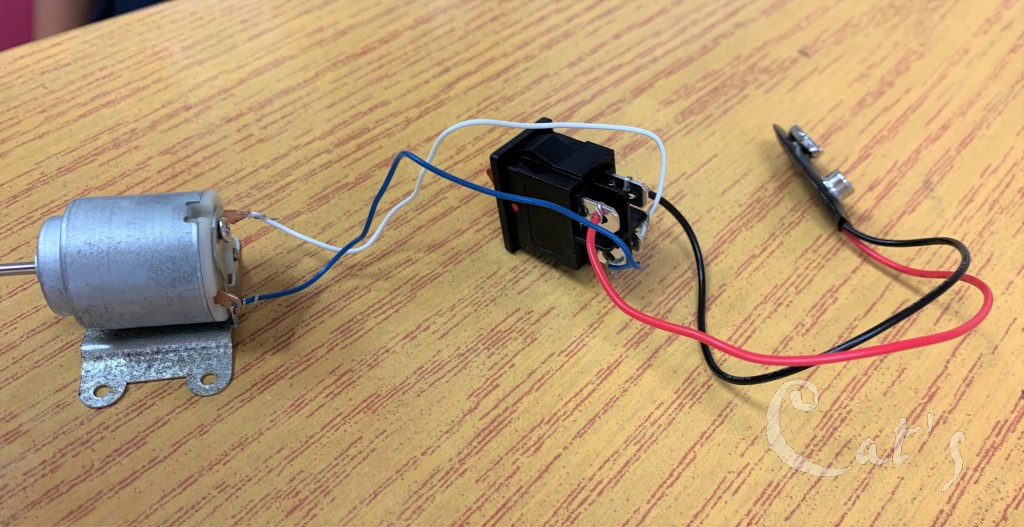
簡單明瞭的電路連接示意圖
-
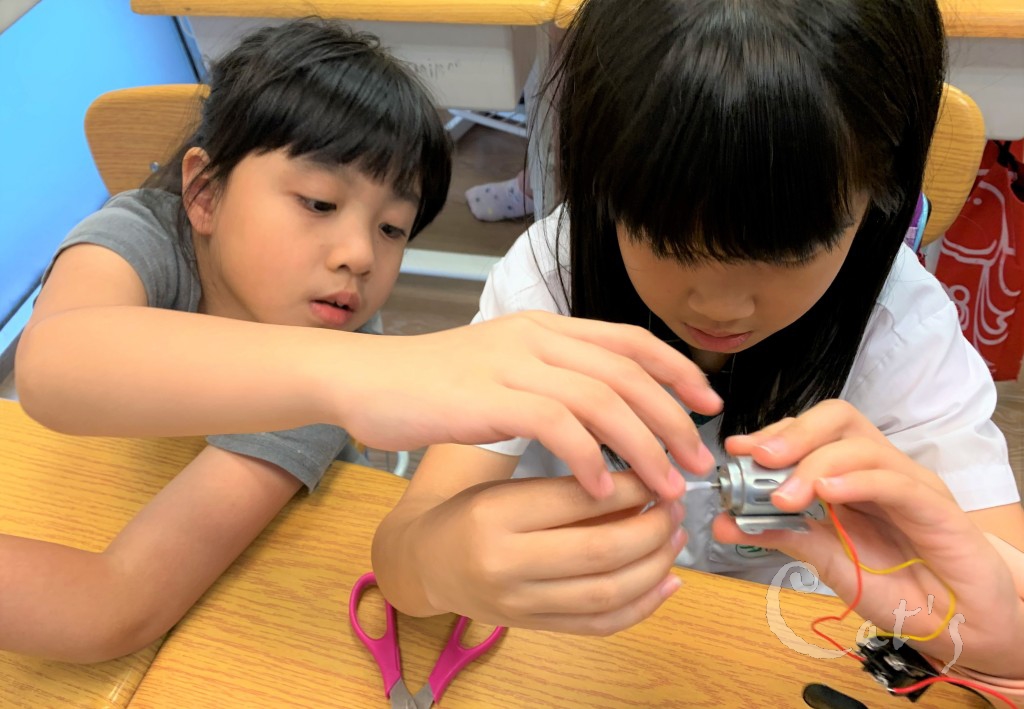
準備將各個部位相連接
-
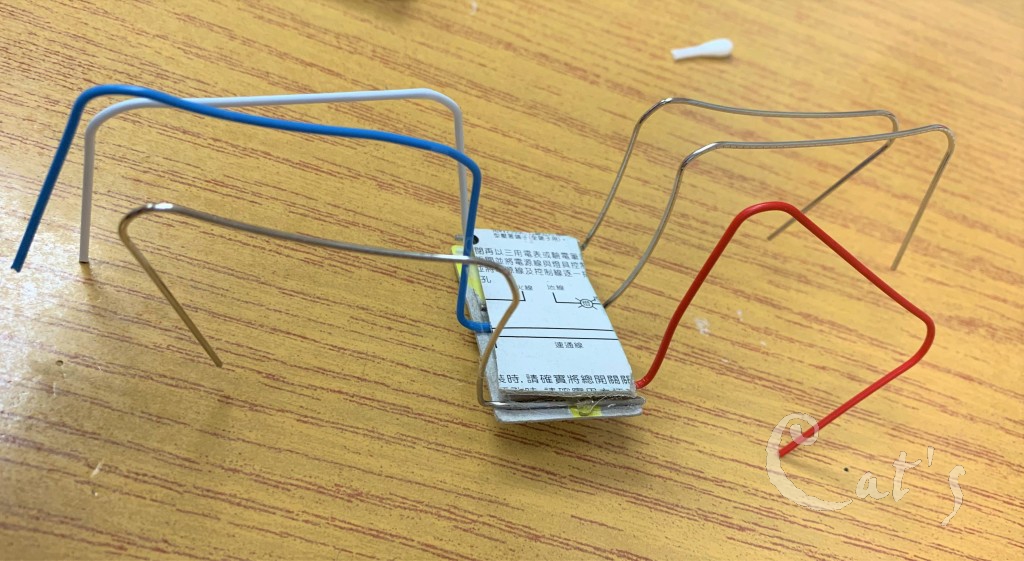
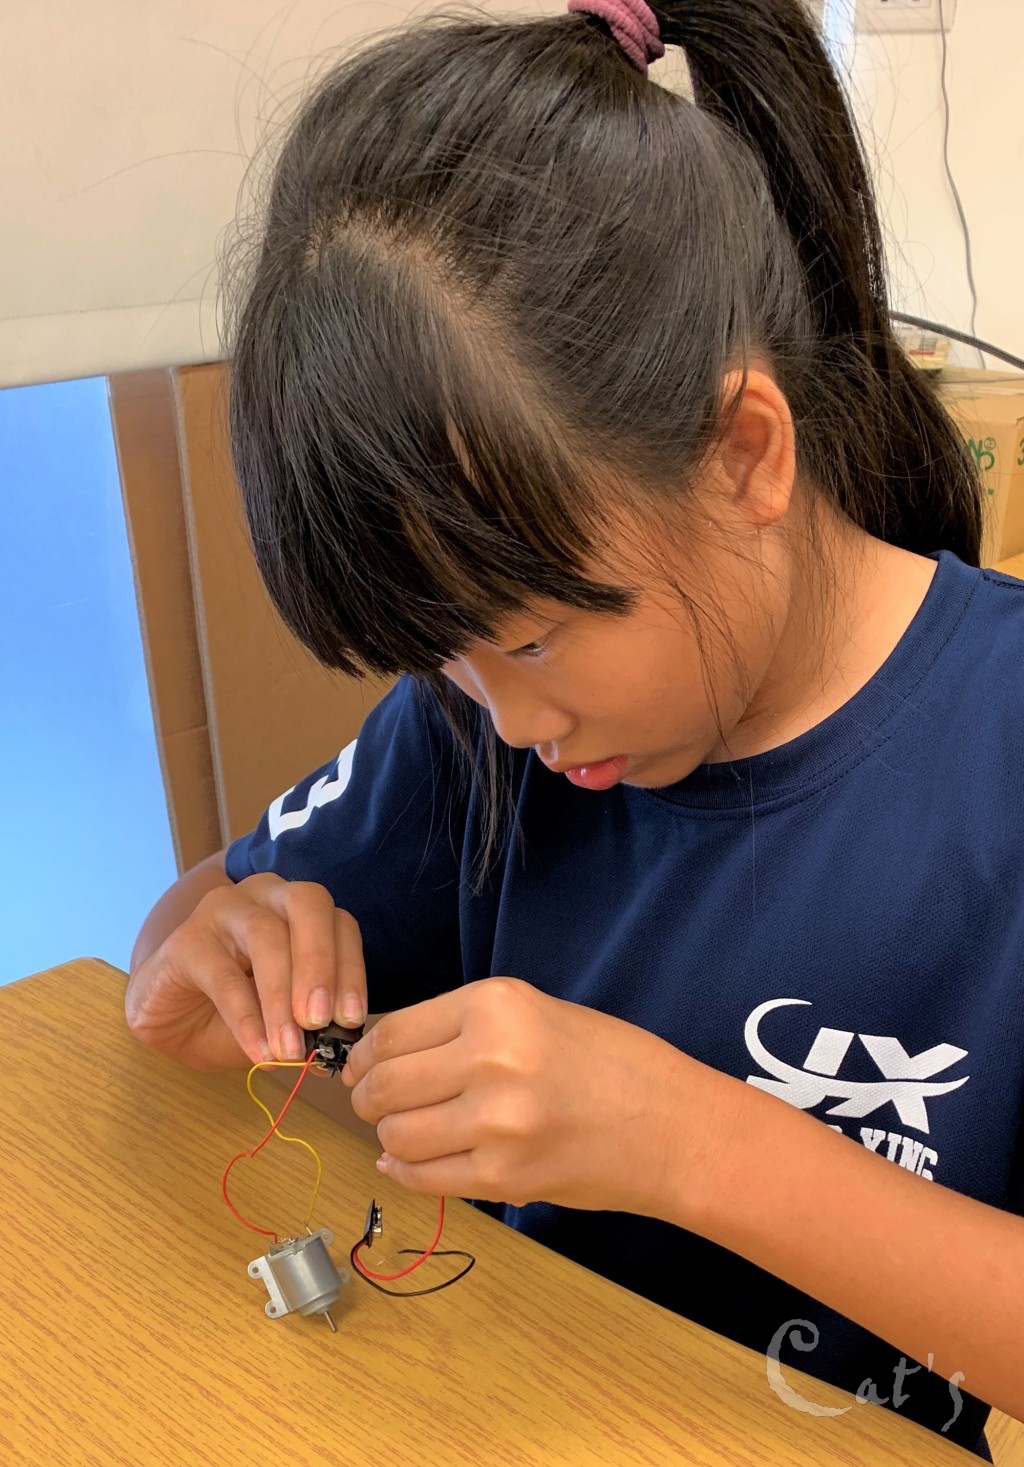
將細細電線繞捲至迴圈中
-
確定顏色正確
-
產生電力的迴圈完成
-
將電力迴圈及螞蟻的身體連接
-
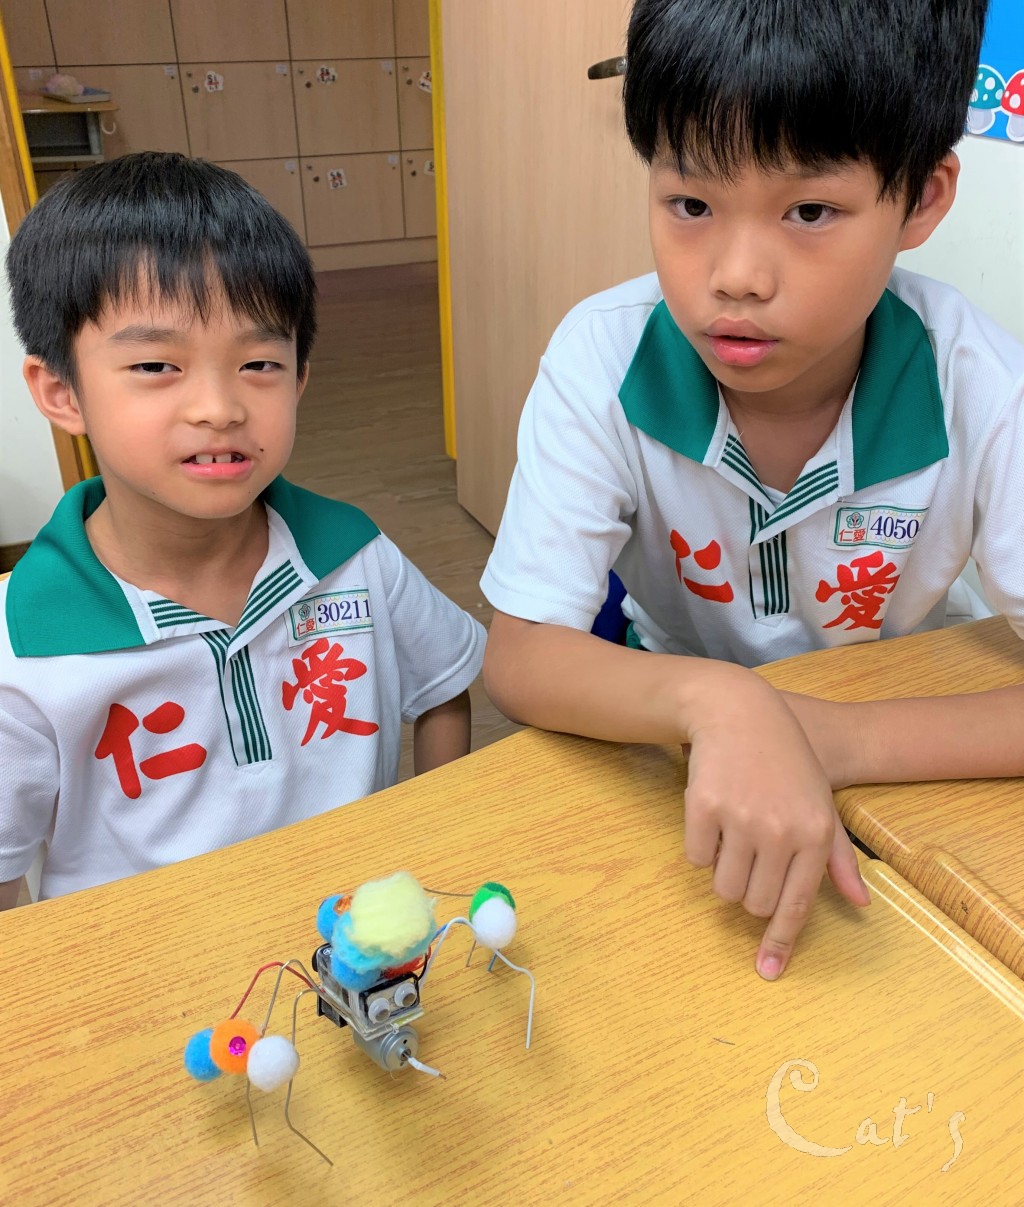
兩人一組互助學習
-
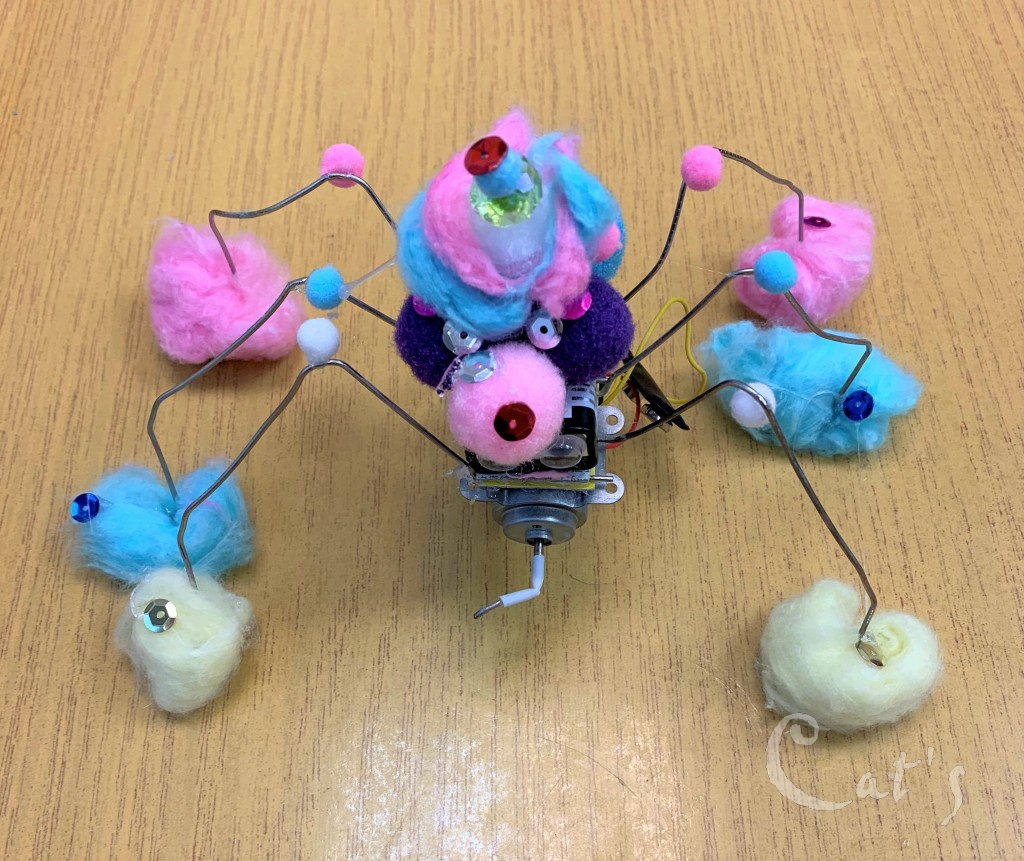
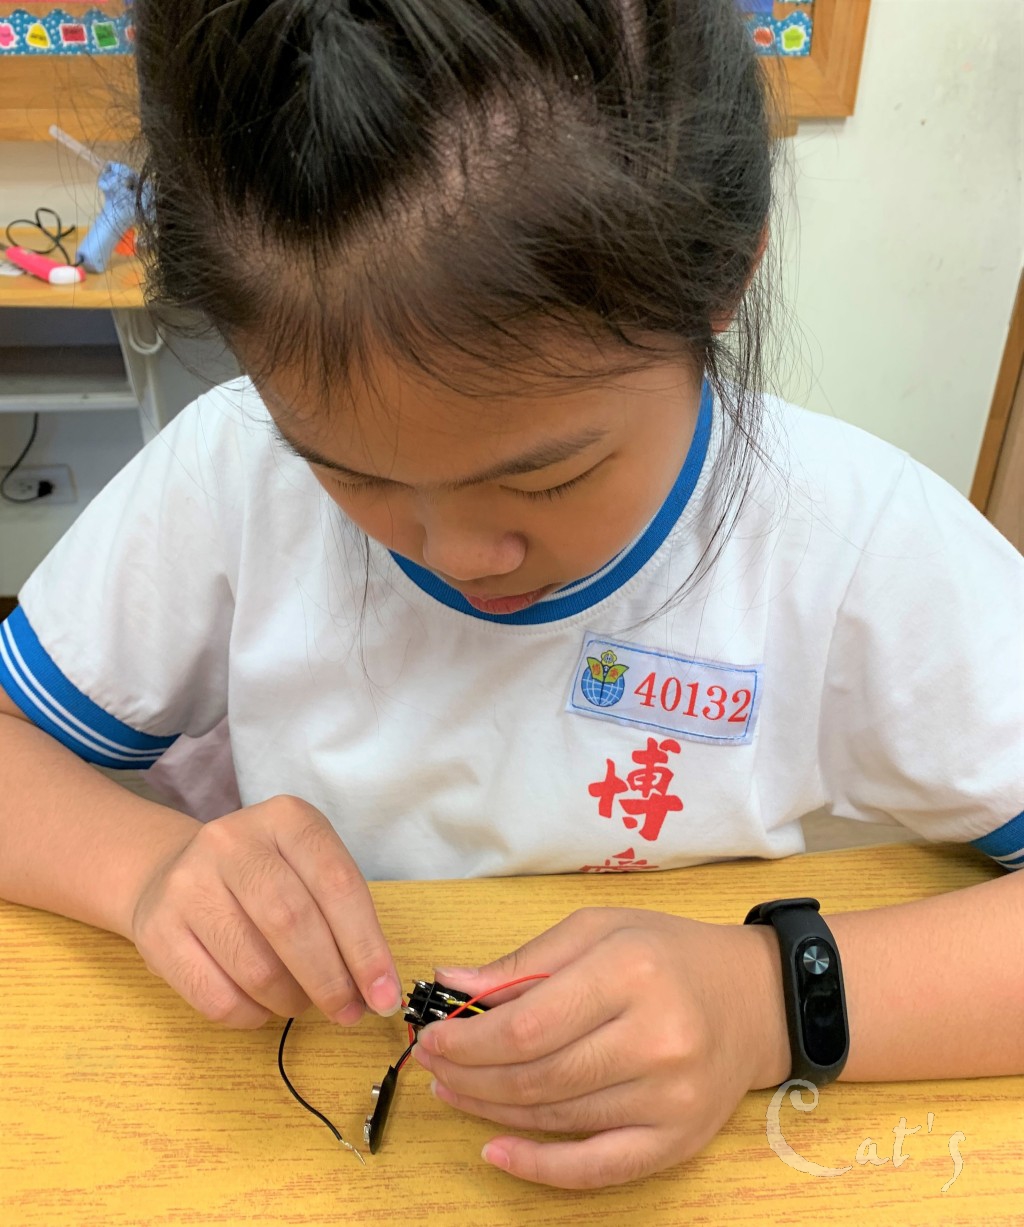
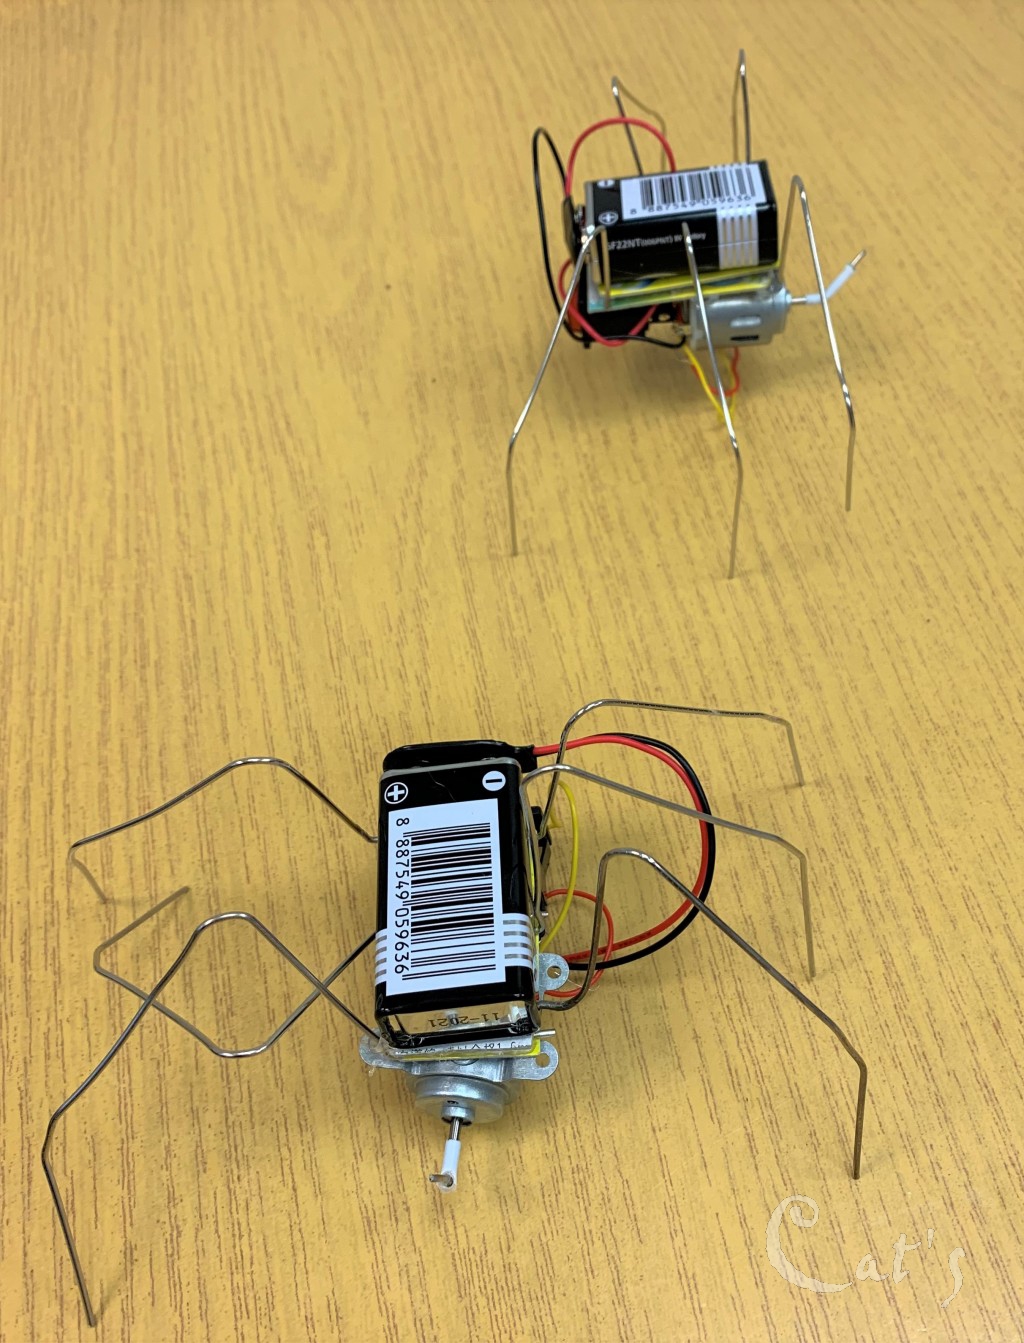
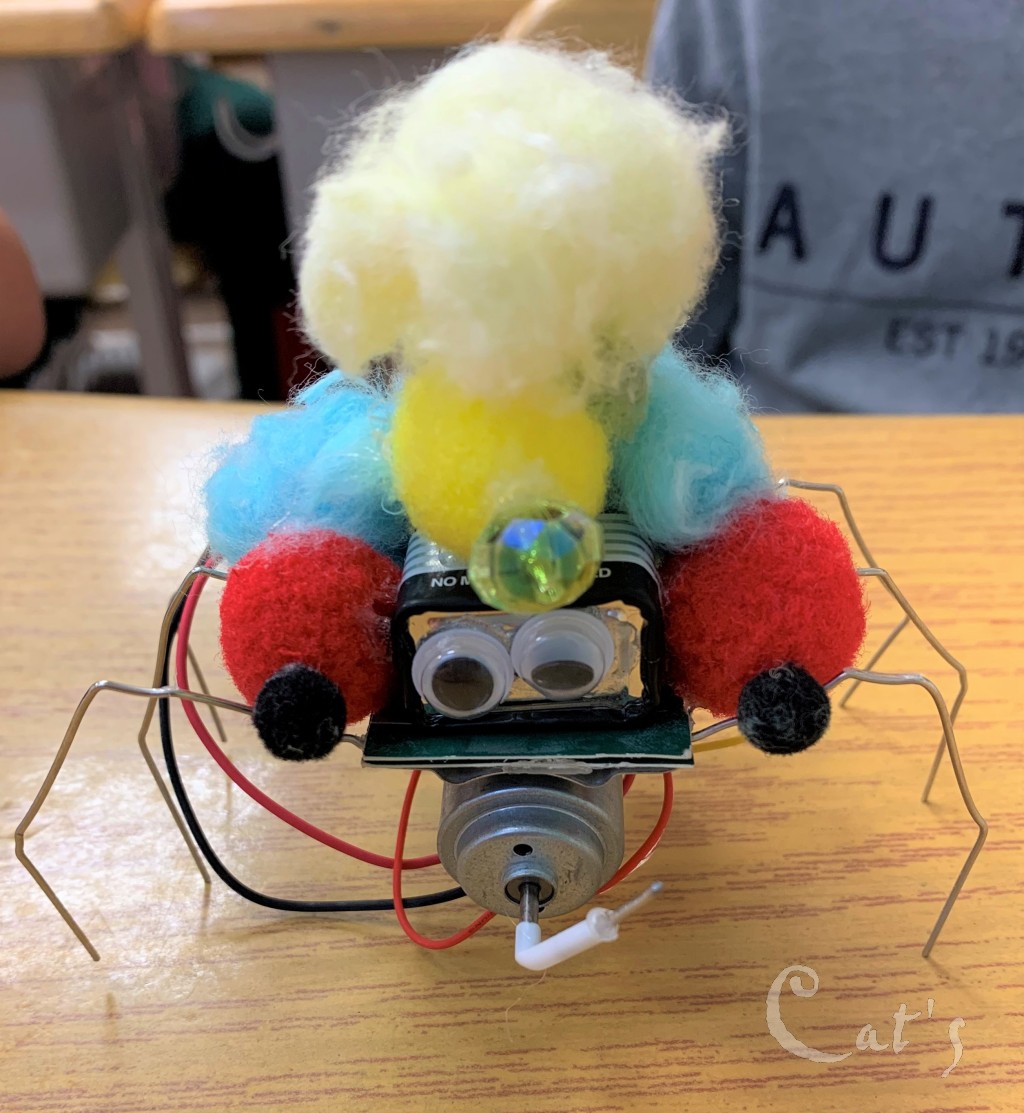
螞蟻雛型完成圖
-
正面有一紐釦開關
-
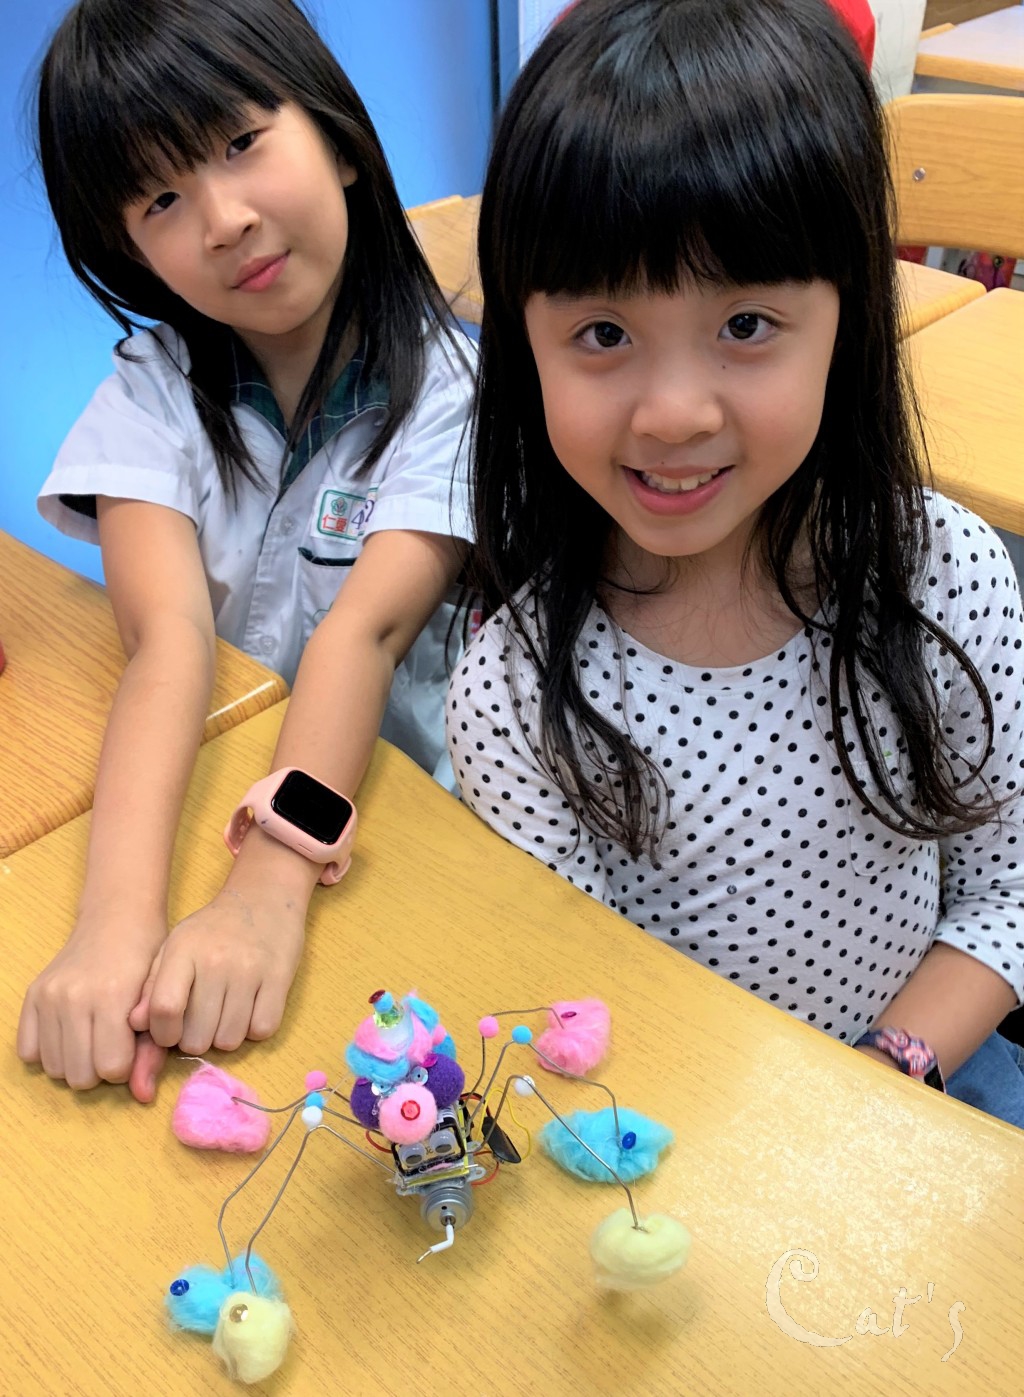
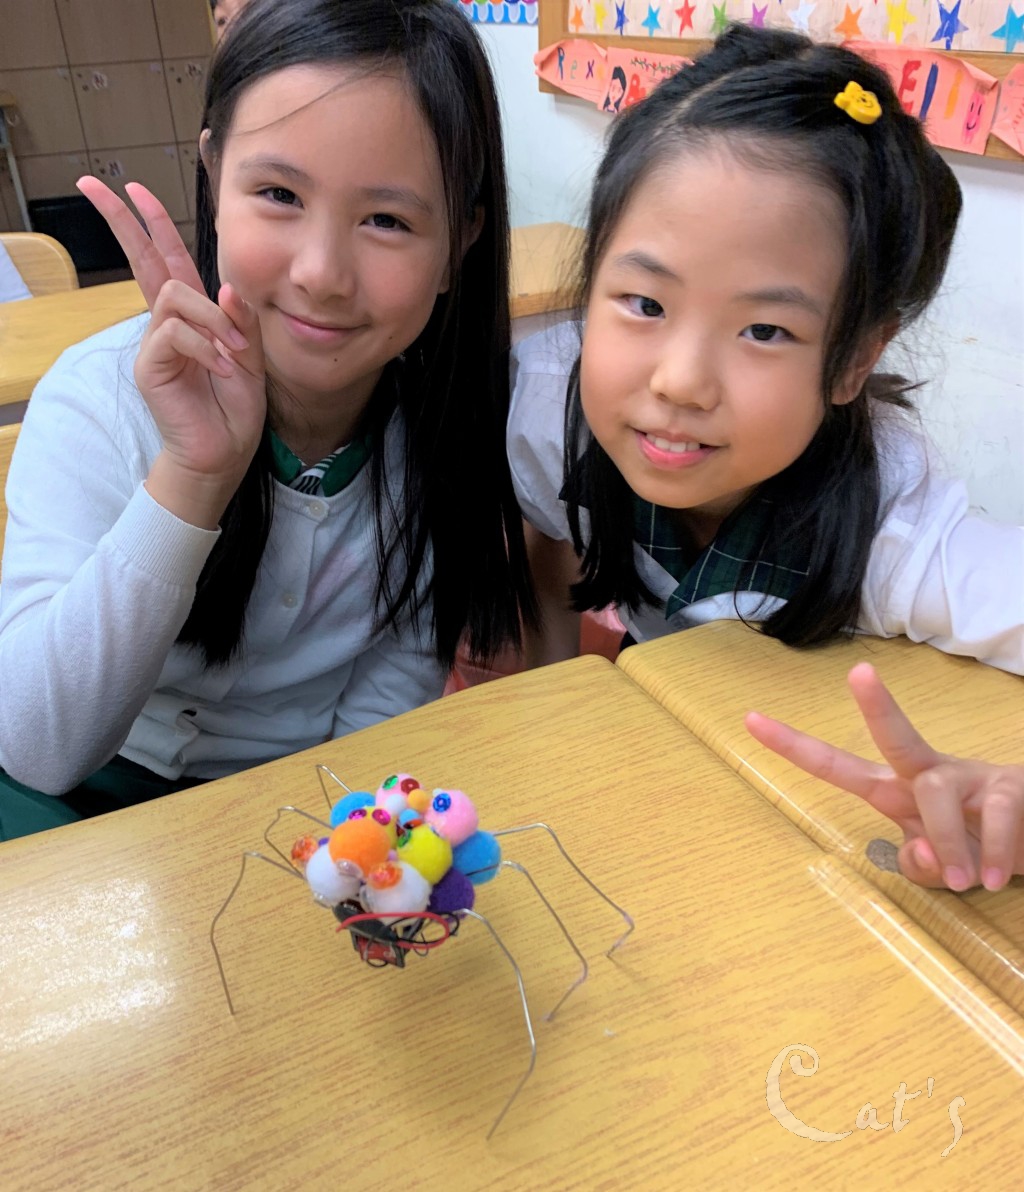
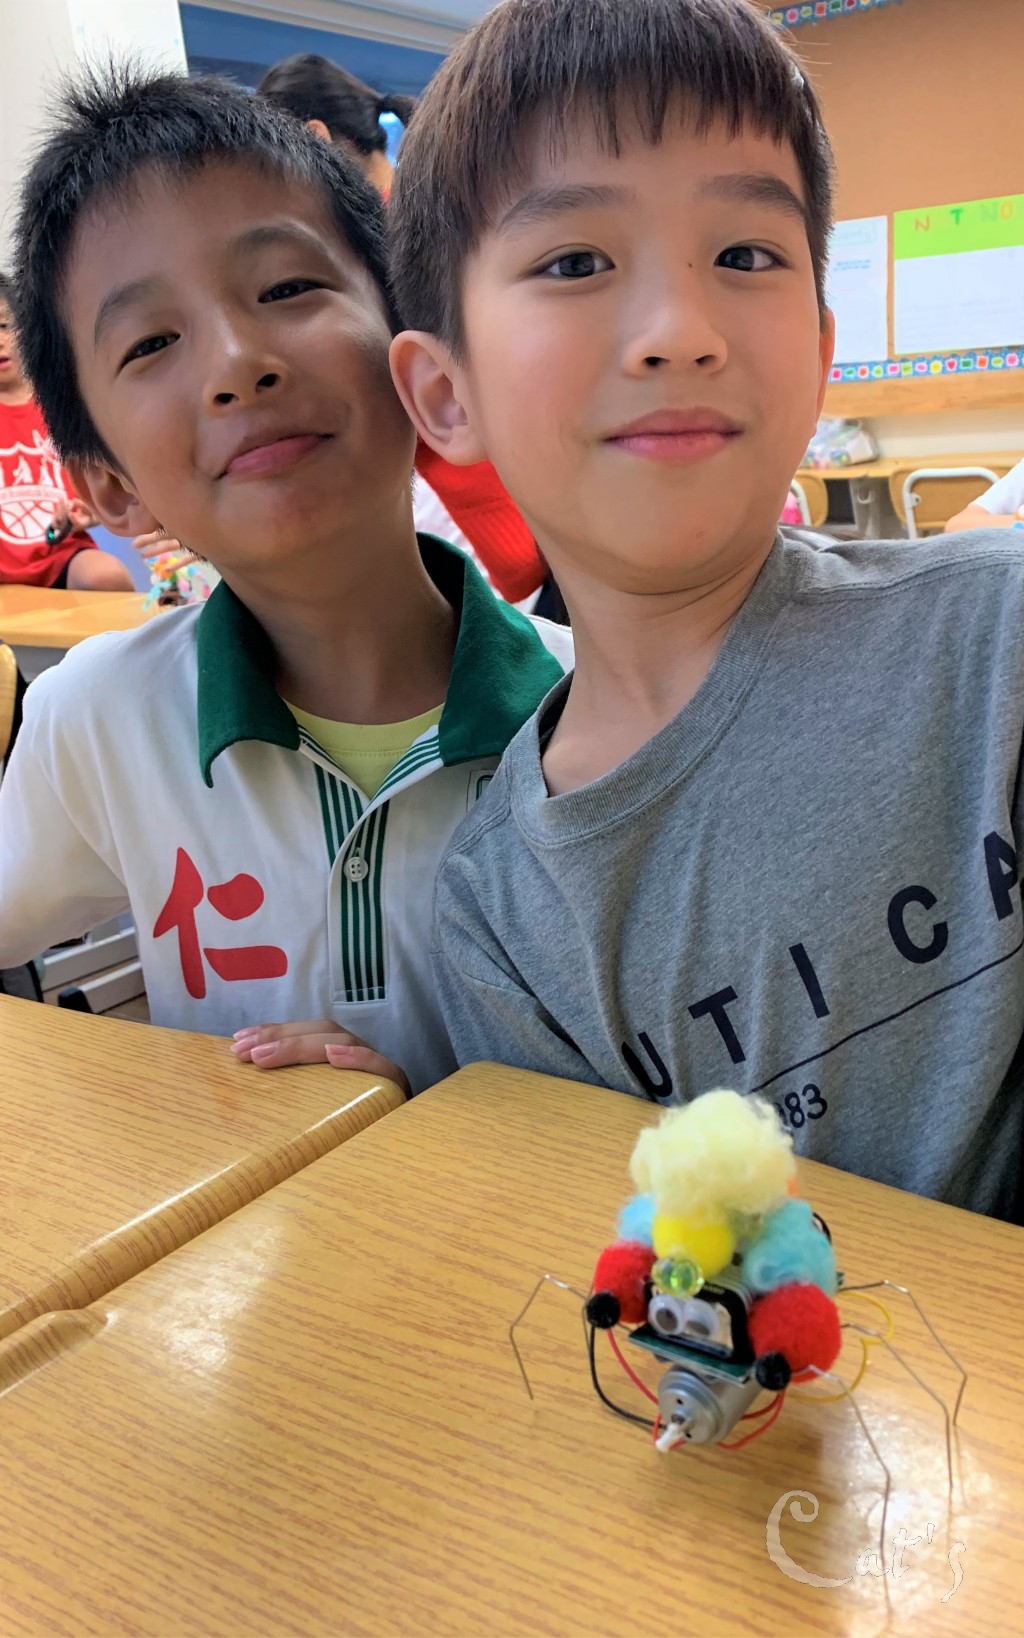
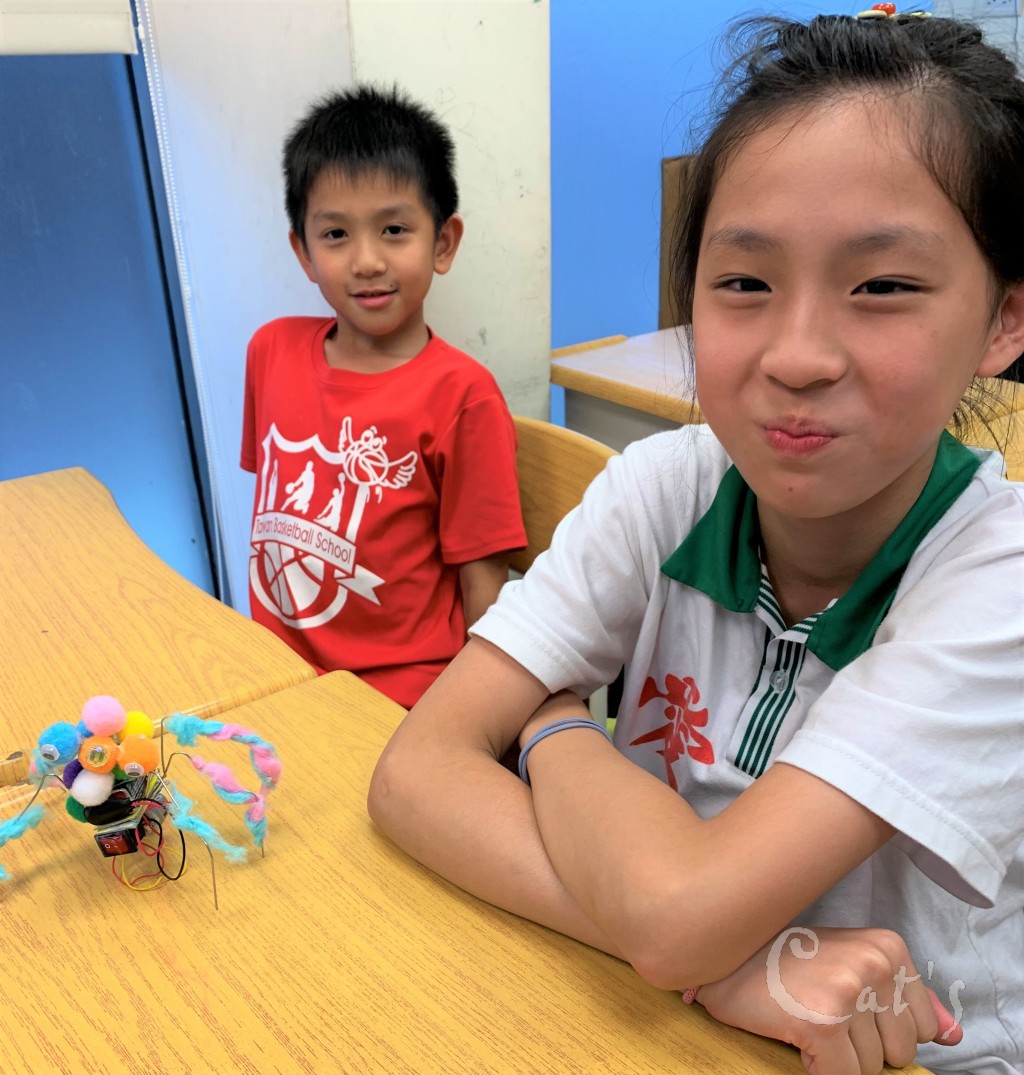
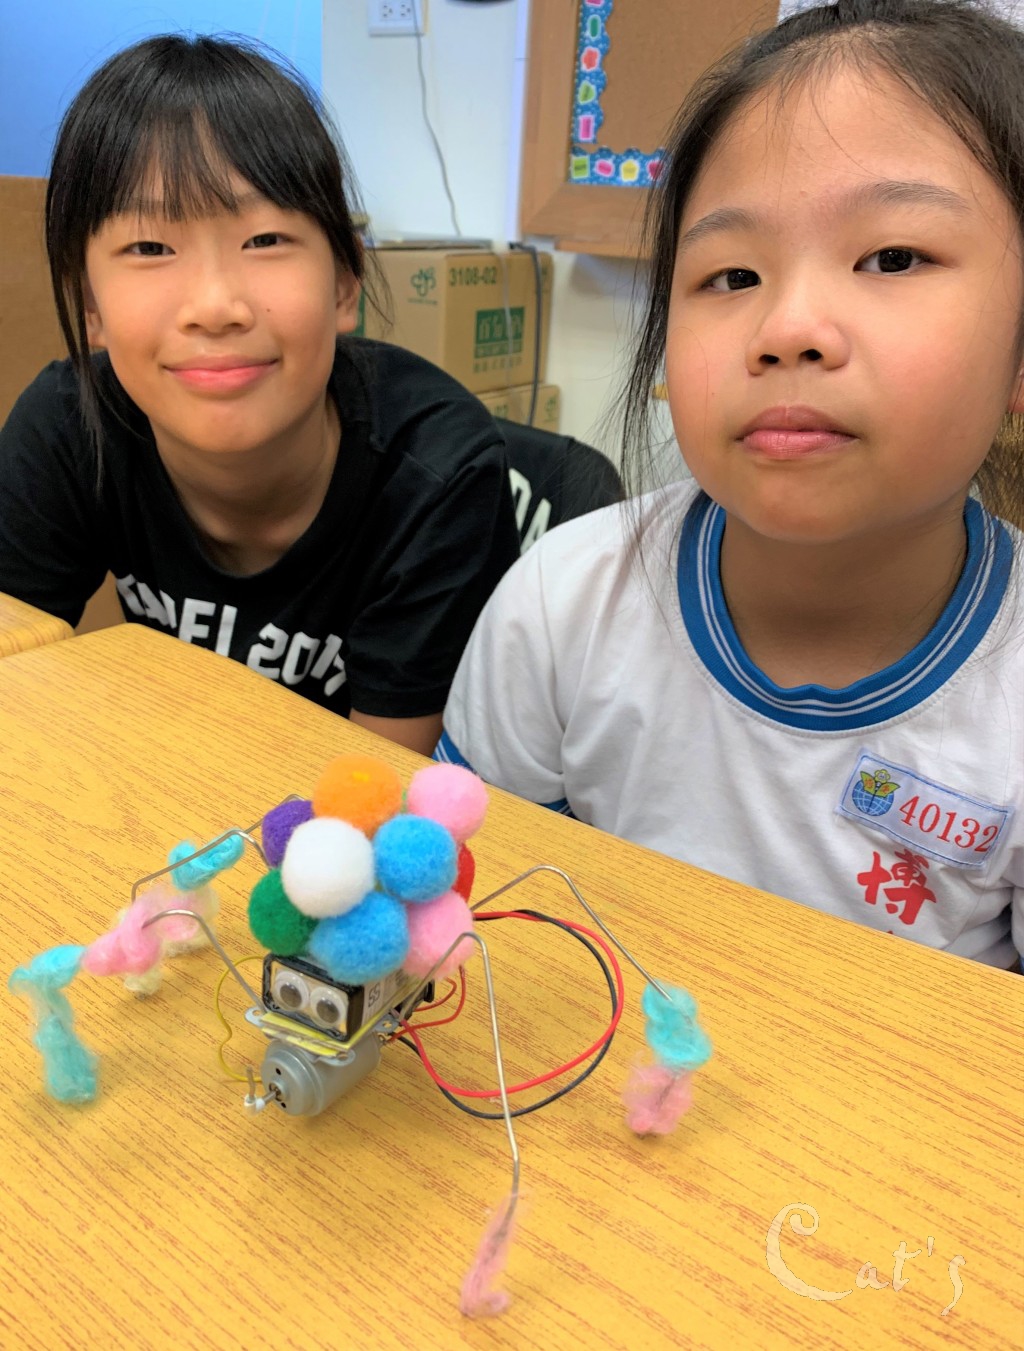
電力螞蟻集合囉
-
可愛的電力螞蟻一號
-
好動的螞蟻二號
-
活潑的螞蟻三號
-
五顏六色的裝飾
-
親切的螞蟻四號
-
有多隻迷人的大眼睛
-
聰穎的螞蟻五號
-
冷靜平穩的螞蟻六號
-
加上一點獨特的象徵
-
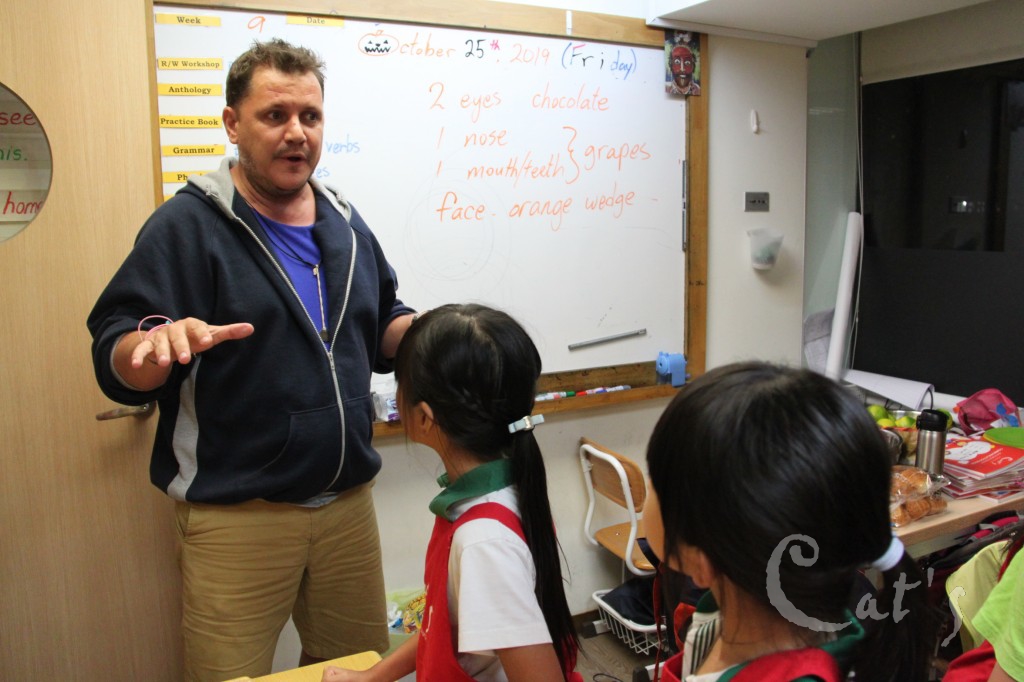
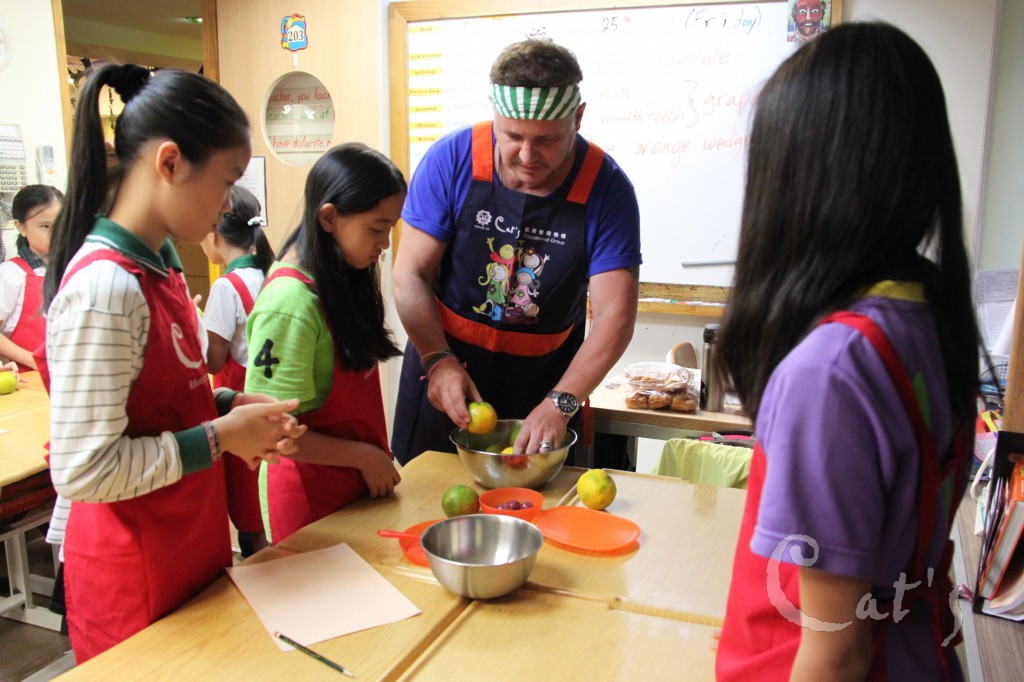
Here's what we are doing today.
-
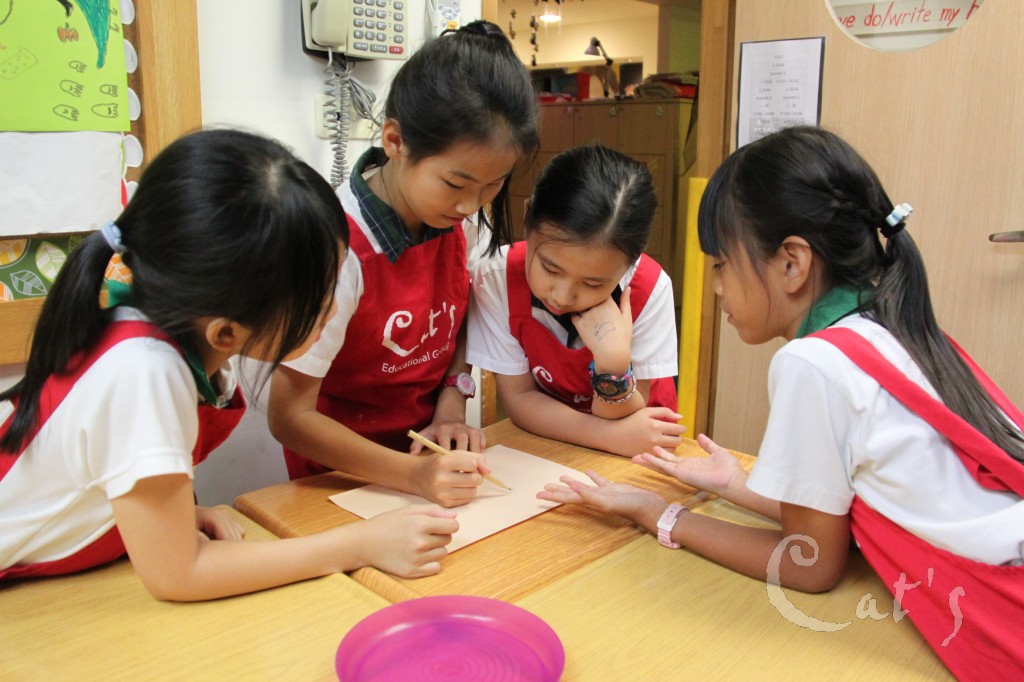
First, you draw your own jack-o'lantern.
-
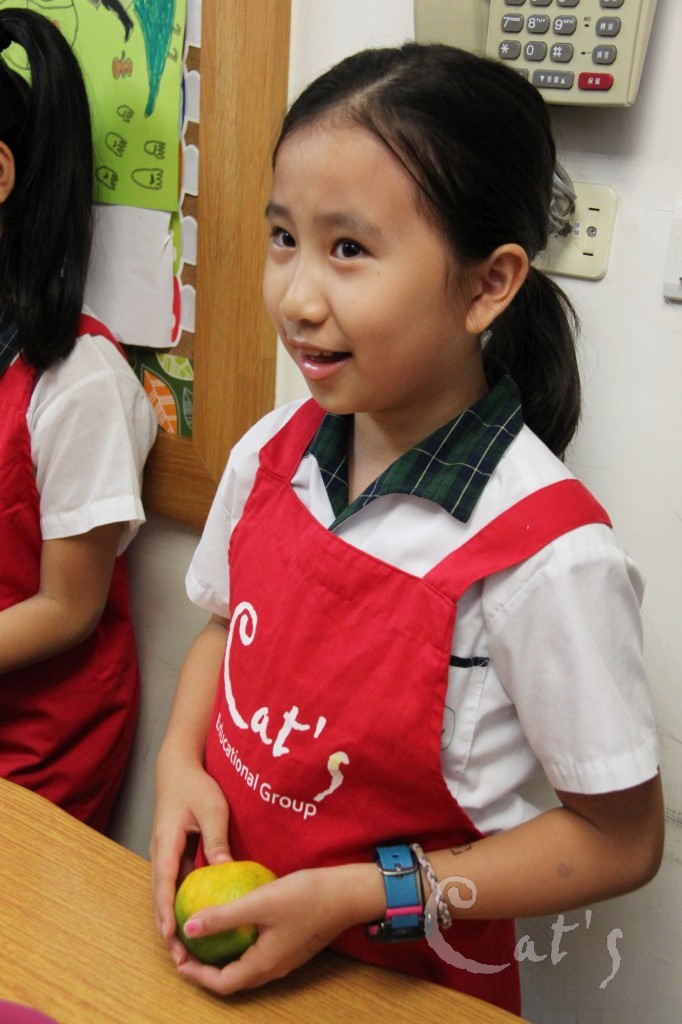
Then you get oranges.
-
So... what are we doing with the oranges?
-
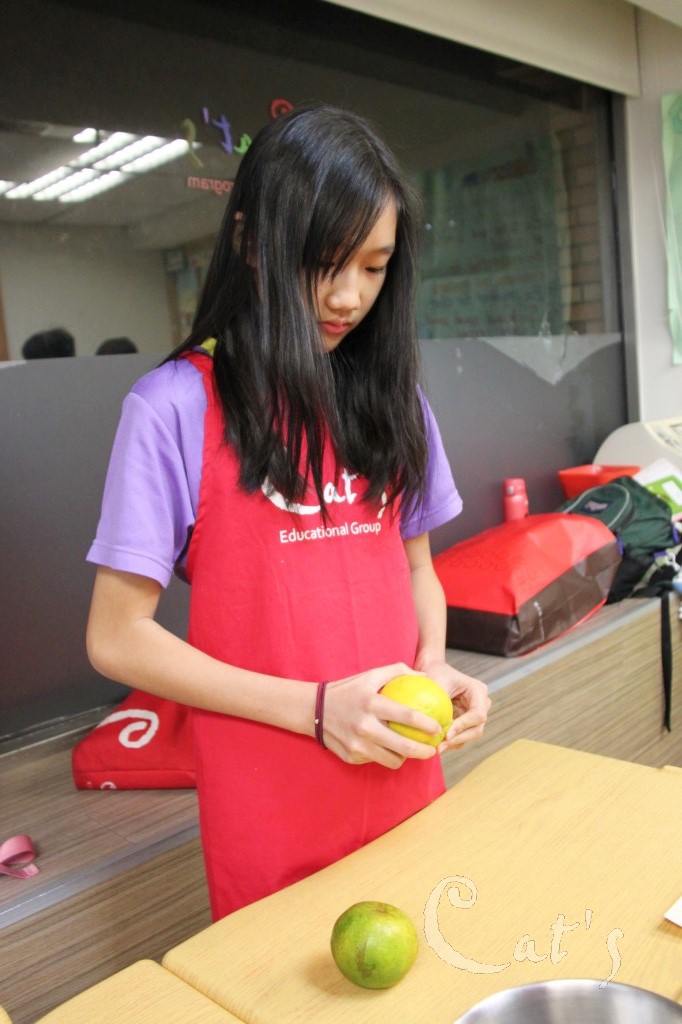
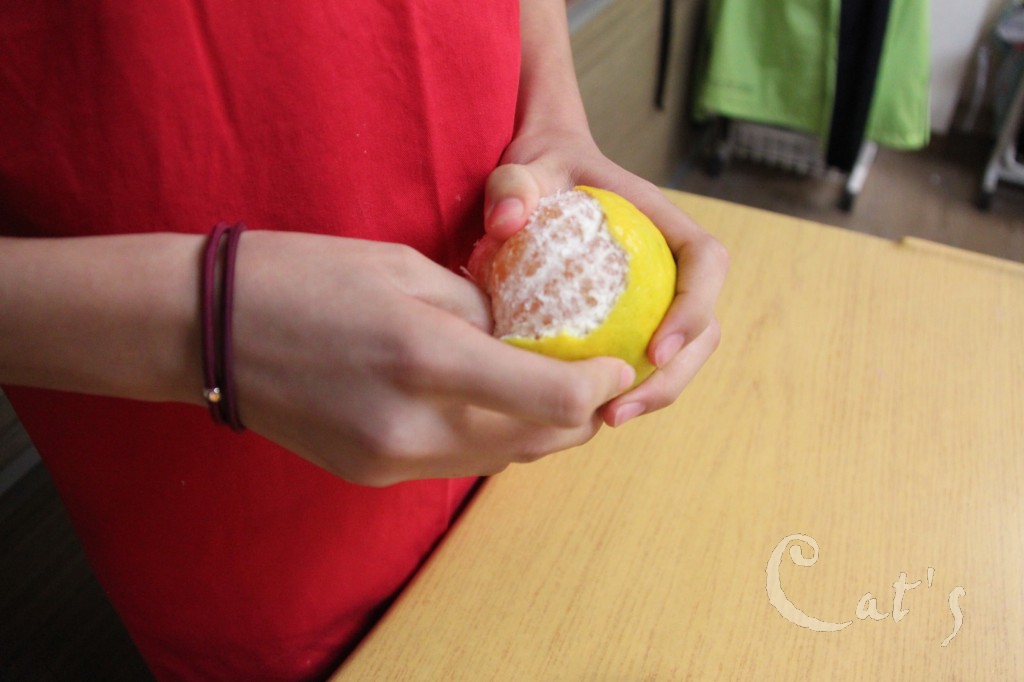
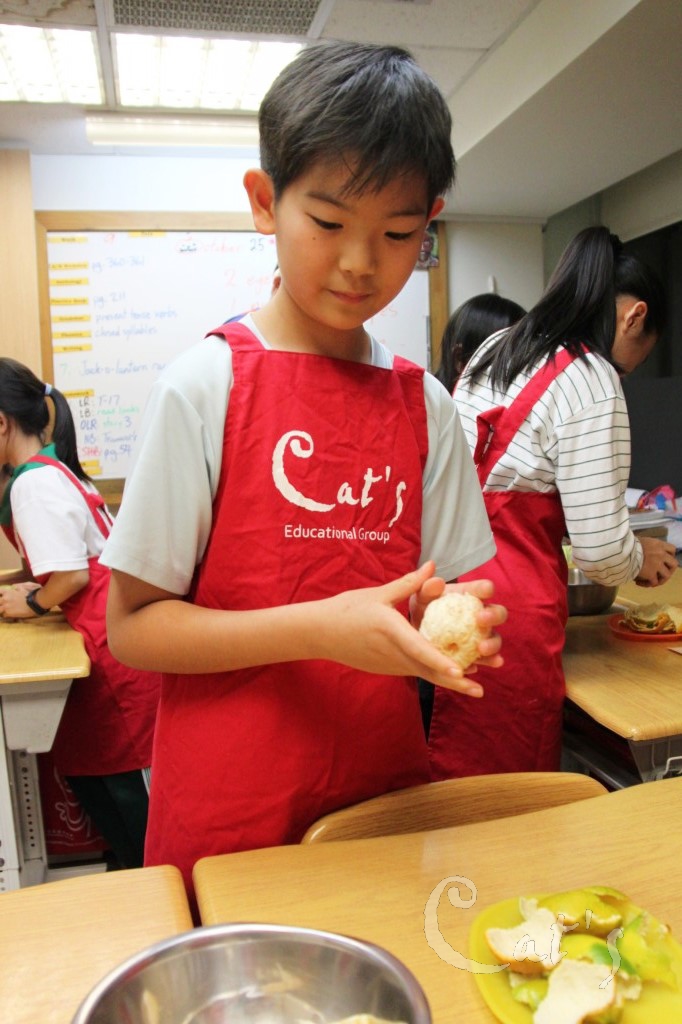
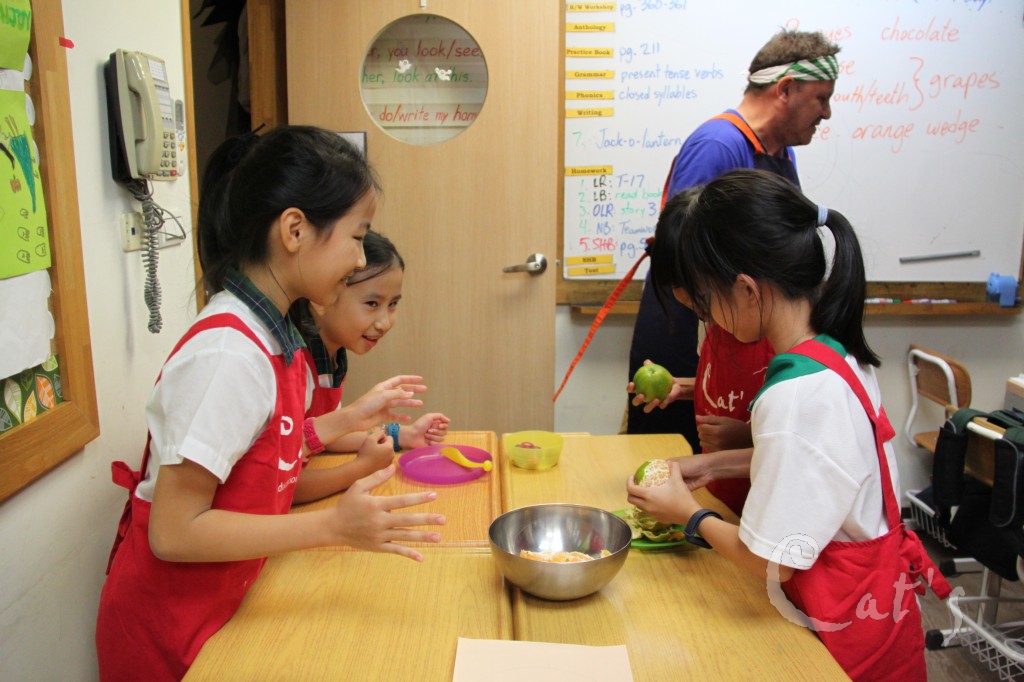
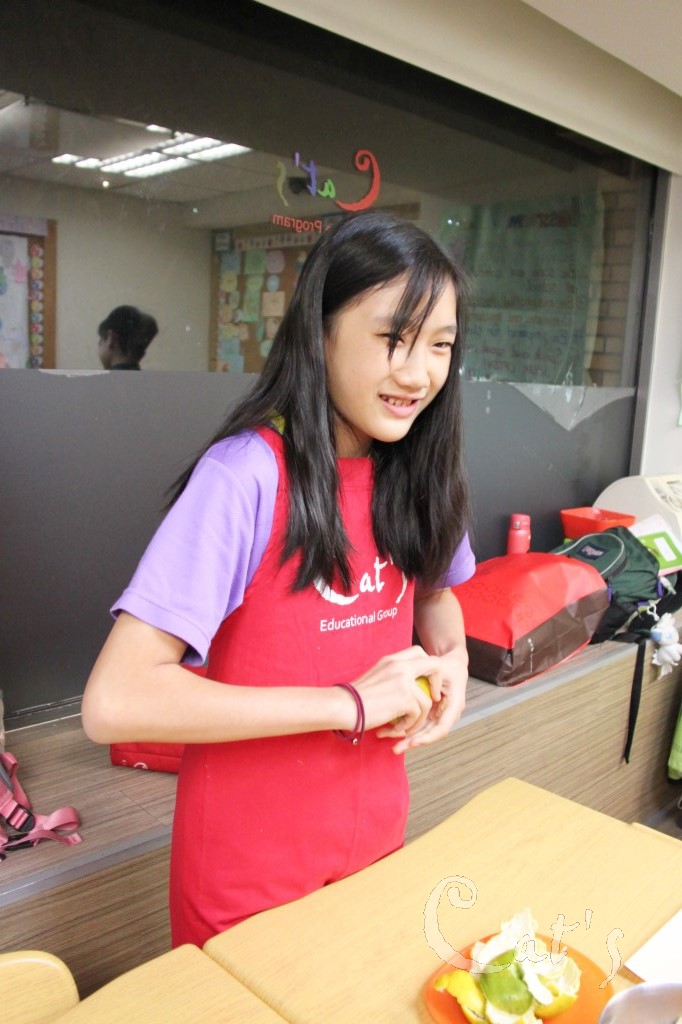
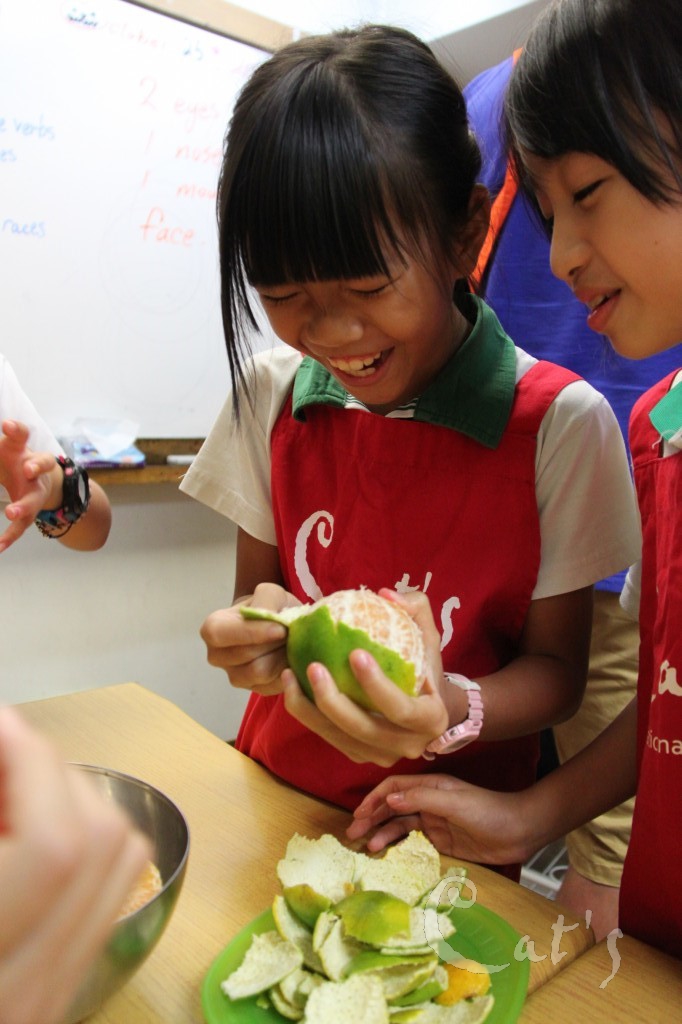
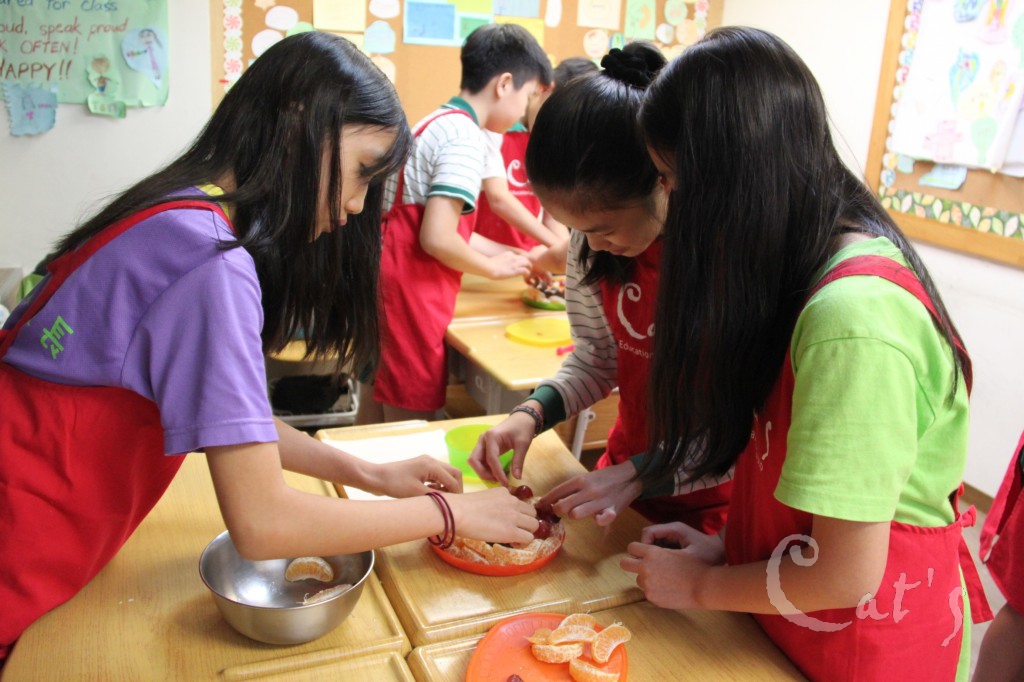
We peel.
-
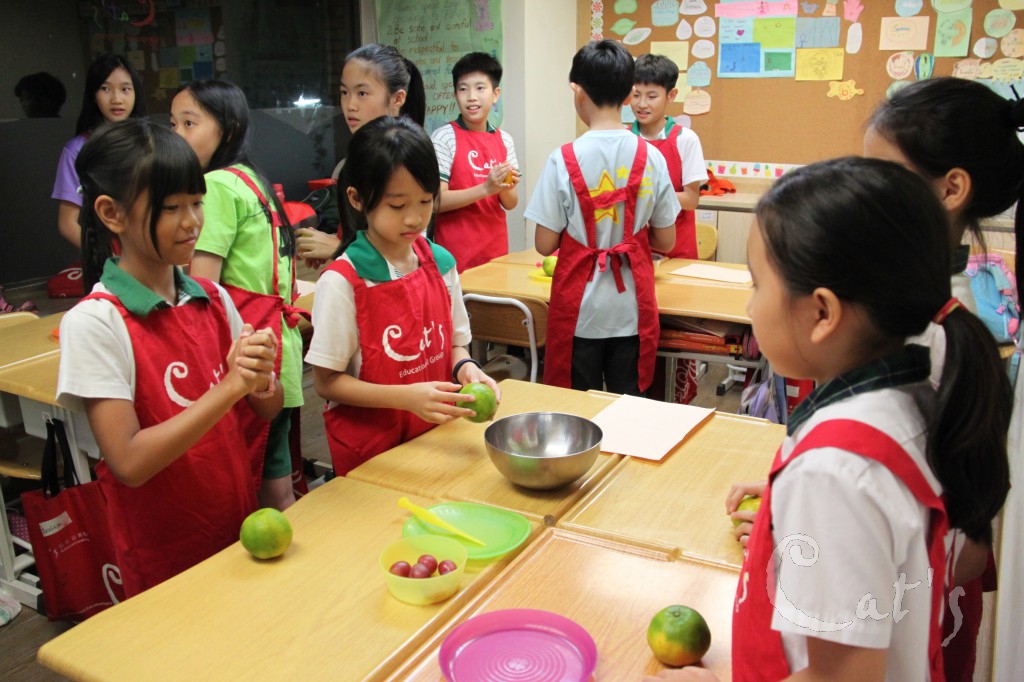
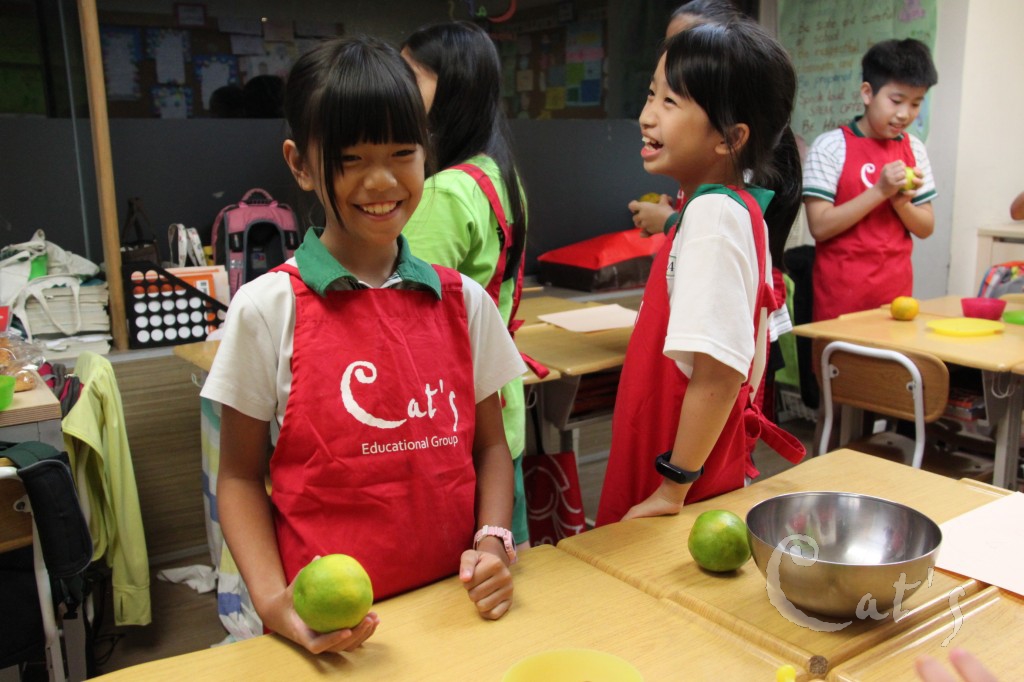
We are doing a peeling orange relay.
-
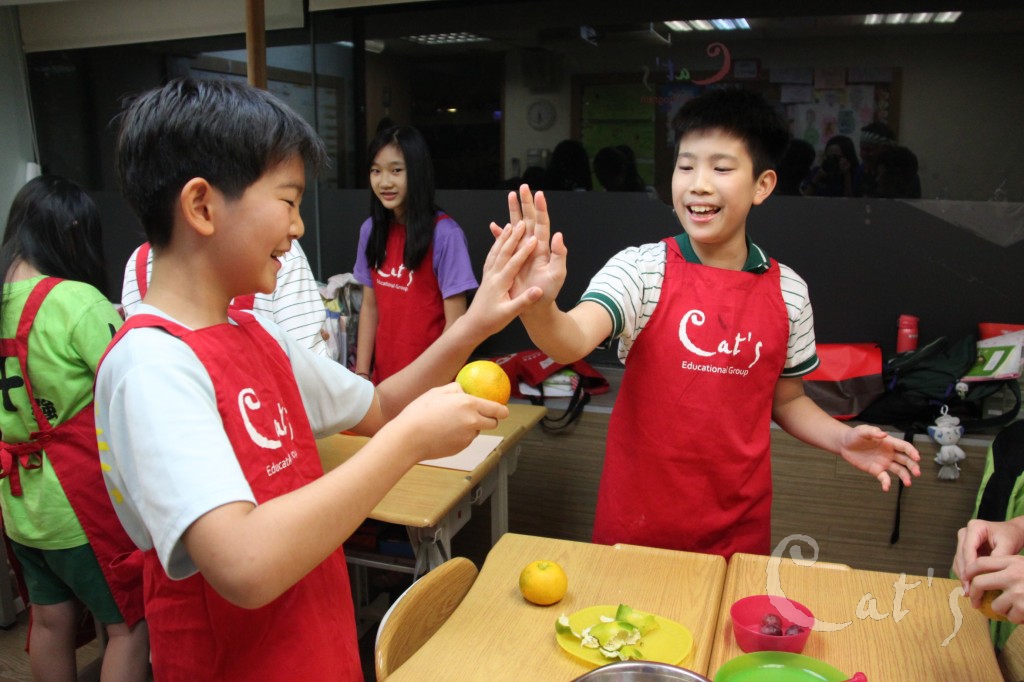
After one person finishes peeling an orange, she or he must hi-five the next person in line!
-
Peel! Hi-five! Peel! Hi-five!
-
Ready?
-
Let the peeling begin!
-
Hurry, hurry, hurry!
-
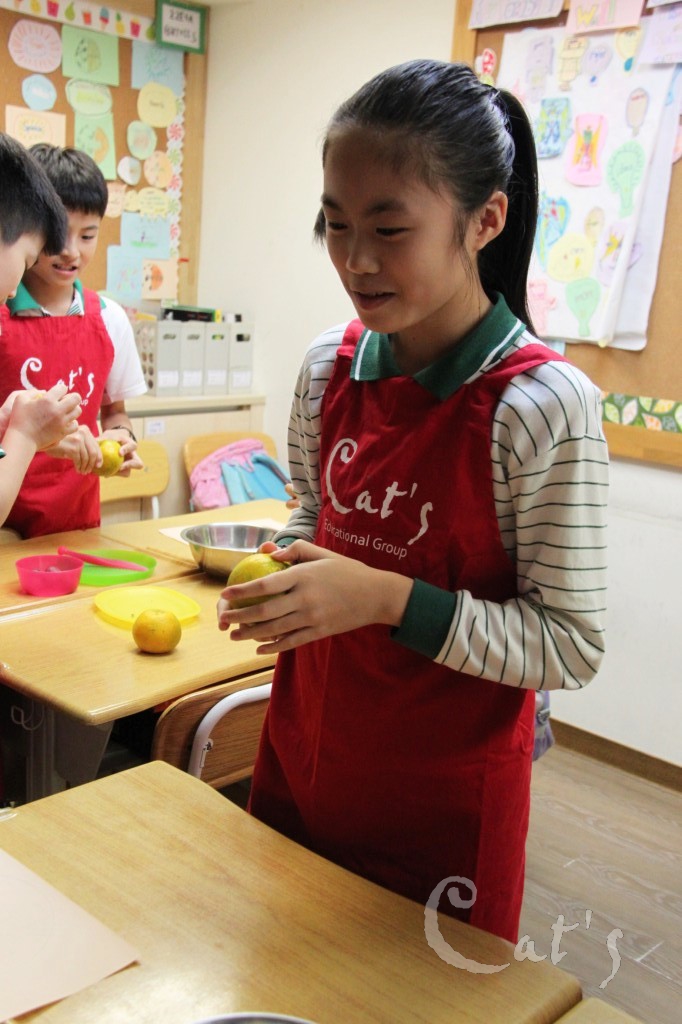
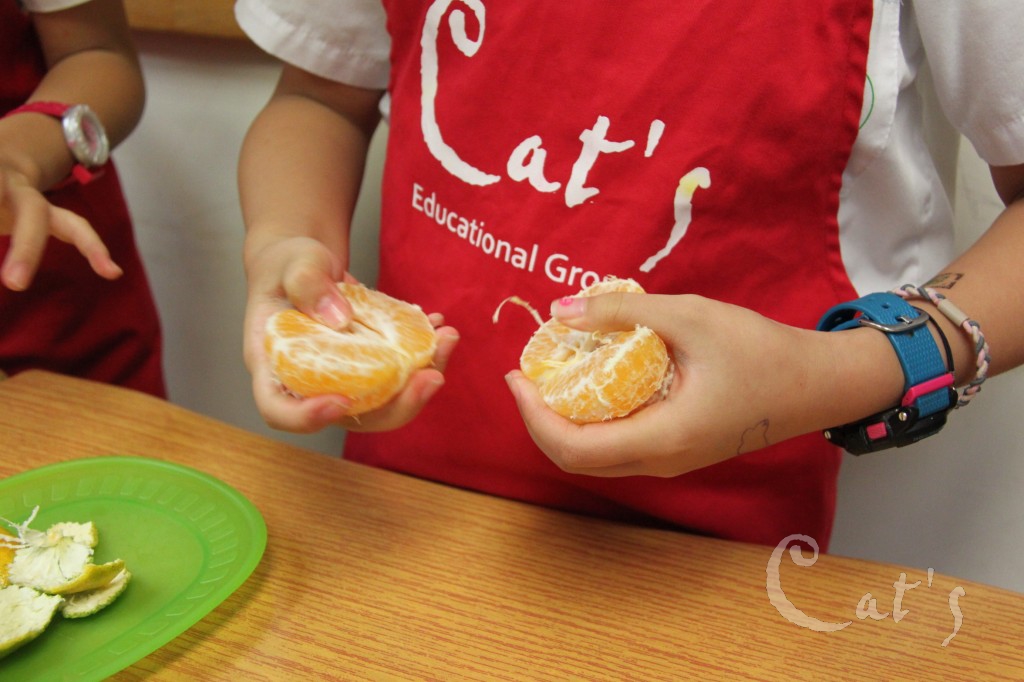
Separate all the wedges.
-
Put the wedges in the metal bowl.
-
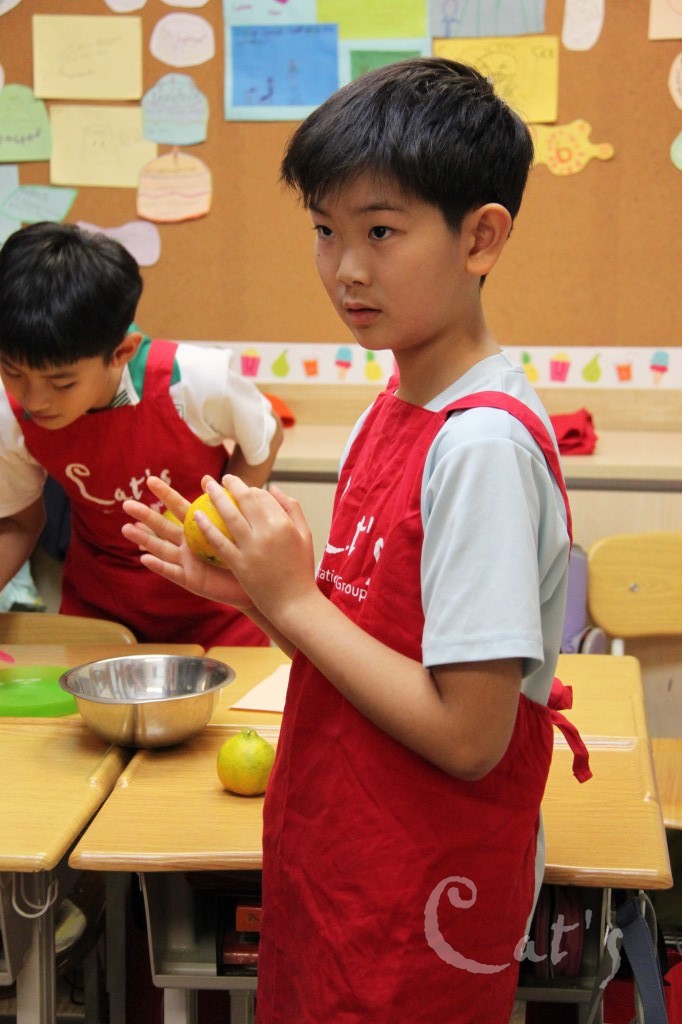
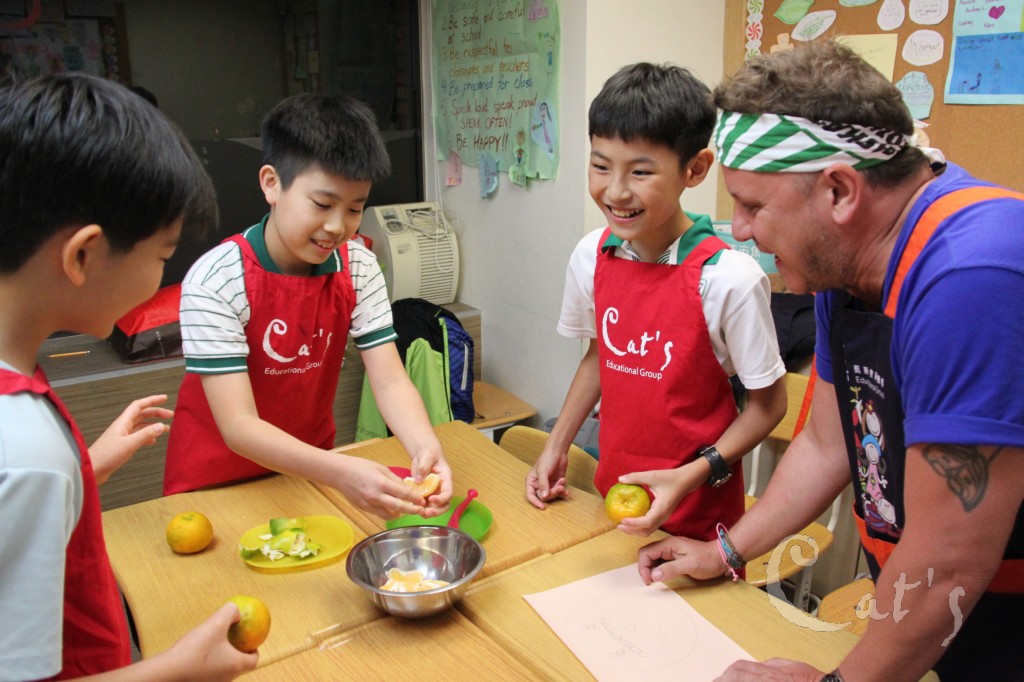
You're almost done!
-
Hi-Five!
-
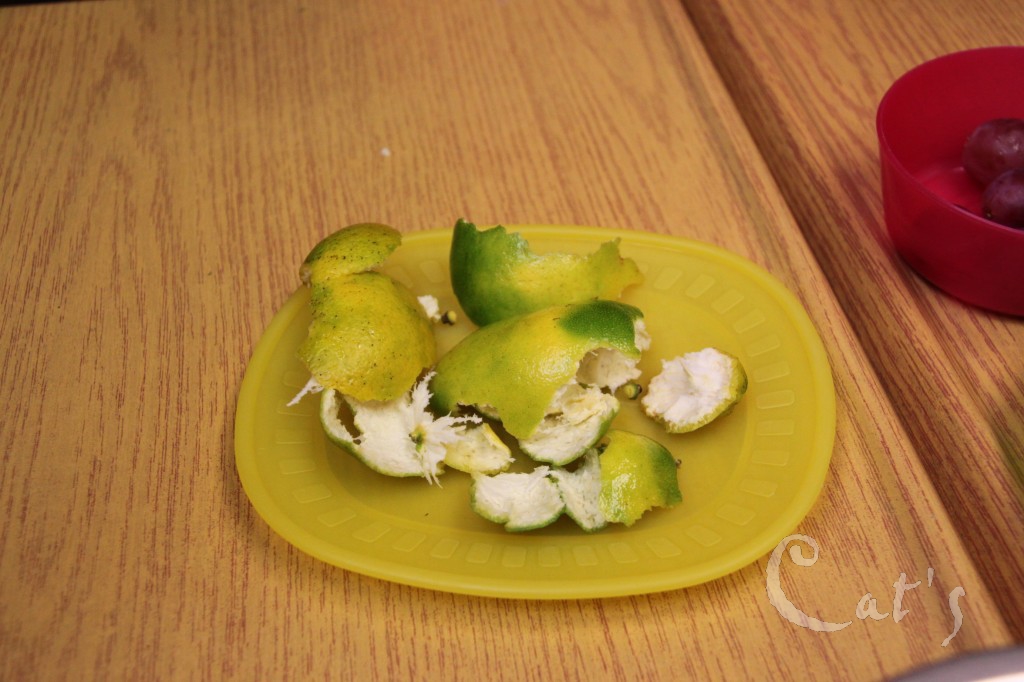
Gather all the orange peels on a plate.
-
I'm a orange peeing pro!
-
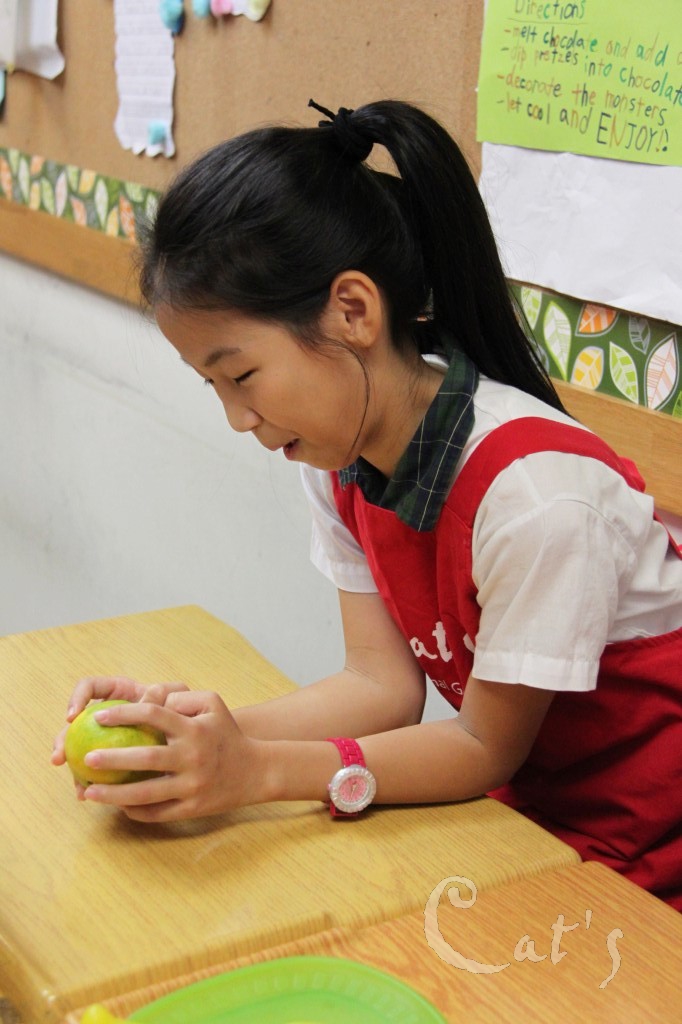
You can do it!
-
Last one!
-
Concentrate!
-
Yes! We finished!
-
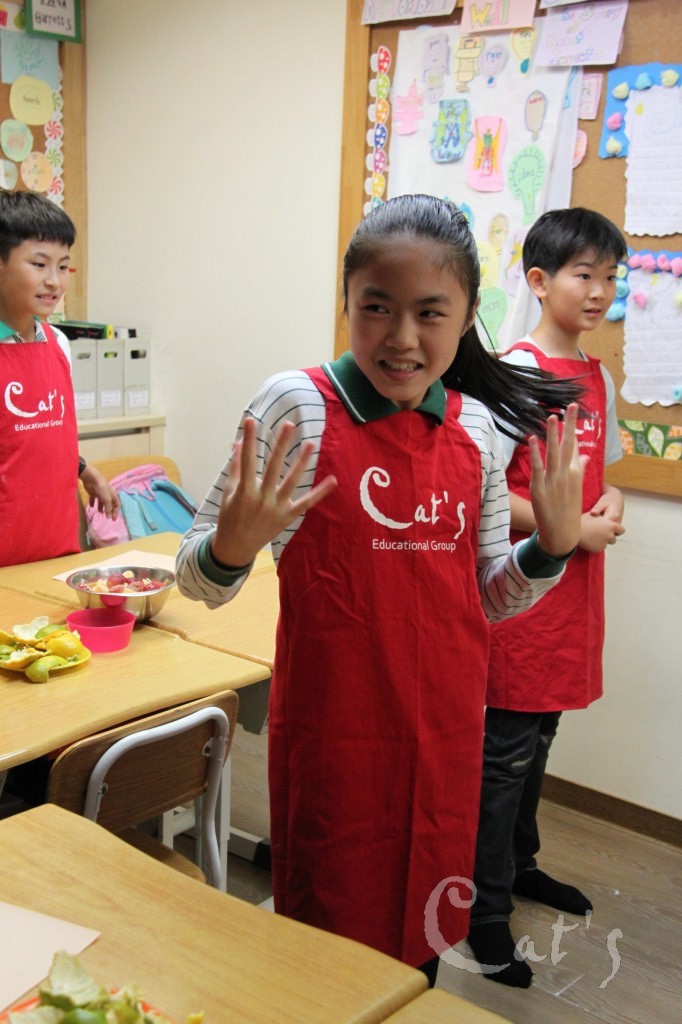
Assemble time!
-
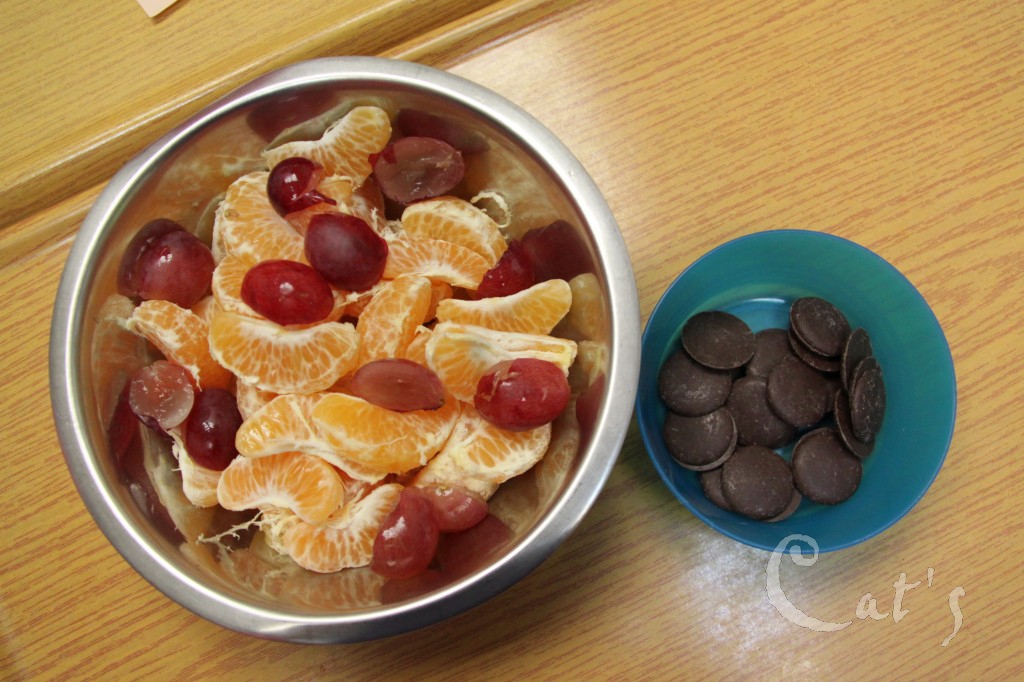
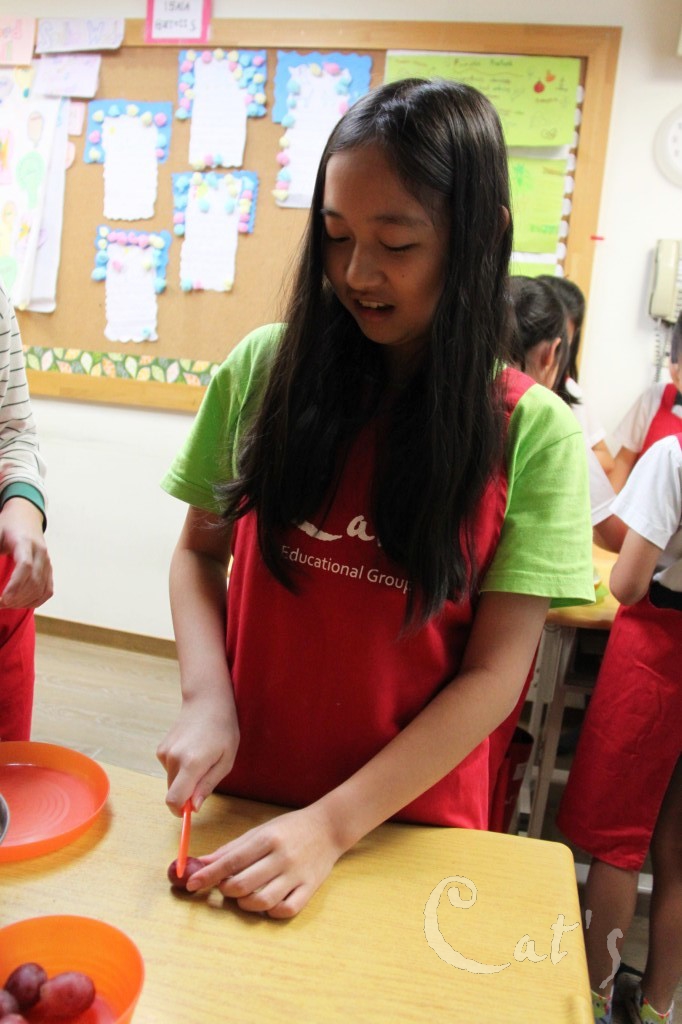
Slicing grapes in halves
-
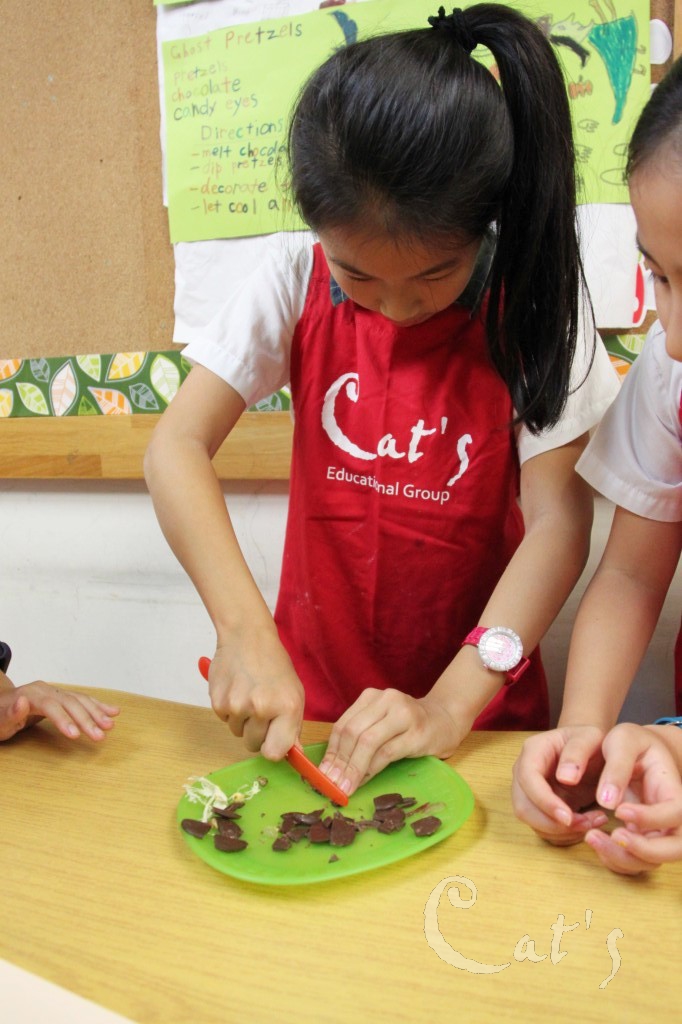
Cutting chocolate buttons into triangles for the eyes.
-
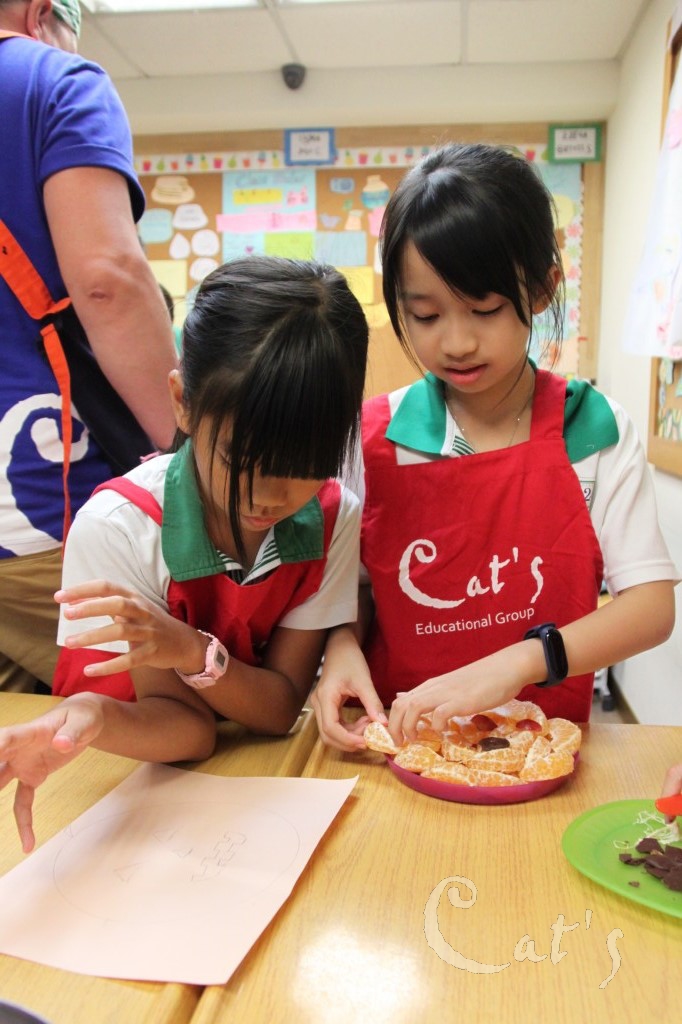
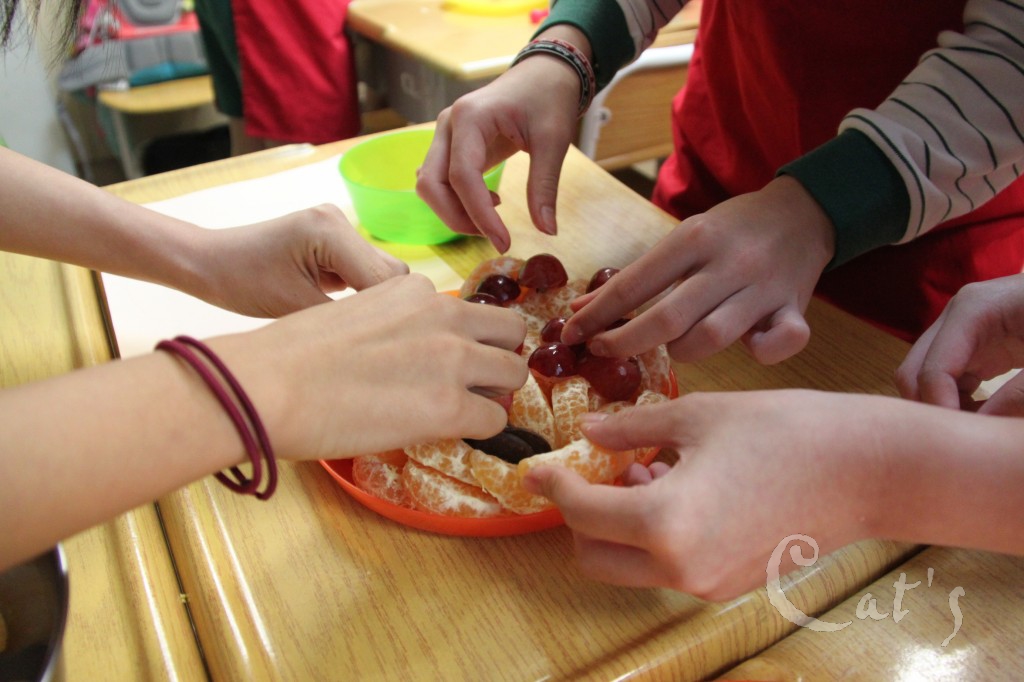
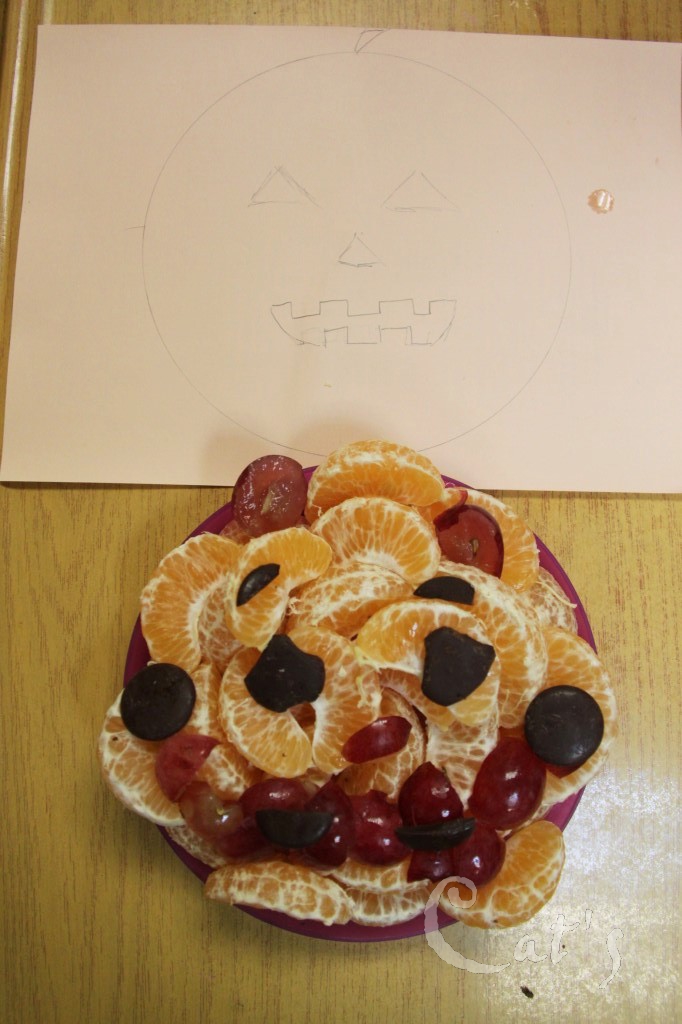
Start assembling your Jack-o'lanterns. First layer is the orange wedges.
-
Orange wedges represent the Jack-o'lantern's body.
-
Placing the grapes on next.
-
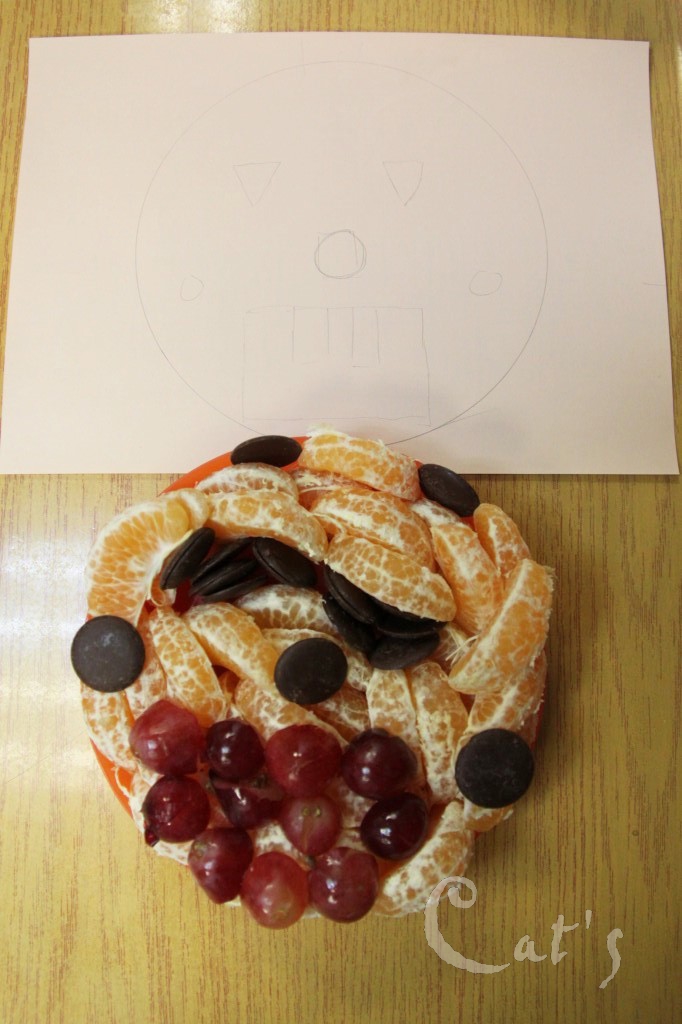
Look at the picture you drew before for guidance!
-
-
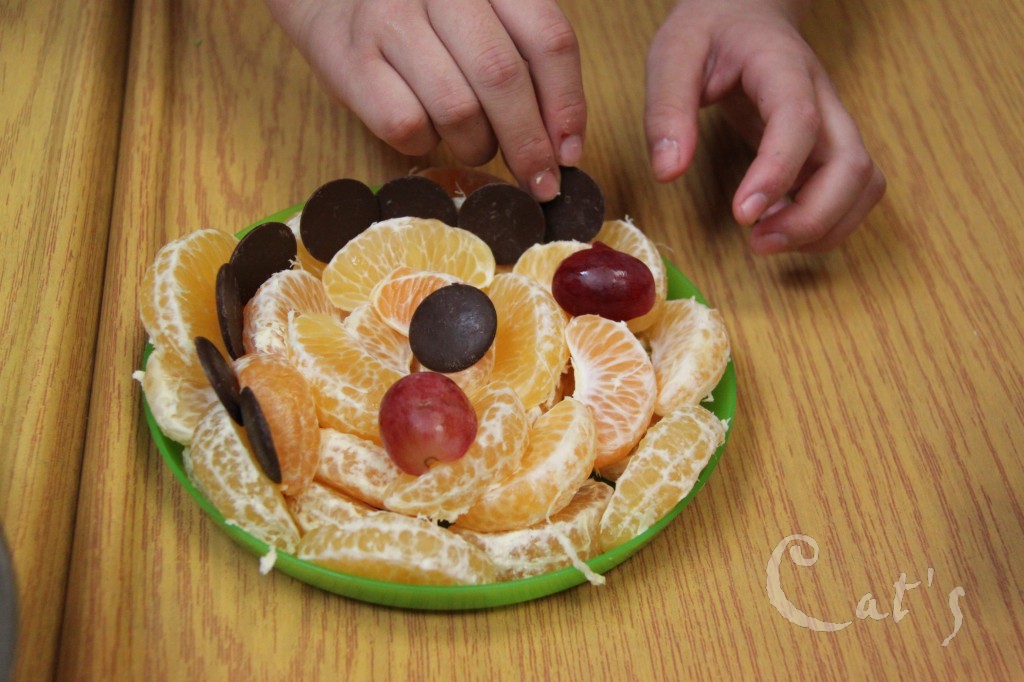
We can also use the chocolate buttons as the mouth.
-
Chocolate buttons and grapes represent eyes and mouths.
-
What an interesting looking Jack-o'lantern!
-
Look at that big toothy grin!
-
Such an adorable snack for Halloween!
-
Make it real creative, people!
-
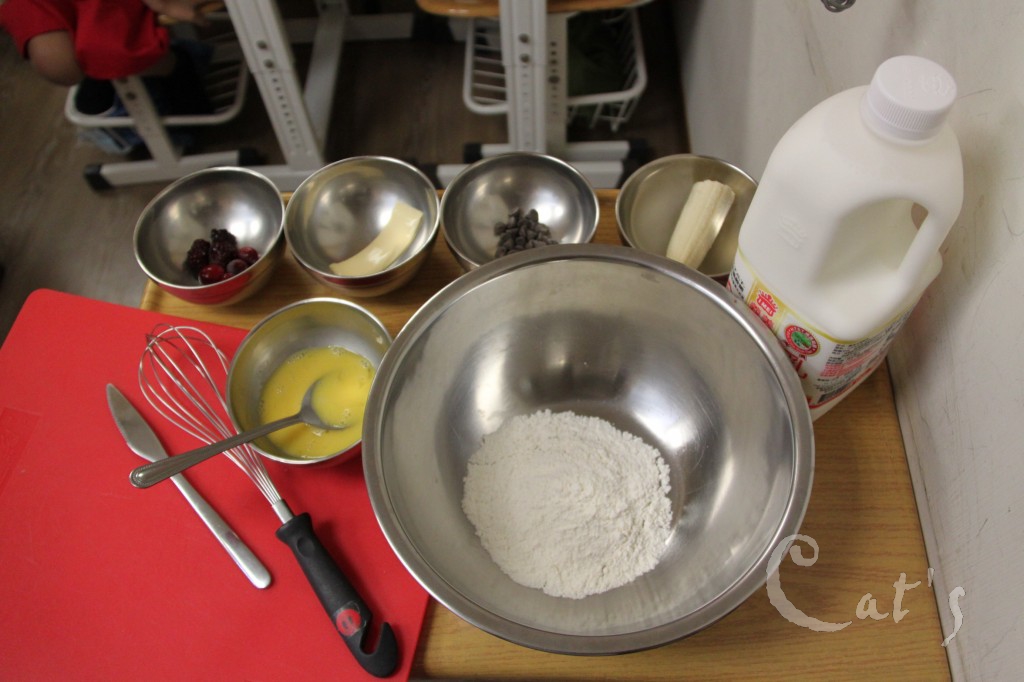
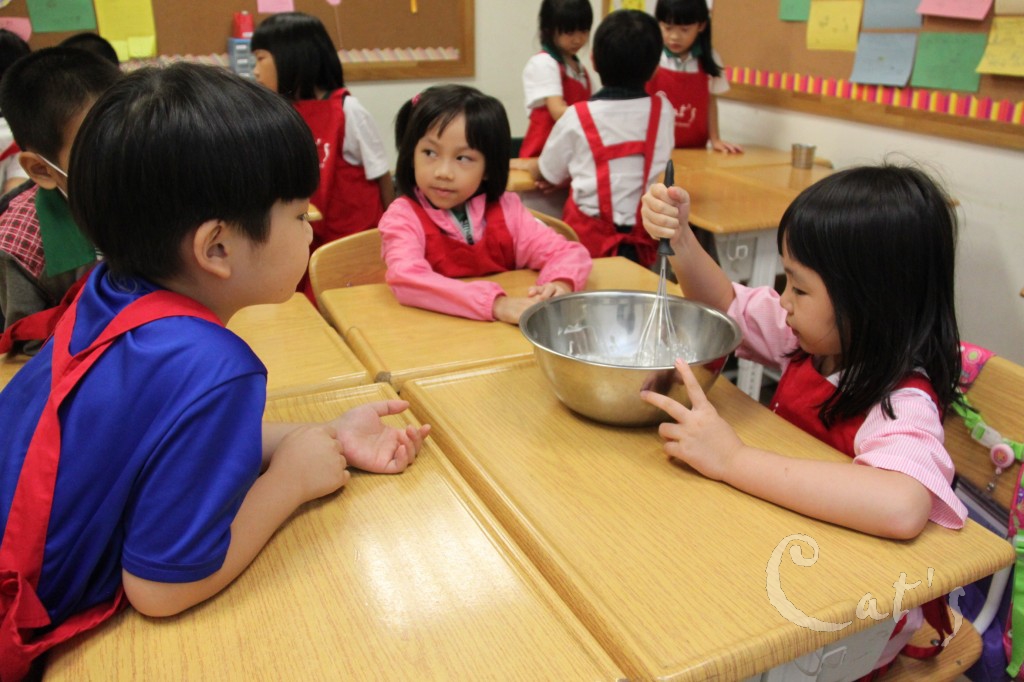
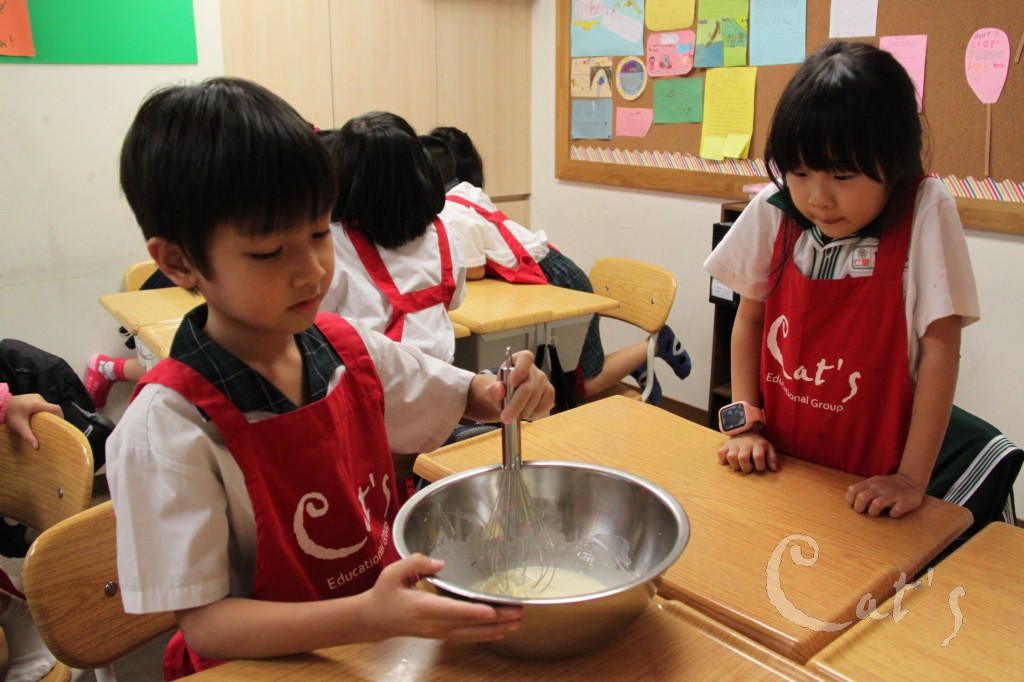
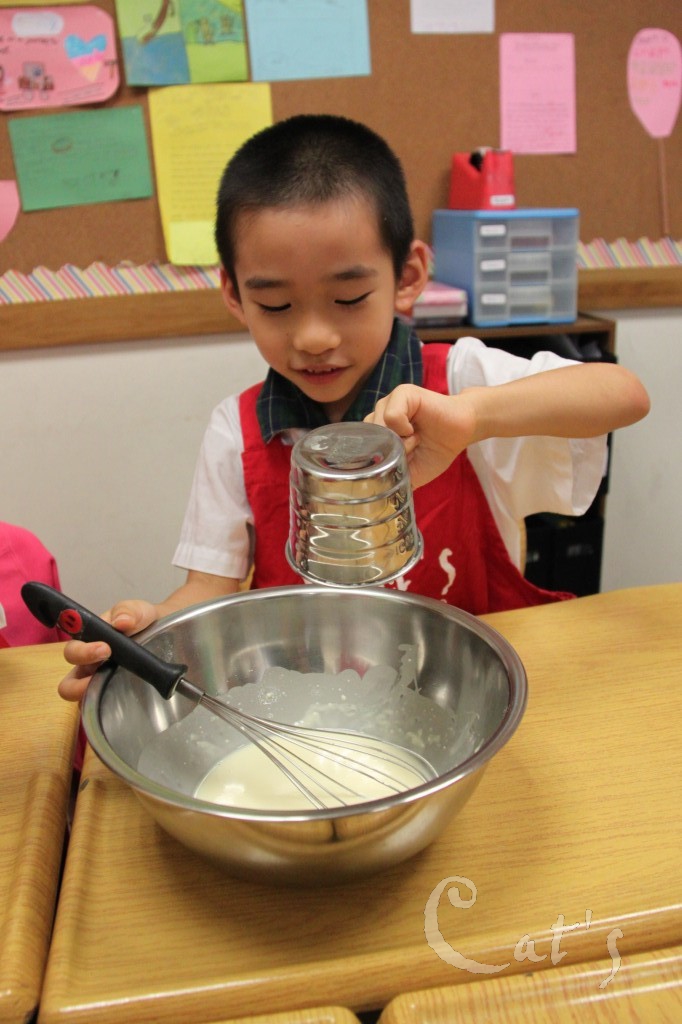
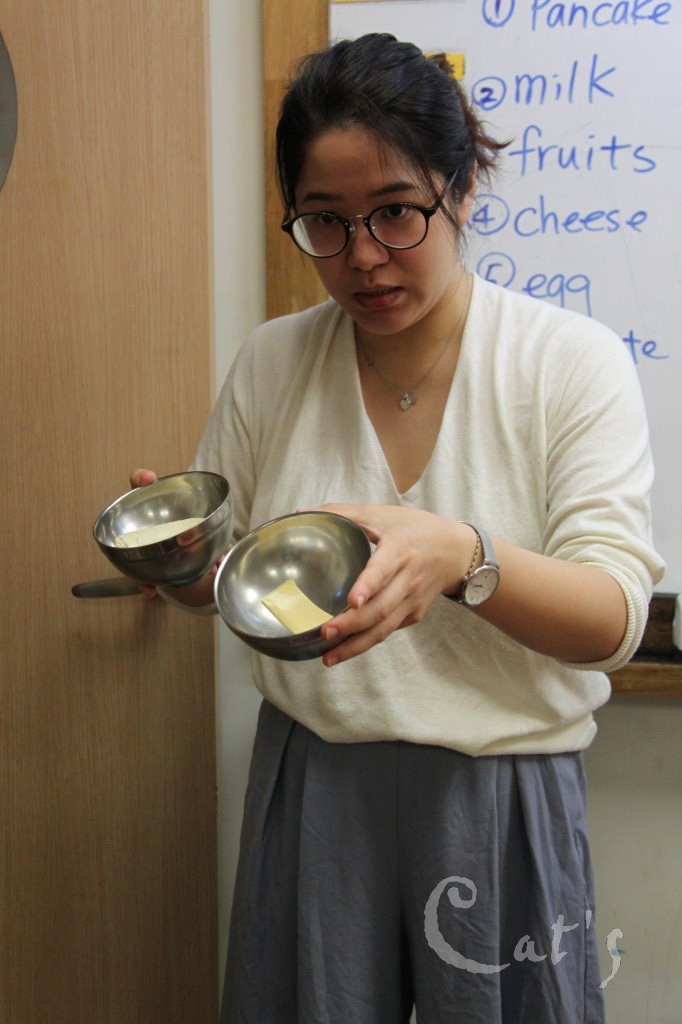
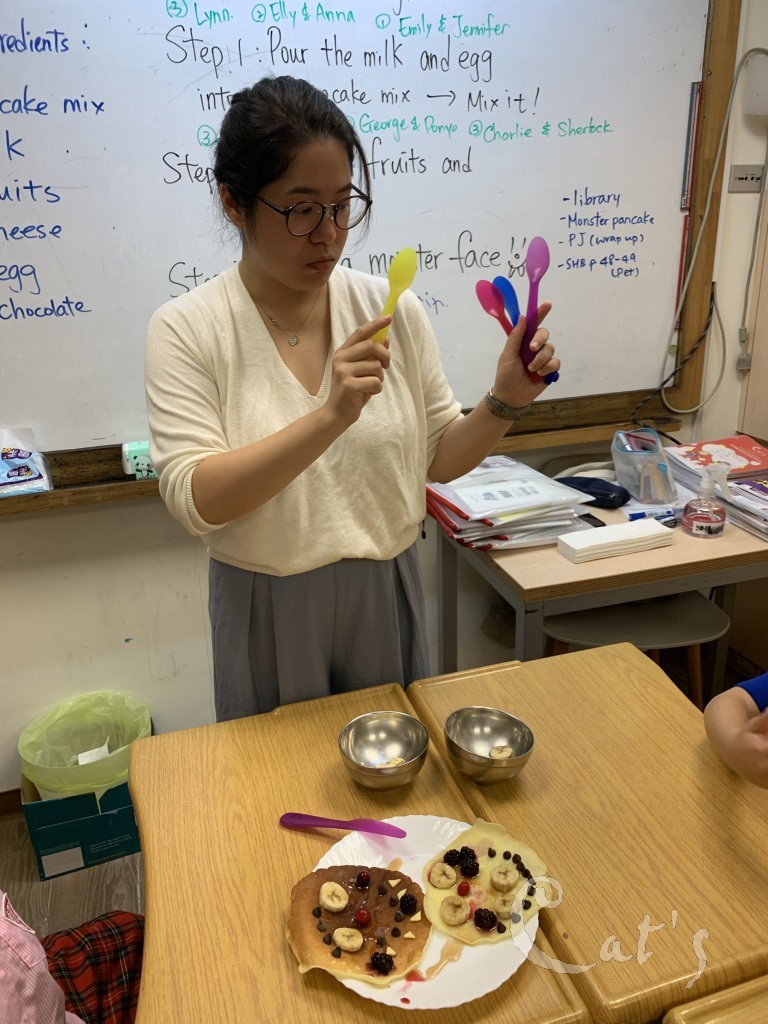
Pancake ingredients are ready!
-
Ms. Jebe goes over the steps.
-
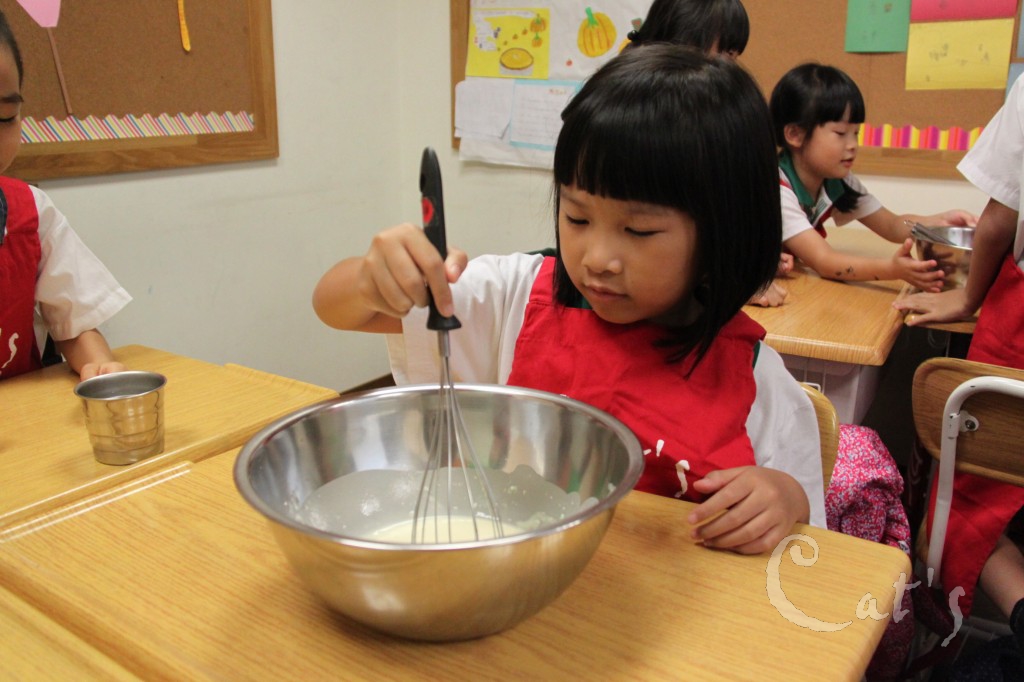
I'm in charge of mixing in this group.
-
I have made pancakes at home before.
-
I've added all the milk.
-
Ms. Jebe says "No lumps!"
-
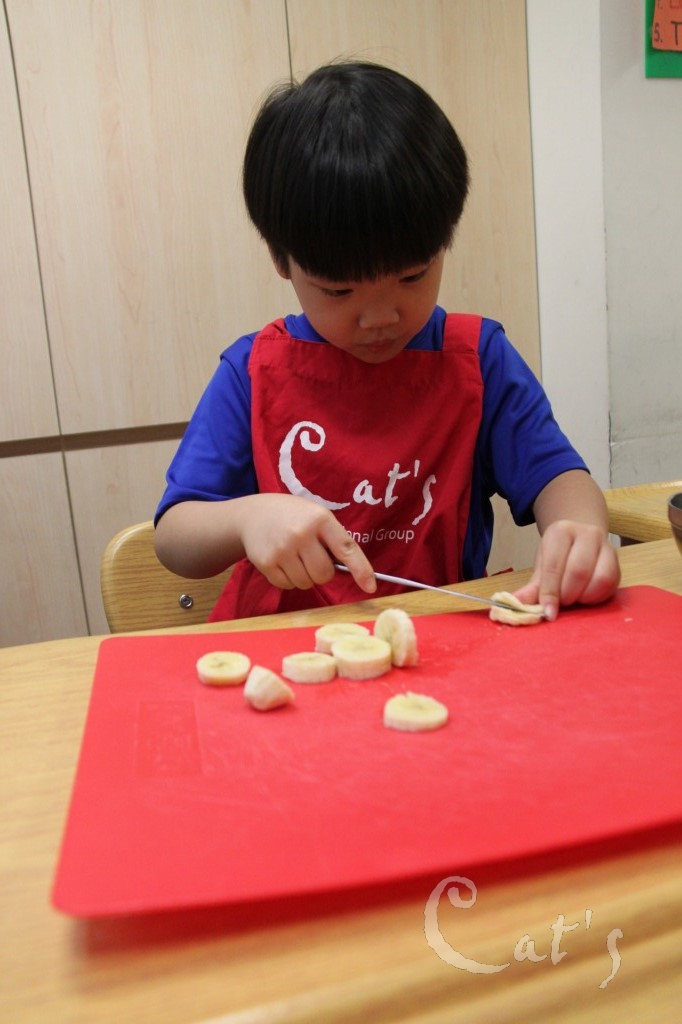
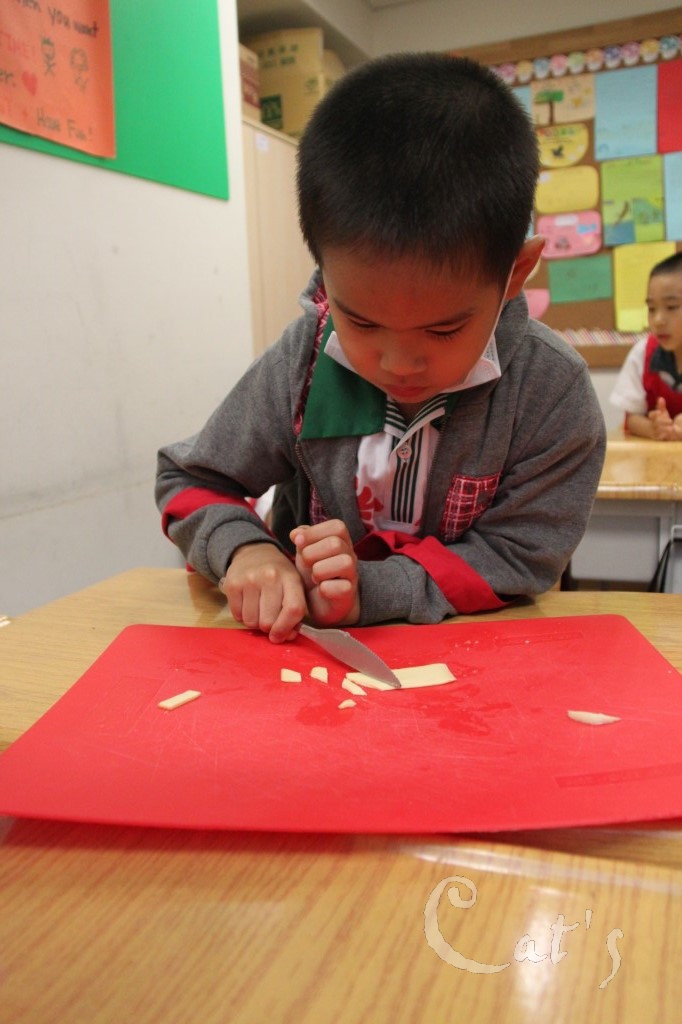
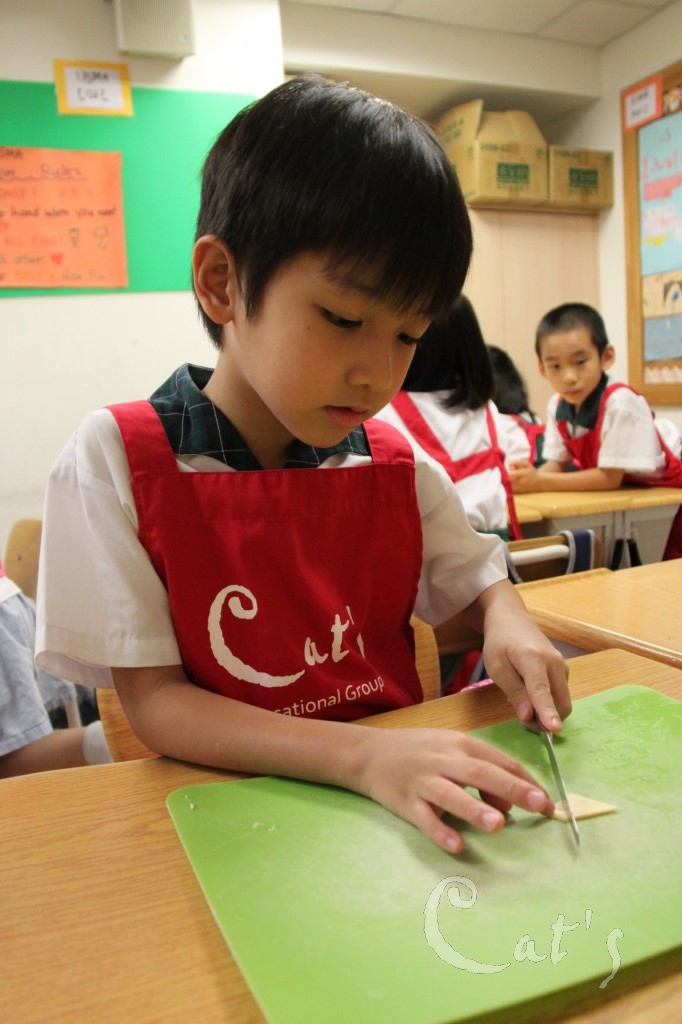
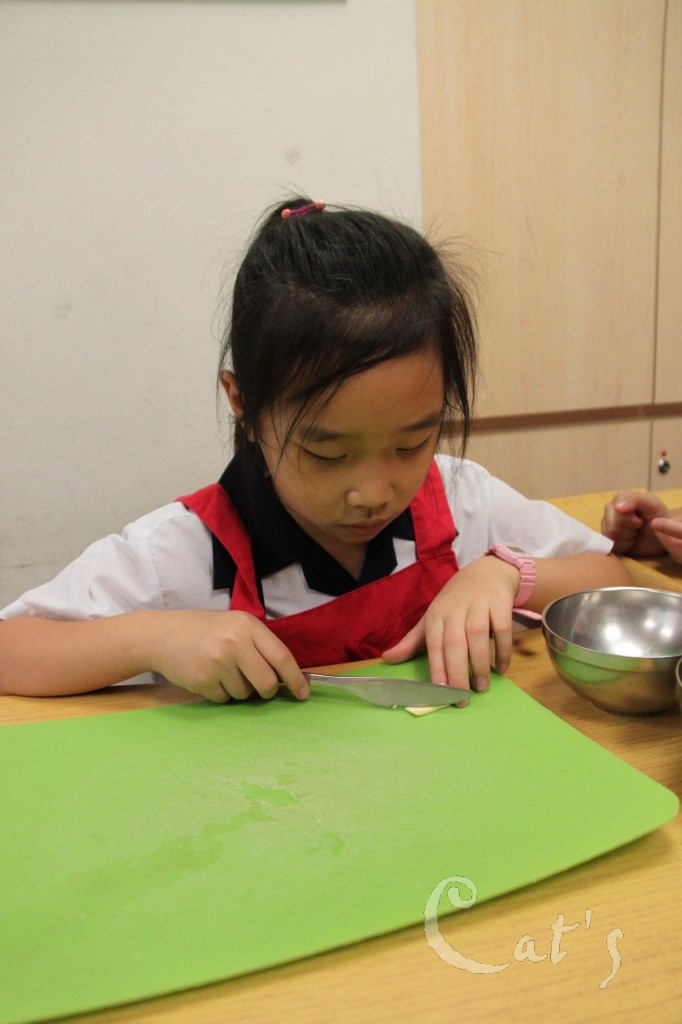
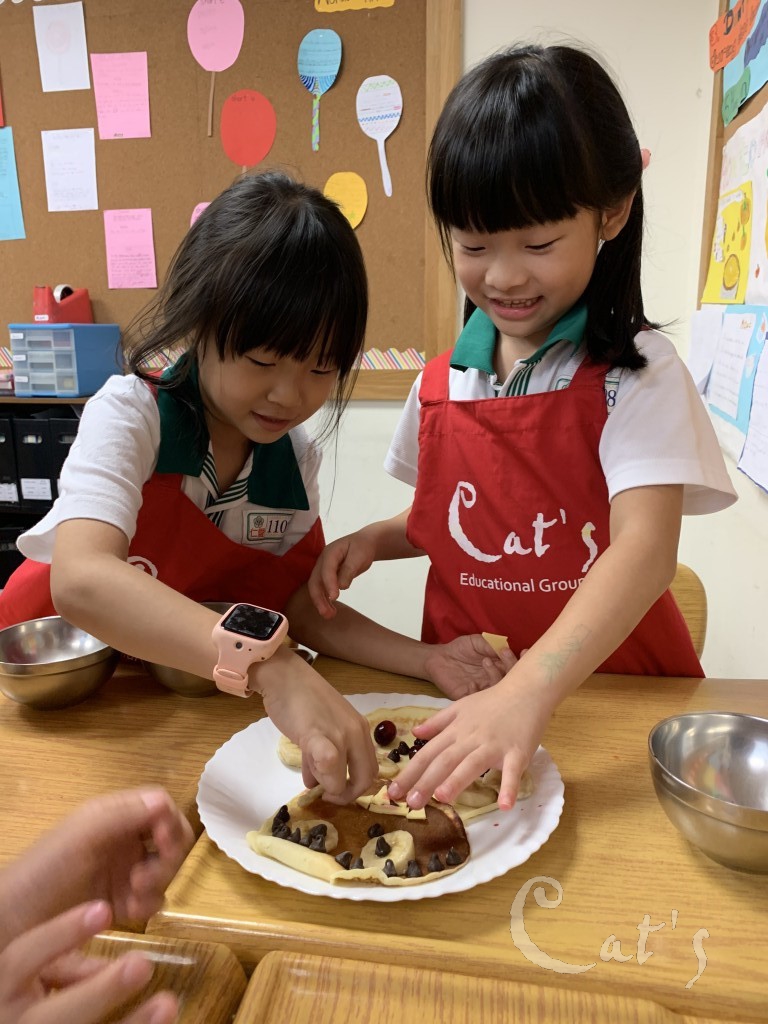
Here are some cheese and banana.
-
Great slicing skills!
-
Good work!
-
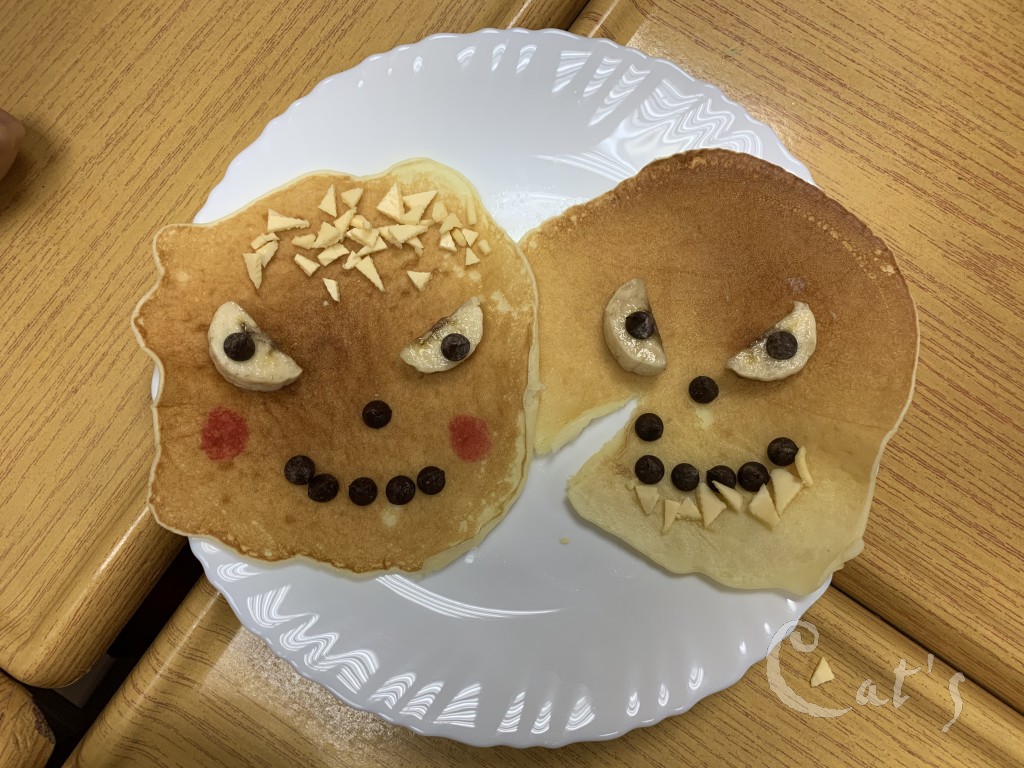
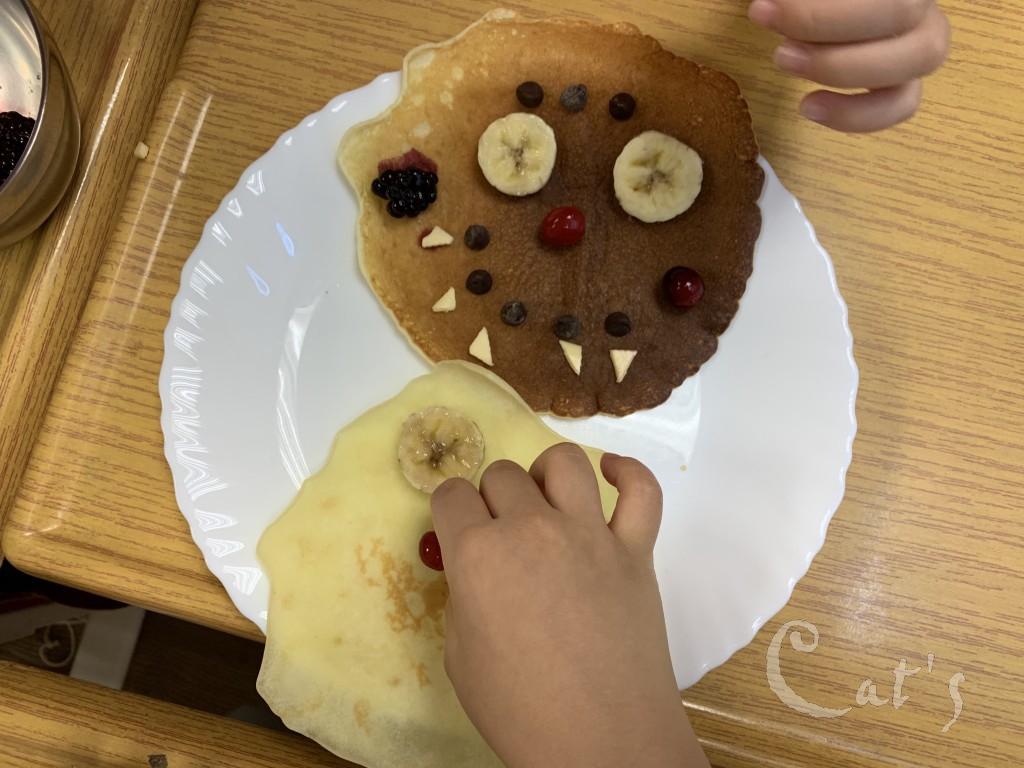
My monster will have long teeth.
-
My monster will have short teeth.
-
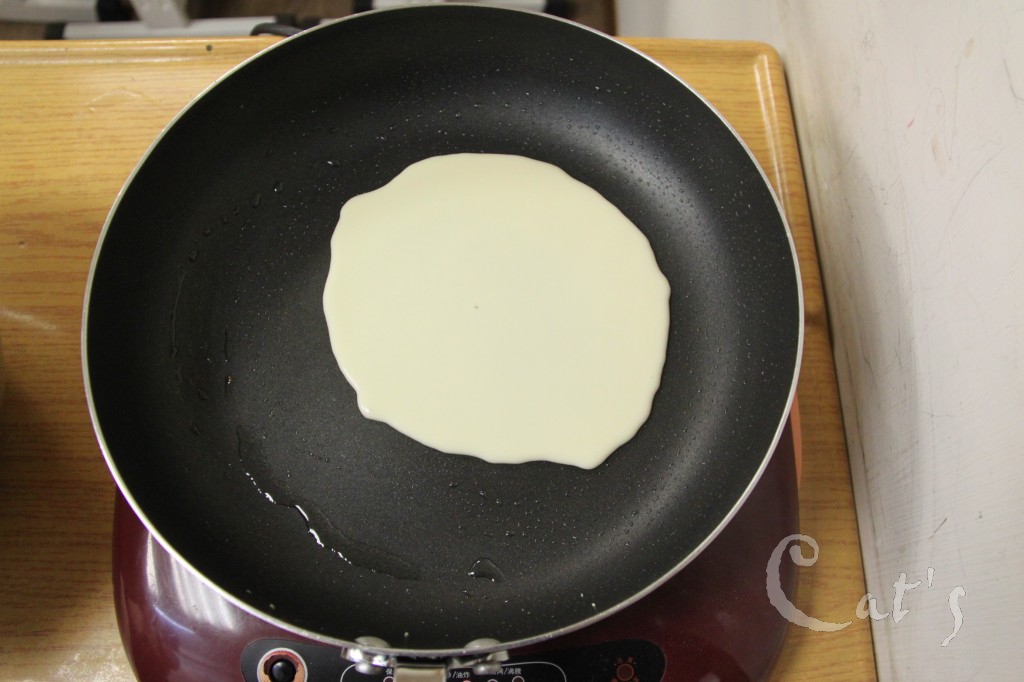
Ms. Jebe pan-fries the first pancake.
-
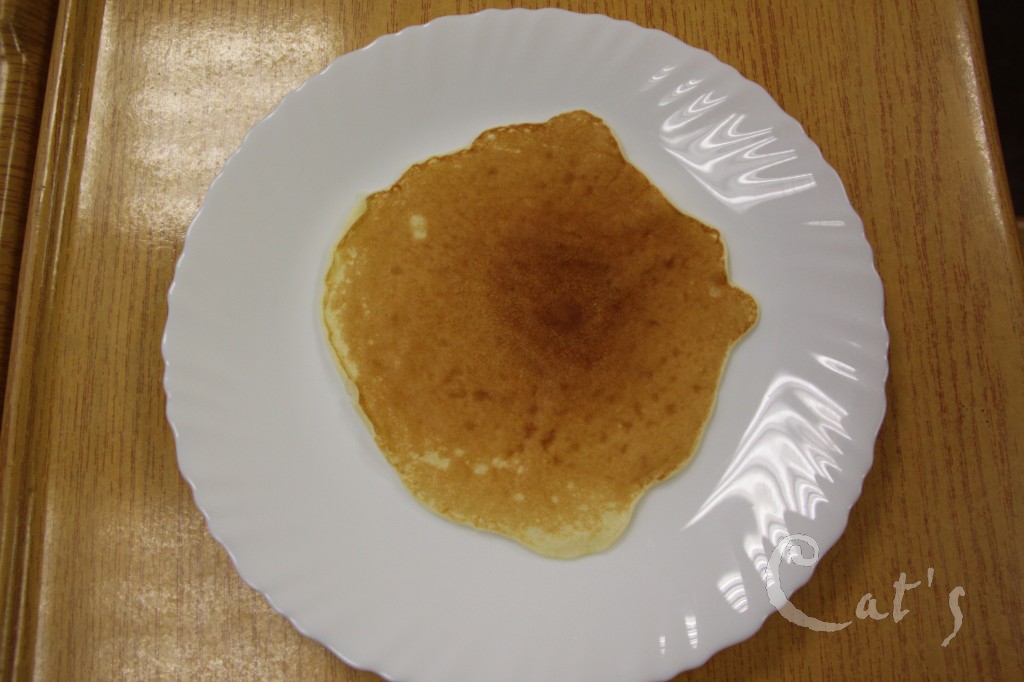
Waiting for it to turn a golden brown.
-
One ugly pancake coming up!
-
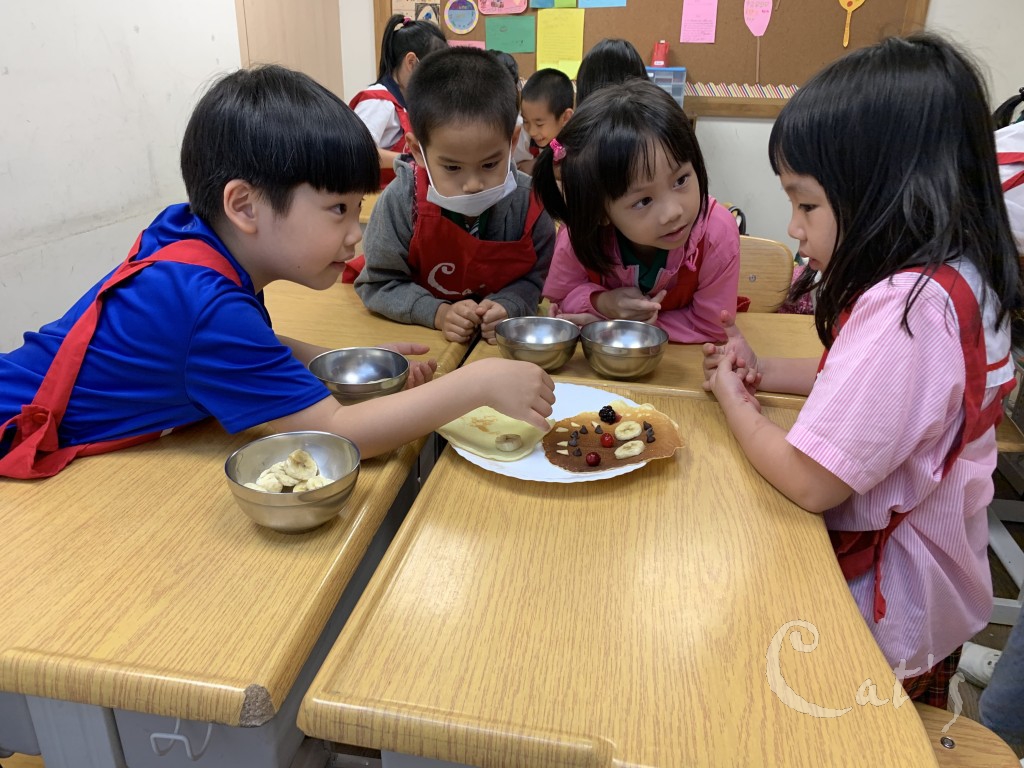
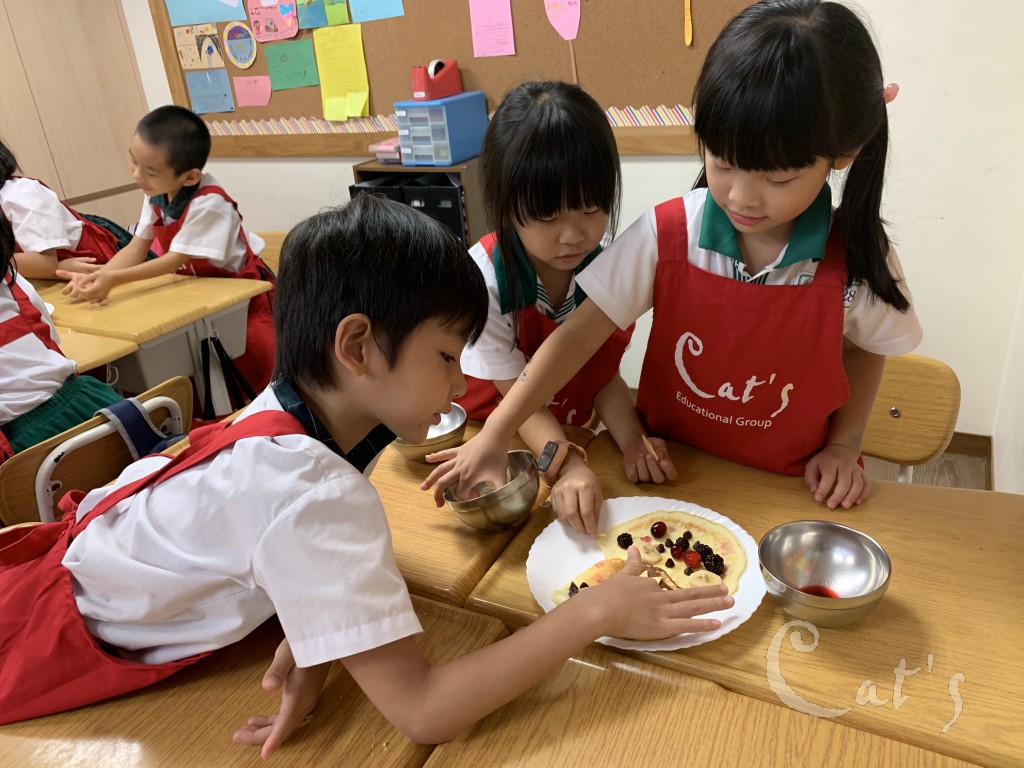
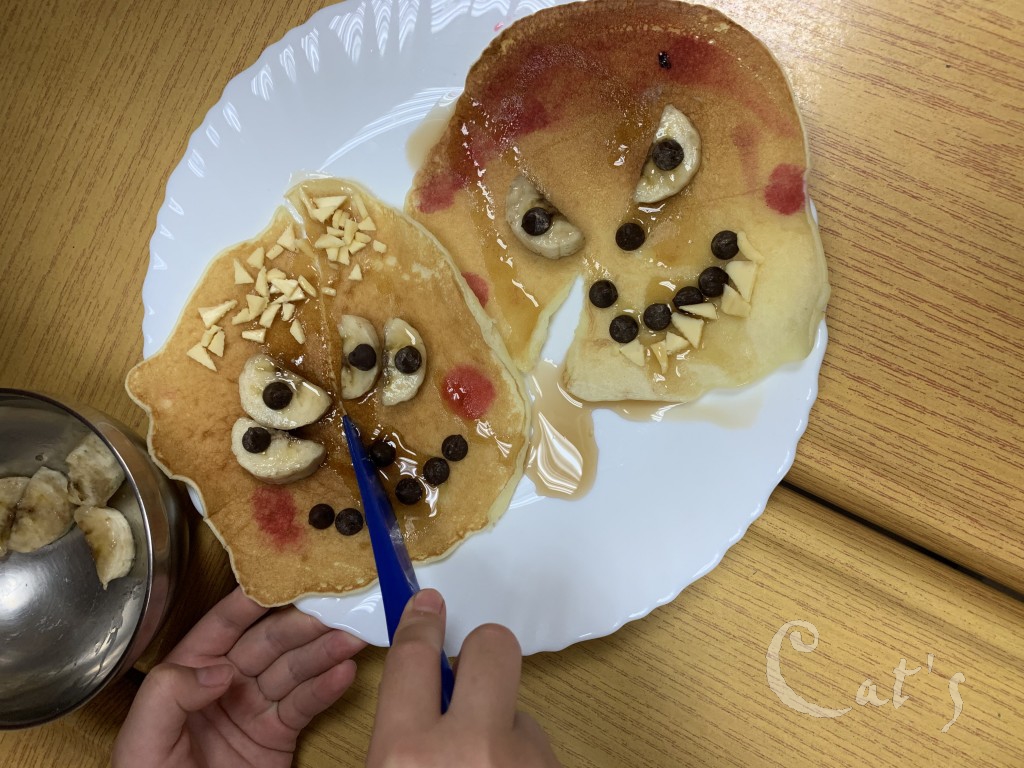
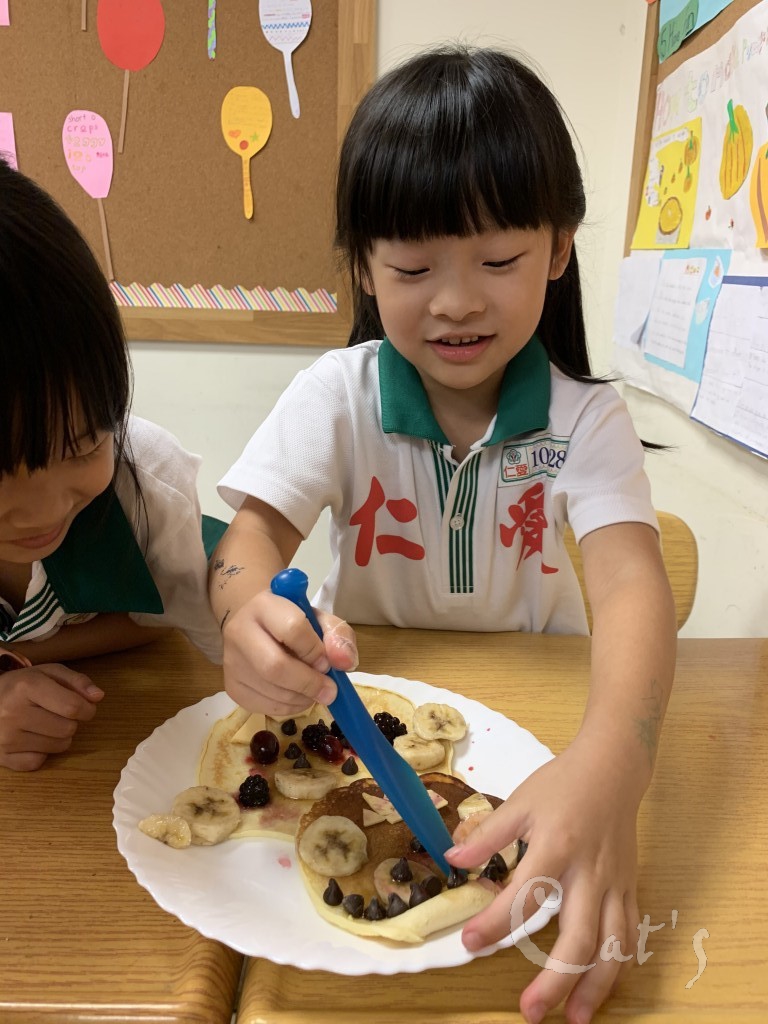
Students discuss with their groups on how to decorate the pancakes.
-
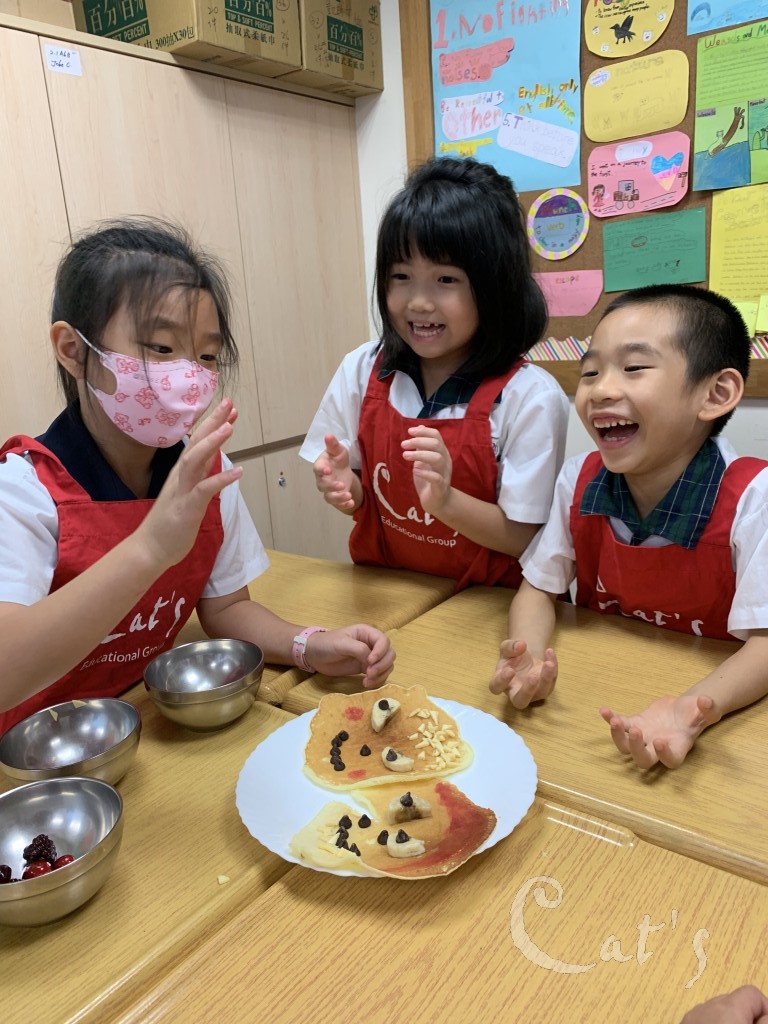
These monsters are just too adorable!
-
We have such wonderful little artists here at Cat's.
-
Great team work!
-
Communication is important in a team.
-
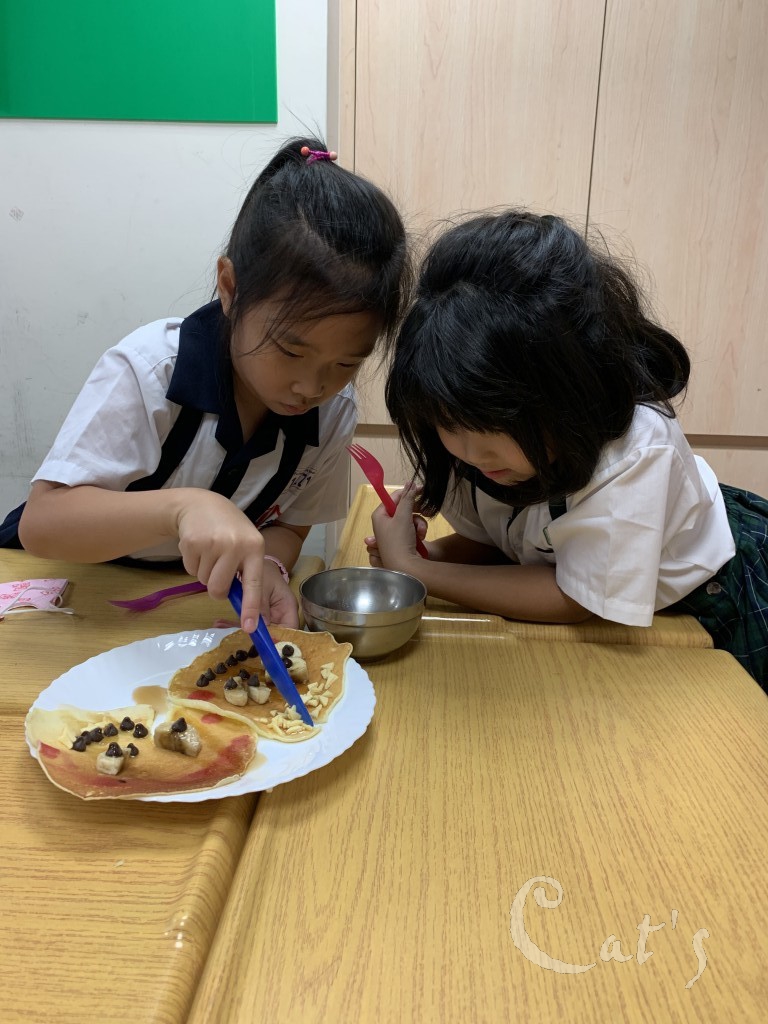
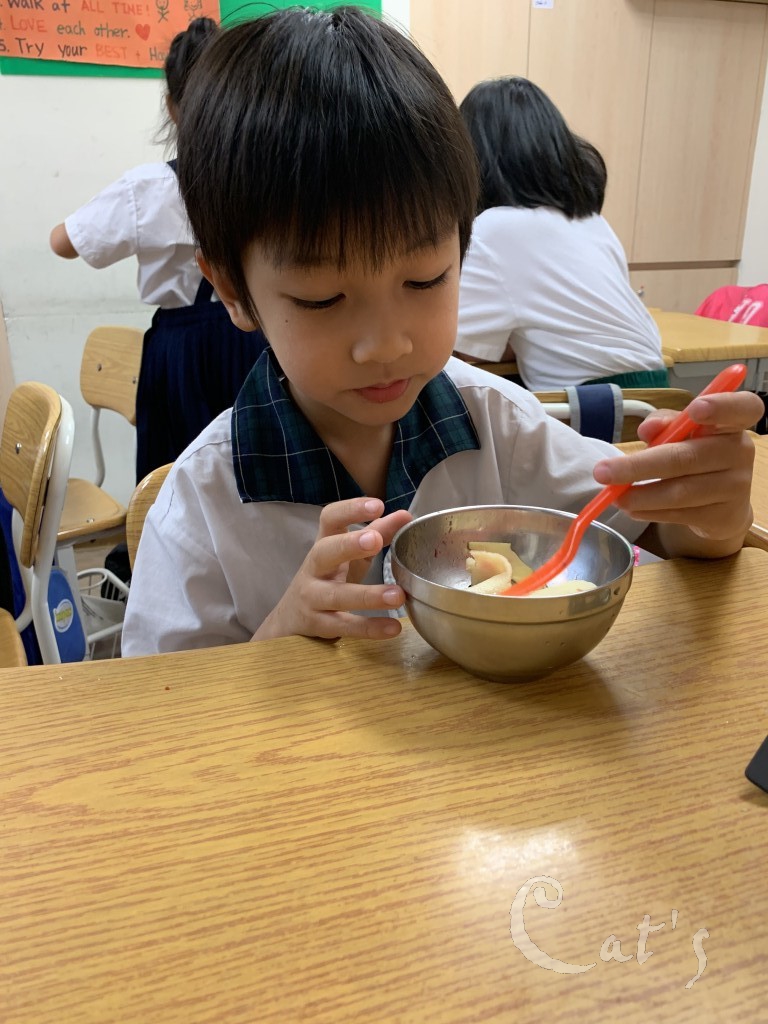
Eating time!
-
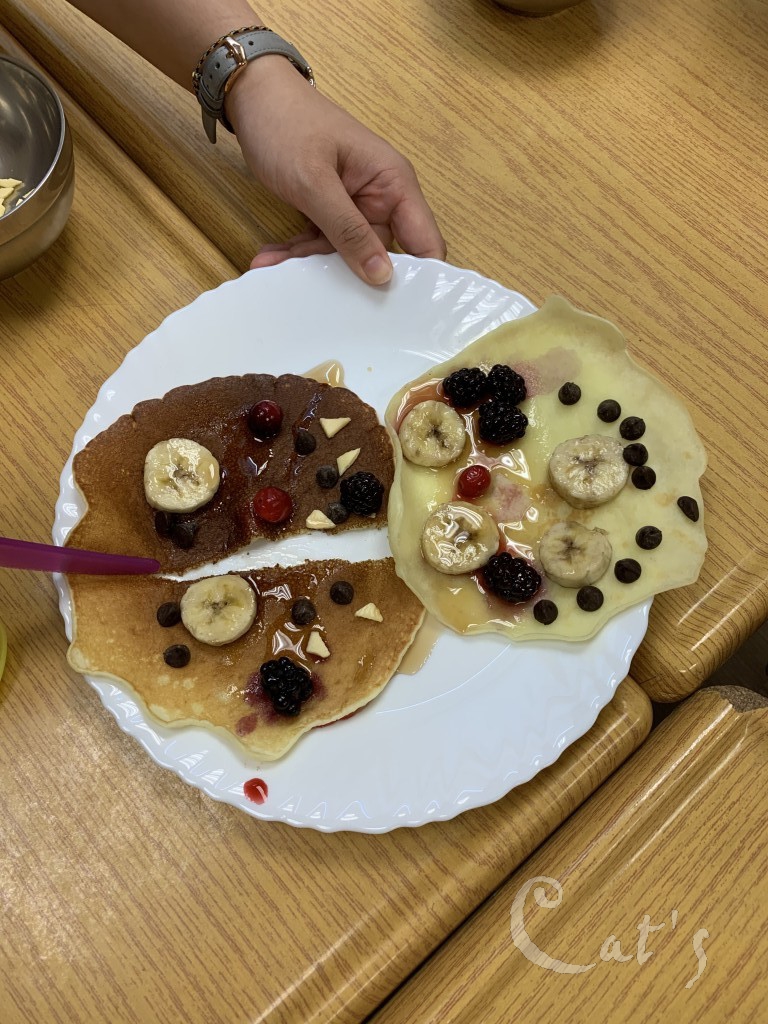
Hmm... how should we divide this?
-
Cut it in half first.
-
Which part would you like to have?
-
Go away Pancake Monster! Go away! GO AWAY!
-
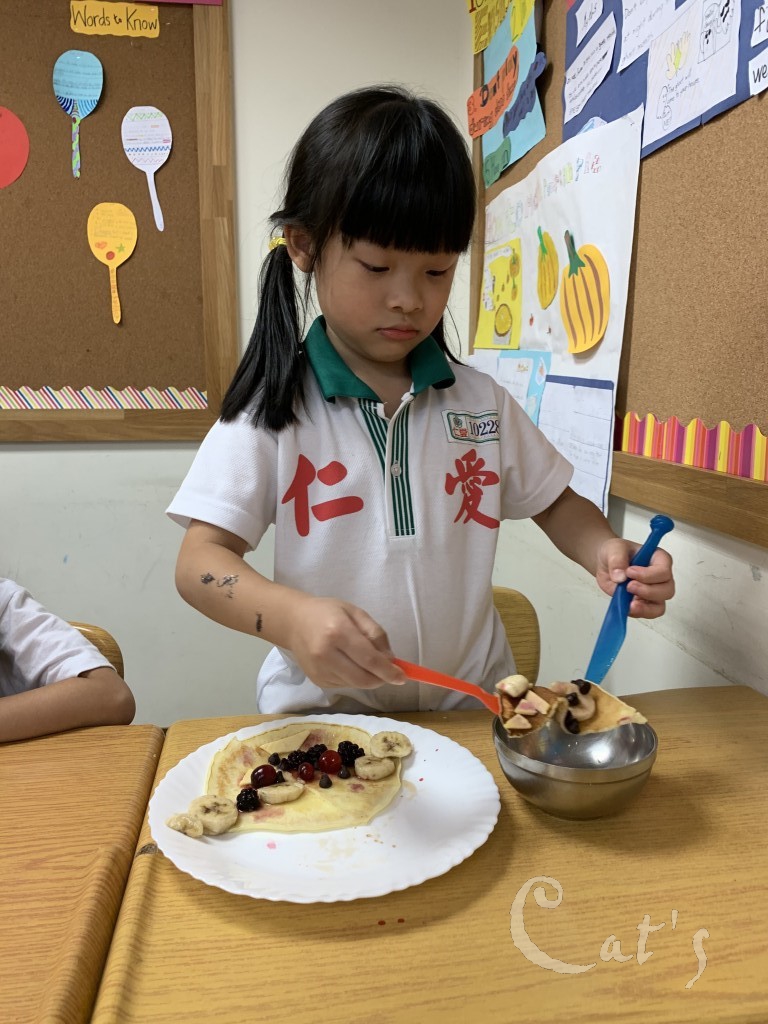
Helping her teammates out.
-
Rock, paper, scissors, who gets the last piece?
-
I love it!
-
Cheeky looking monsters!
-
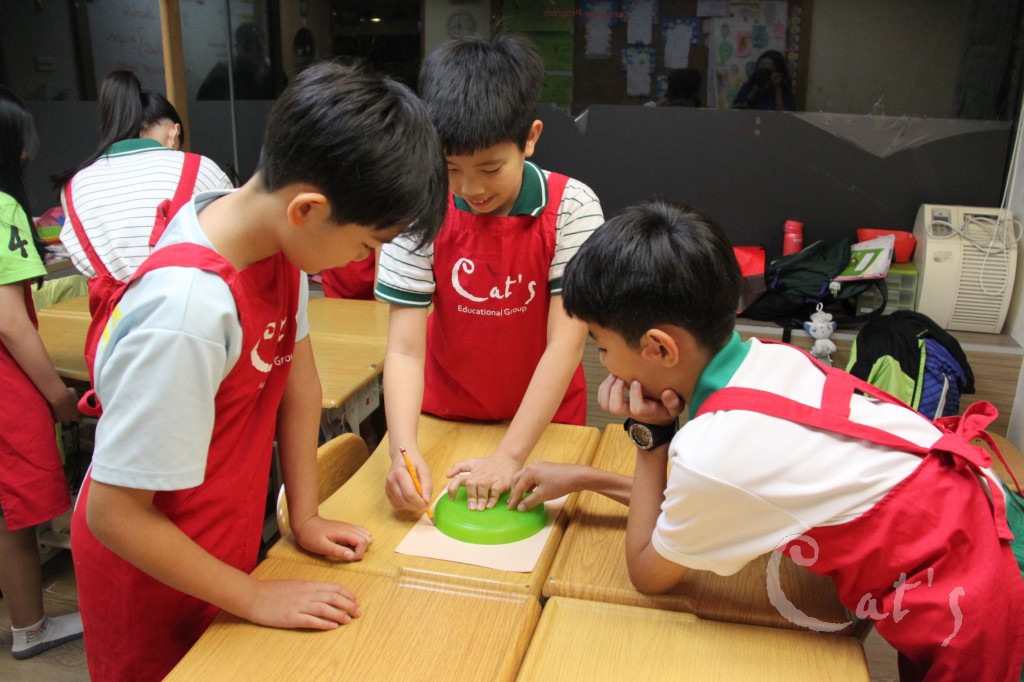
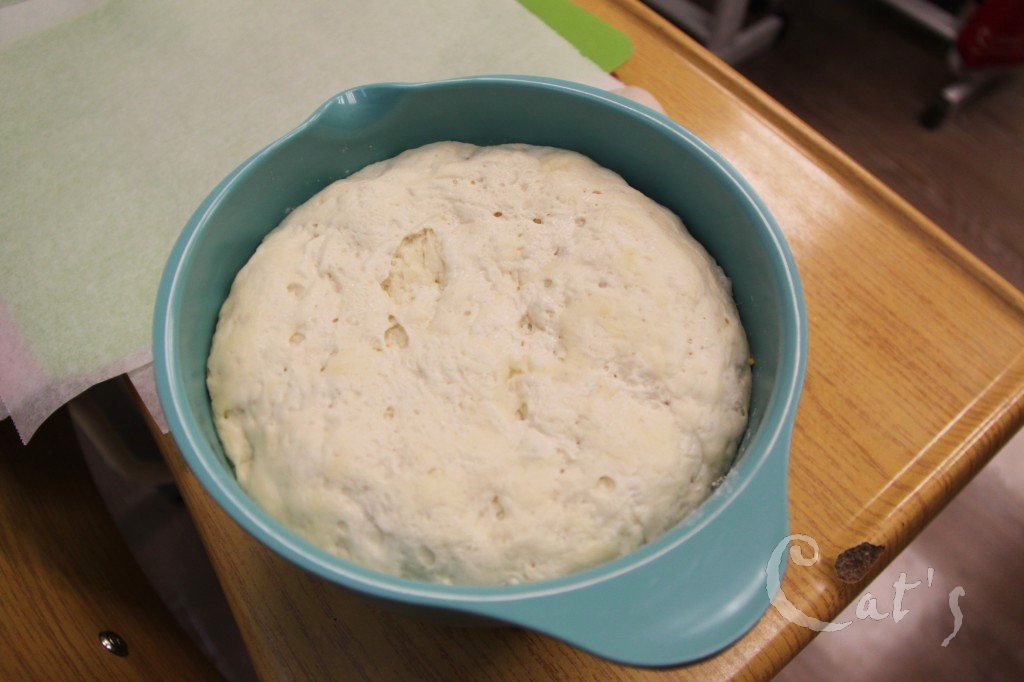
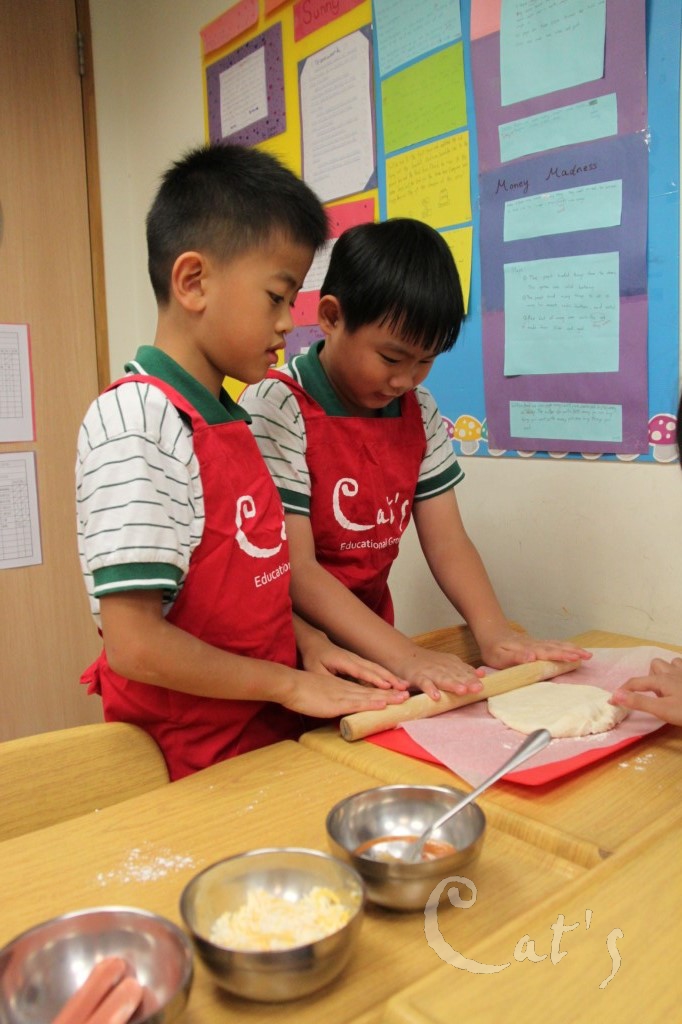
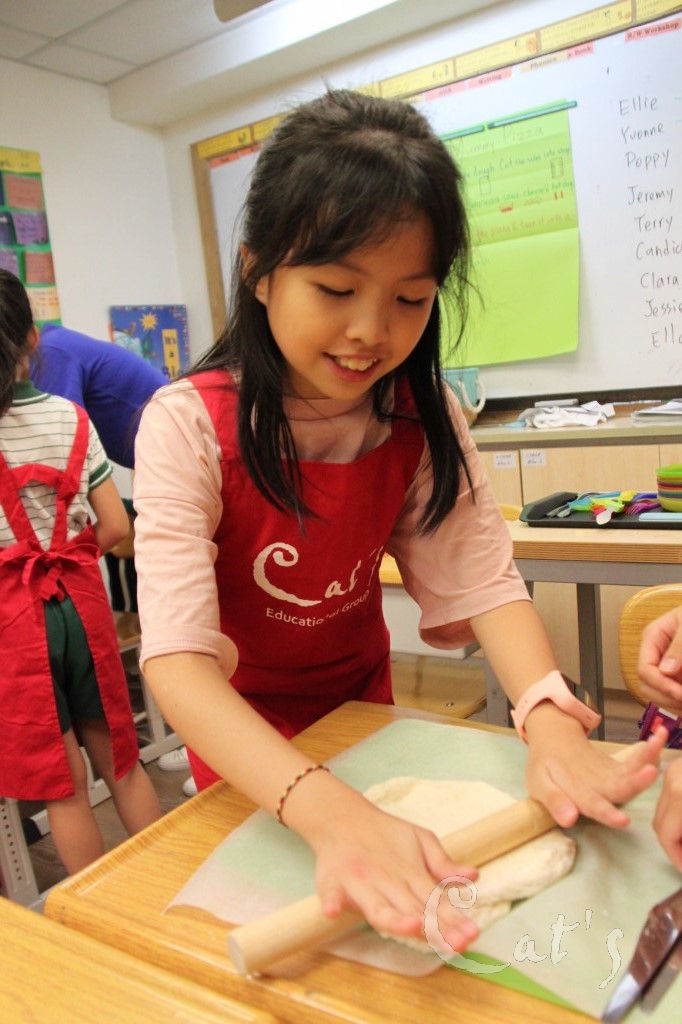
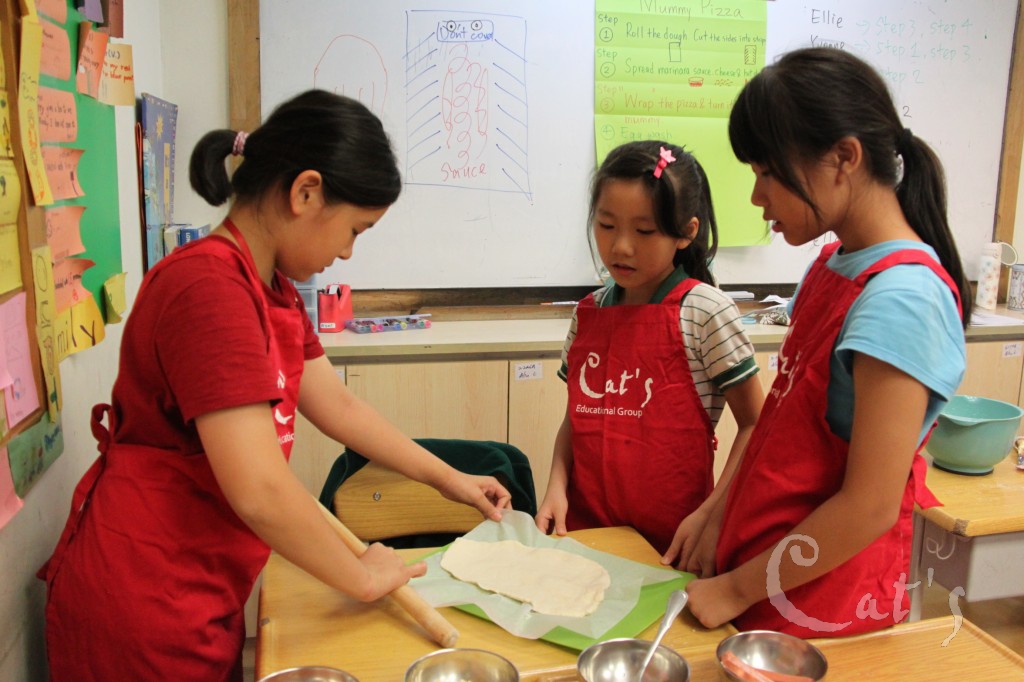
Pizza dough
-
Pizza toppings and sauce
-
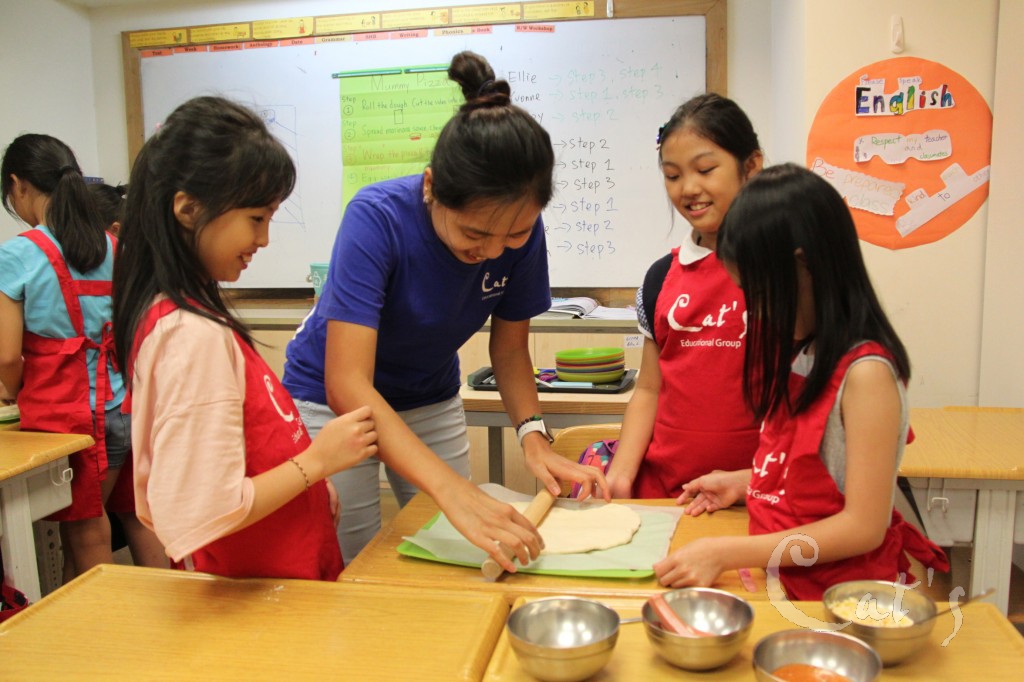
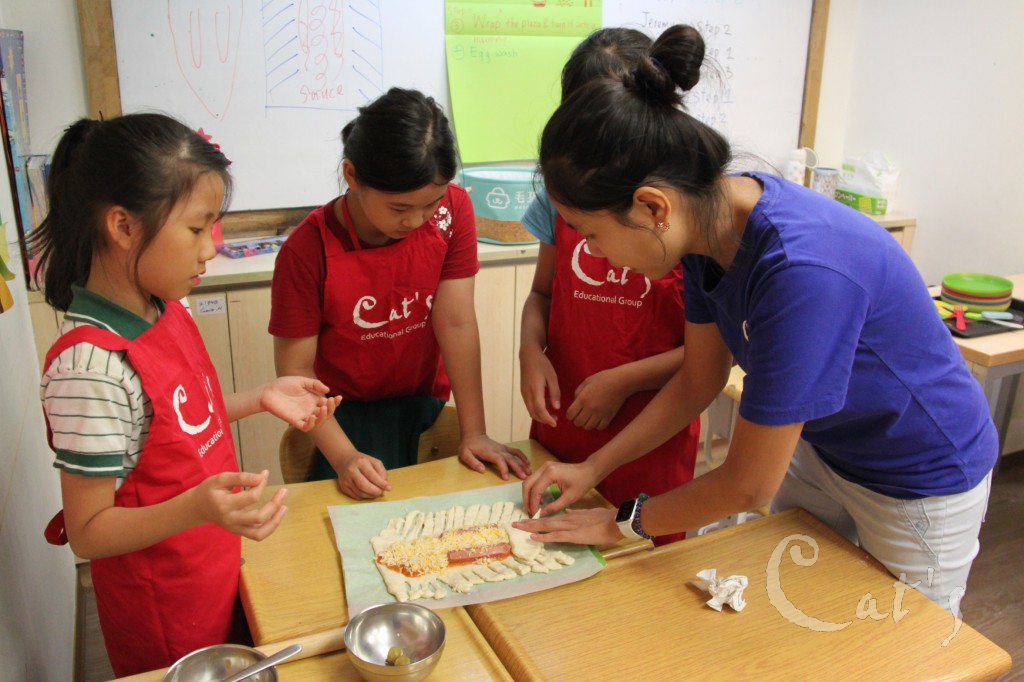
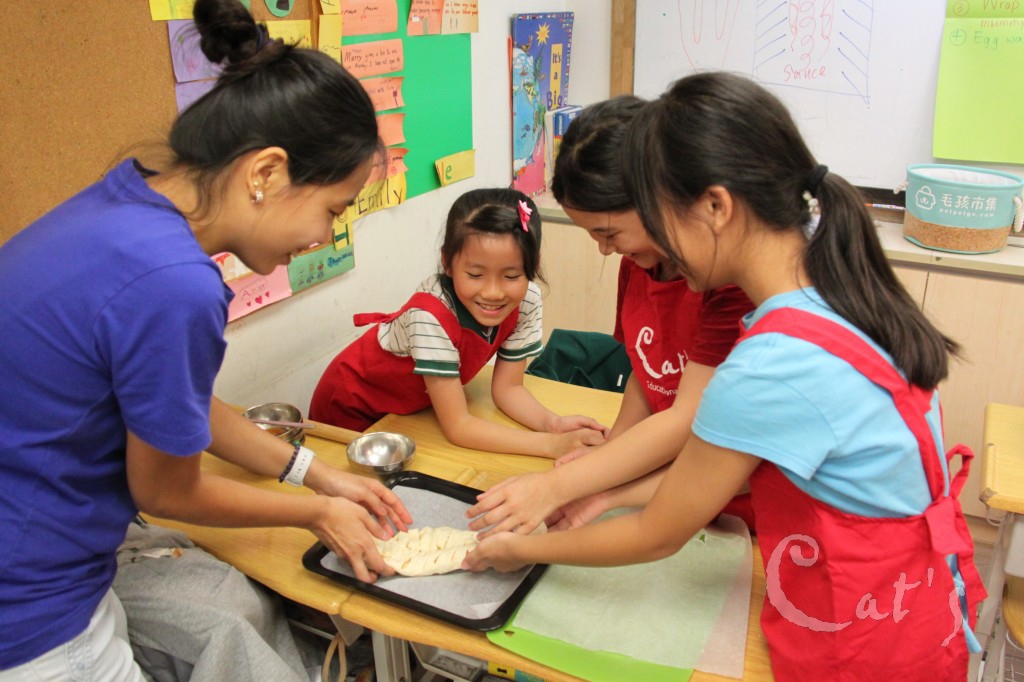
Do you all know what ingredients and steps you will be in charged of?
-
Ms. Tiffany writes down everyone's roles on the whiteboard.
-
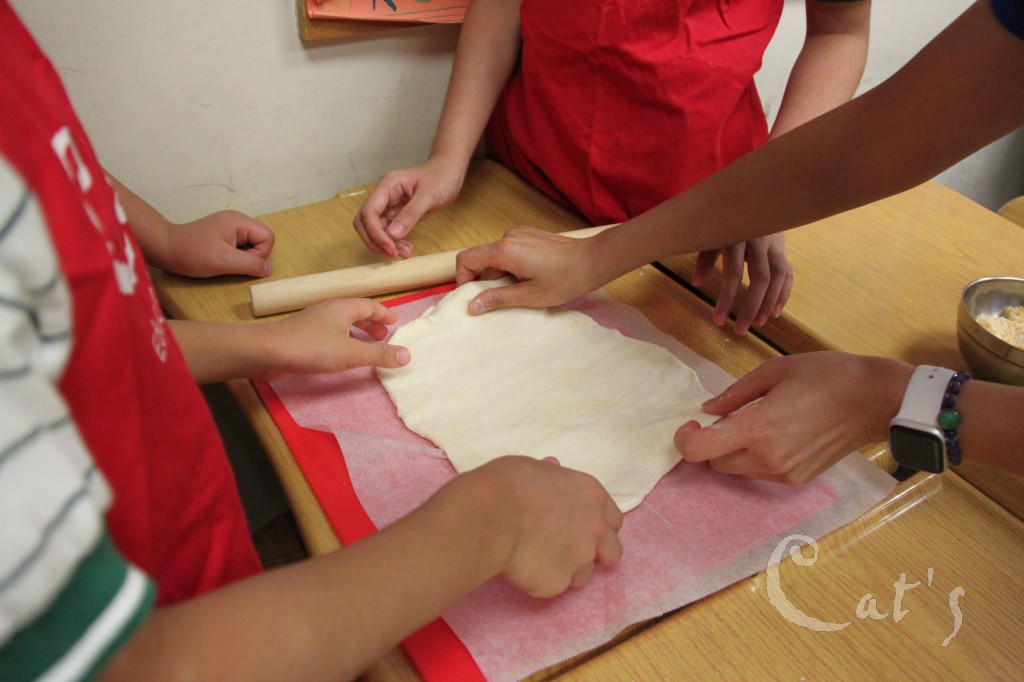
Make sure you floured your hands, work surface and the rolling pin first.
-
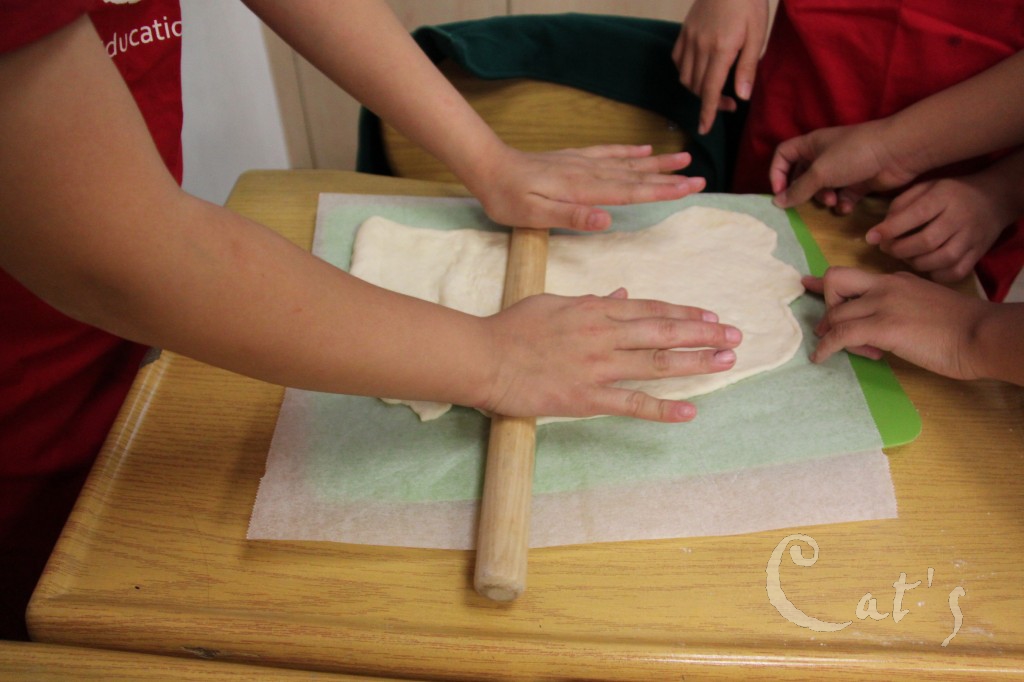
Start at the center and work outwards.
-
Flatten the dough evenly.
-
Keep rolling out the dough!
-
You can also stretch the dough with your fingers.
-
Turn and stretch the dough till it can't be stretched further.
-
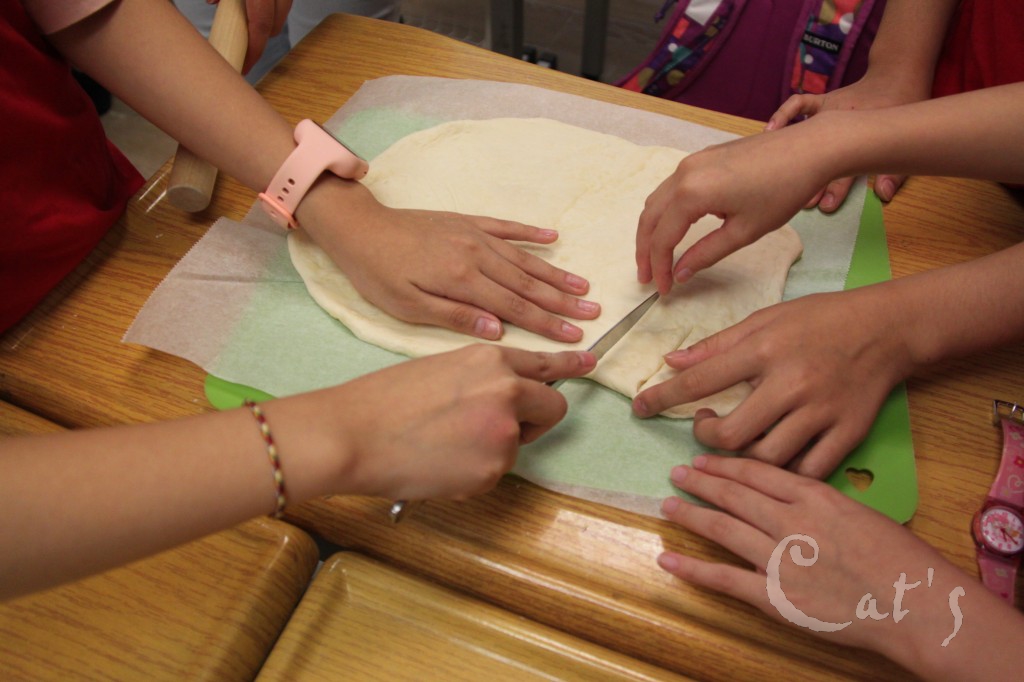
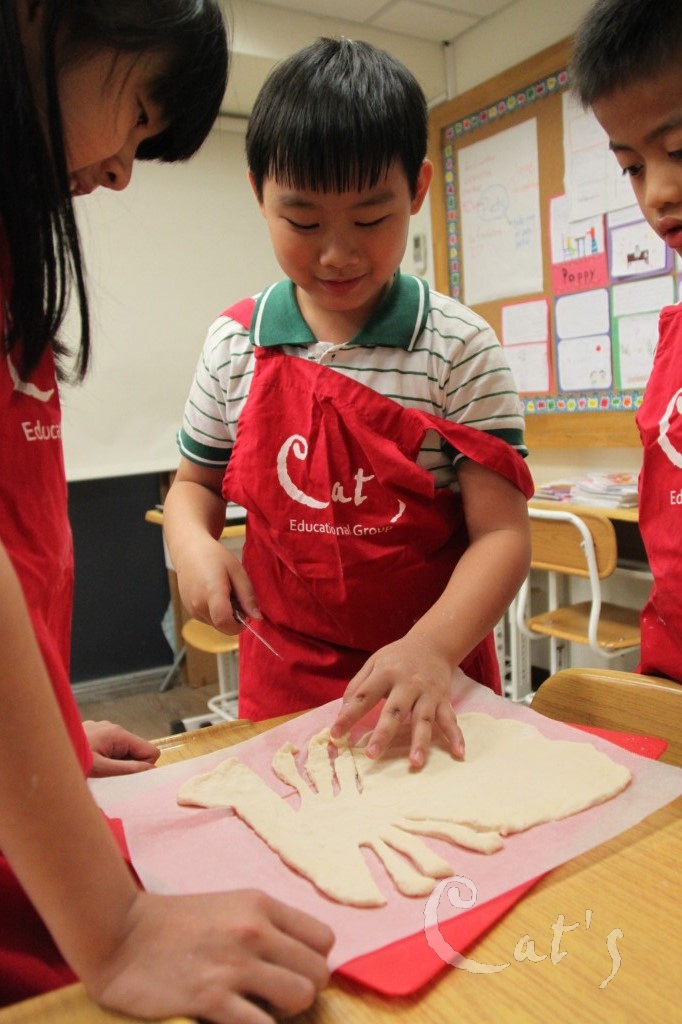
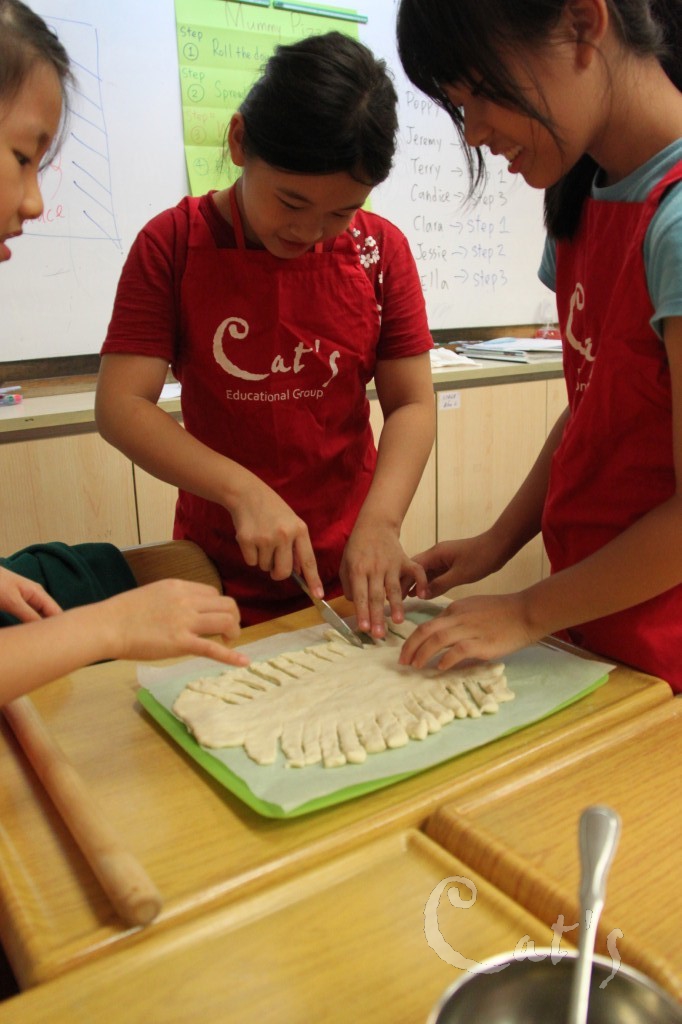
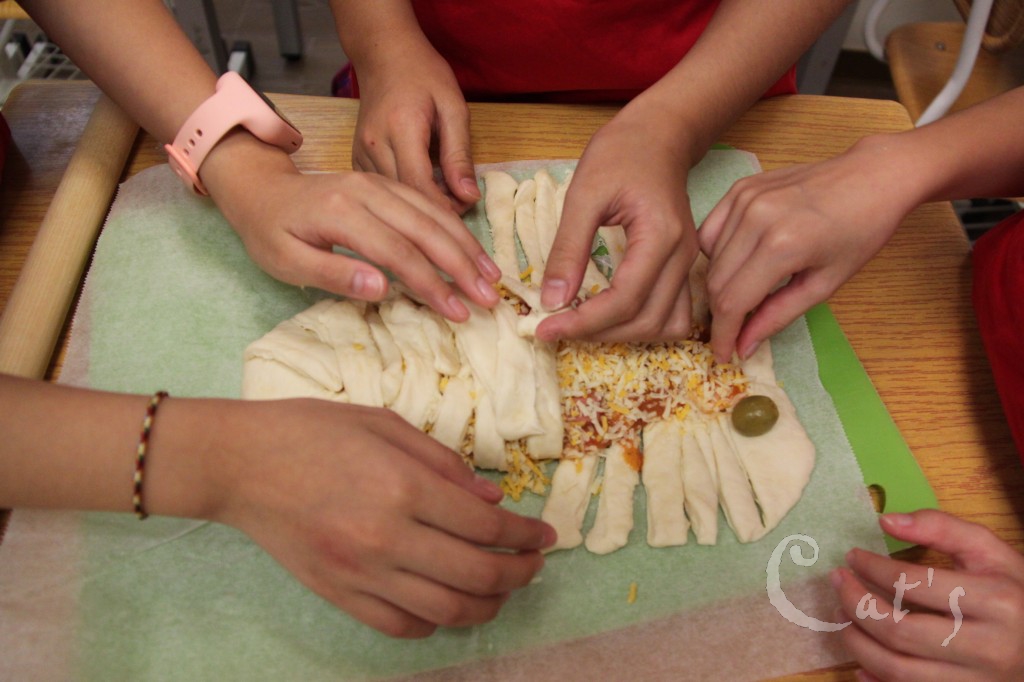
Now it's time to cut the sides.
-
Make 1 inch wide cuts along the long sides of the rectangles.
-
Make sure the cuts are long enough for you to fold them towards the center.
-
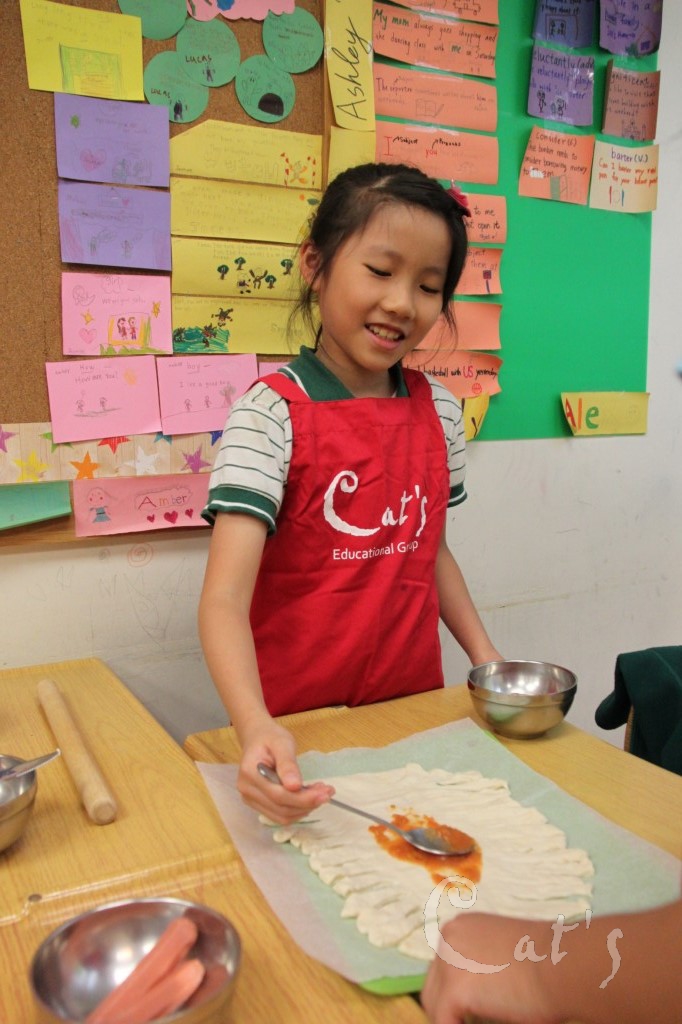
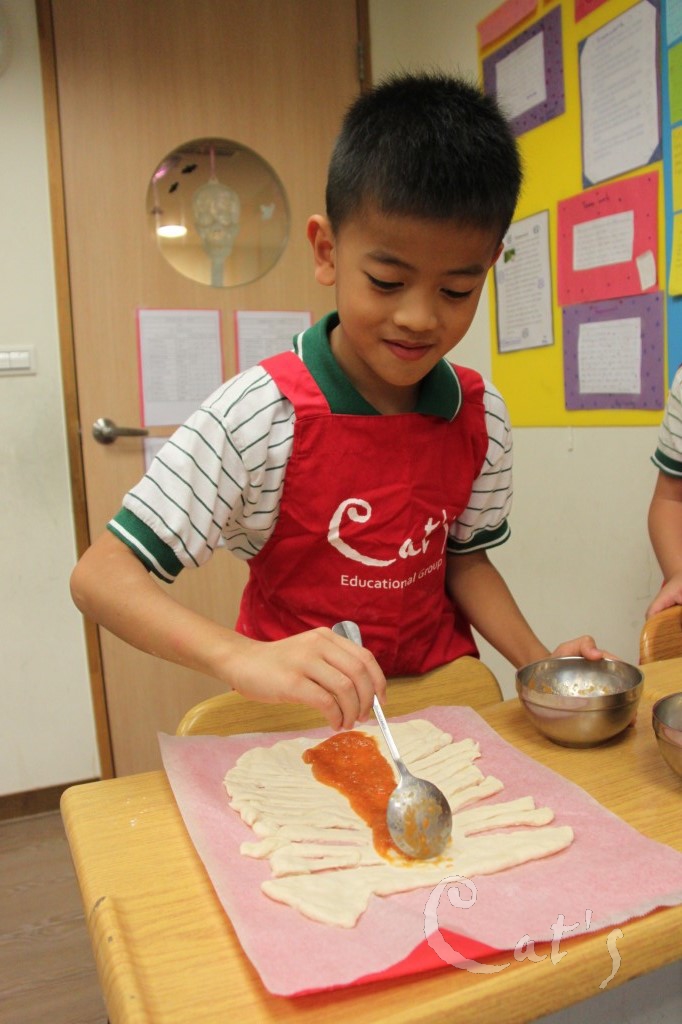
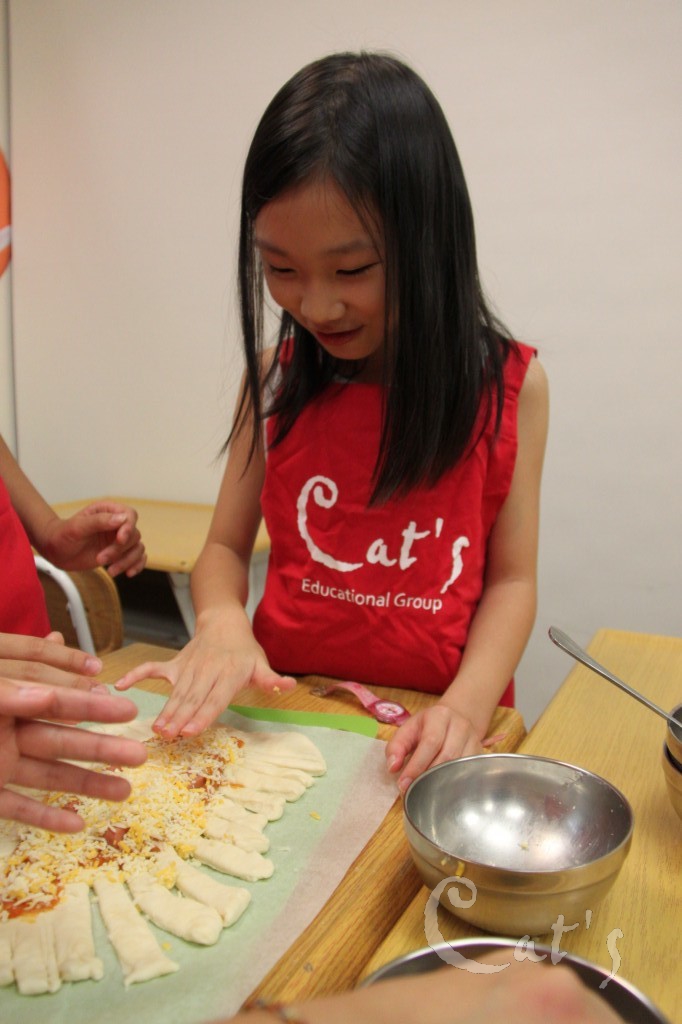
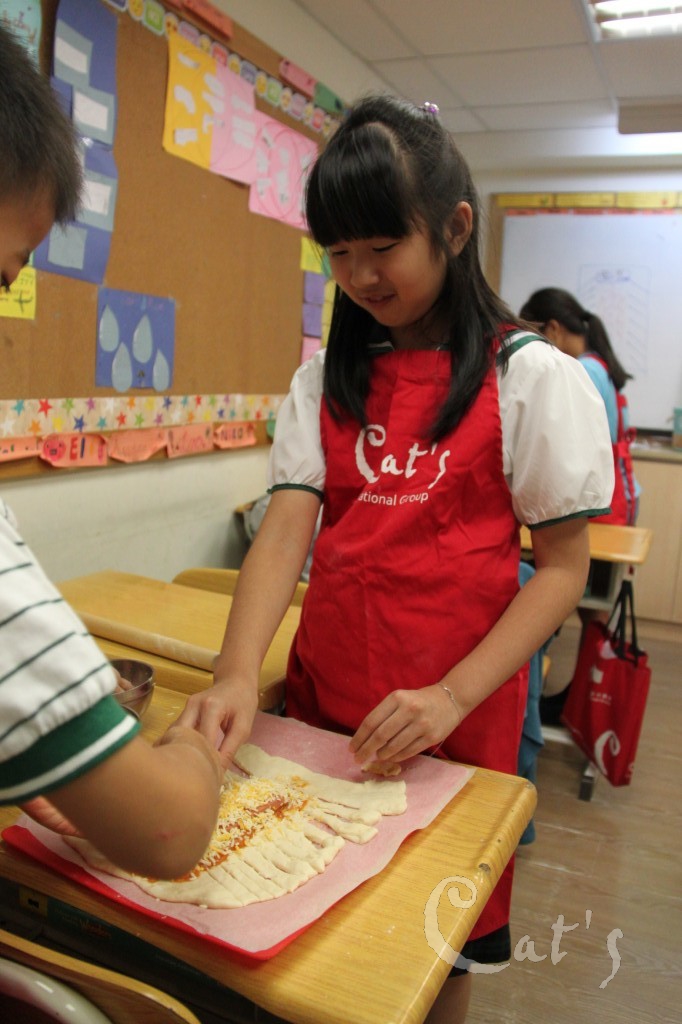
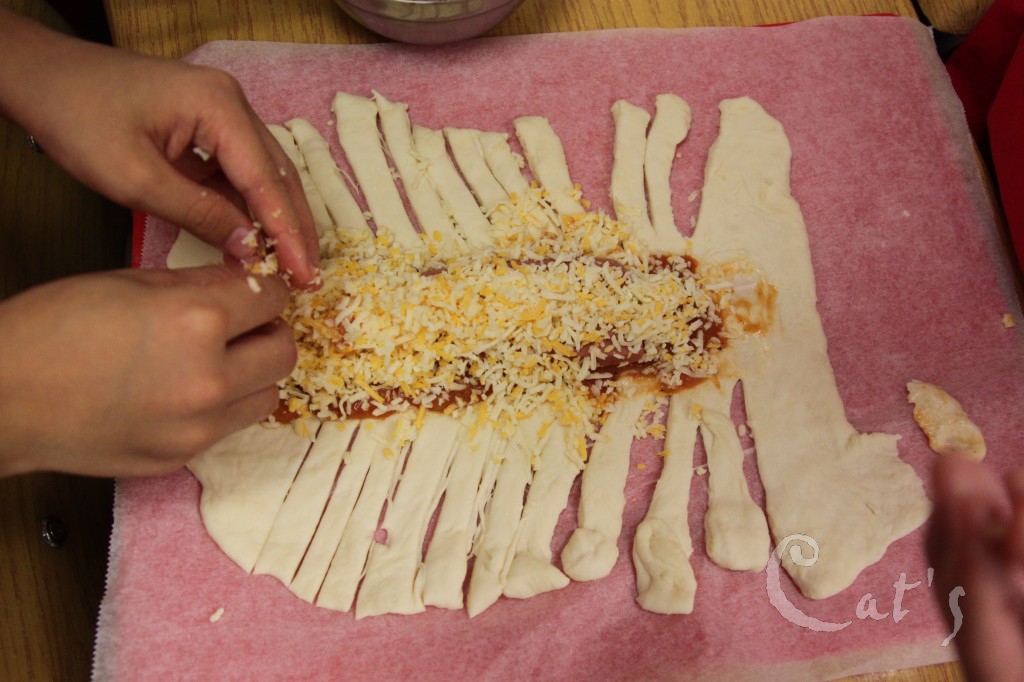
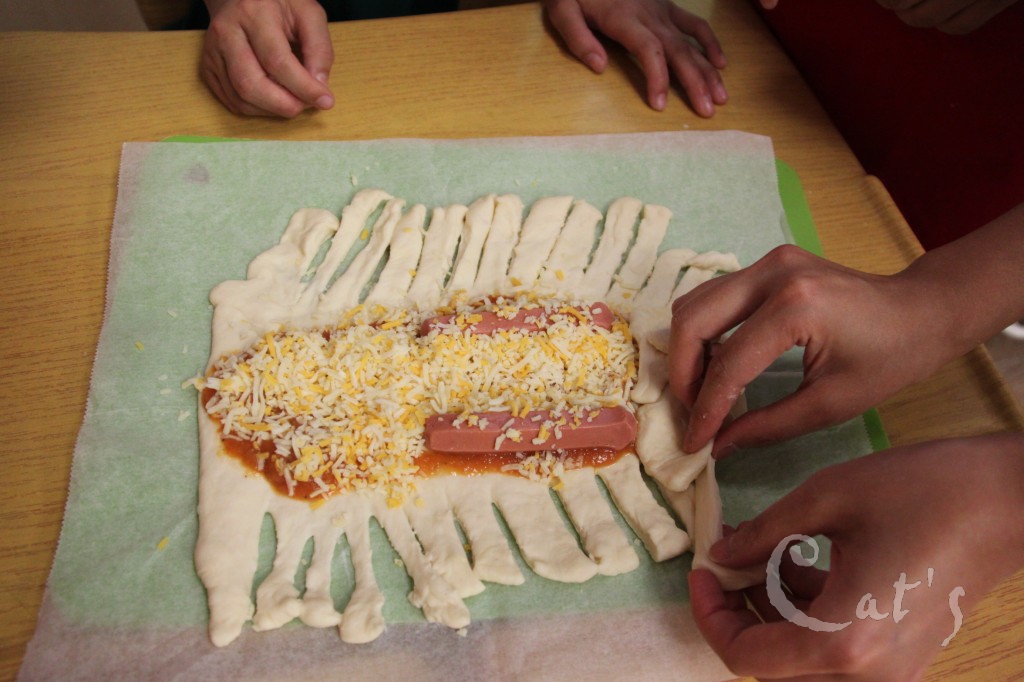
Add a generous dollop of sauce in the center of your pizza dough.
-
Spread it across.
-
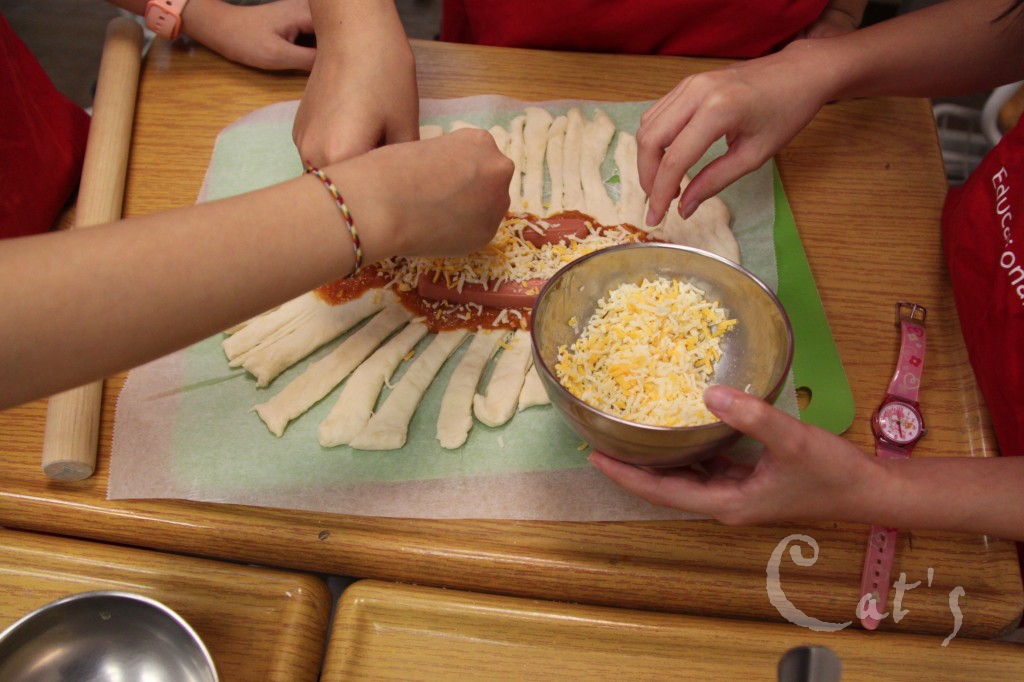
Add some mozzarella cheese and sausages.
-
-
-
-
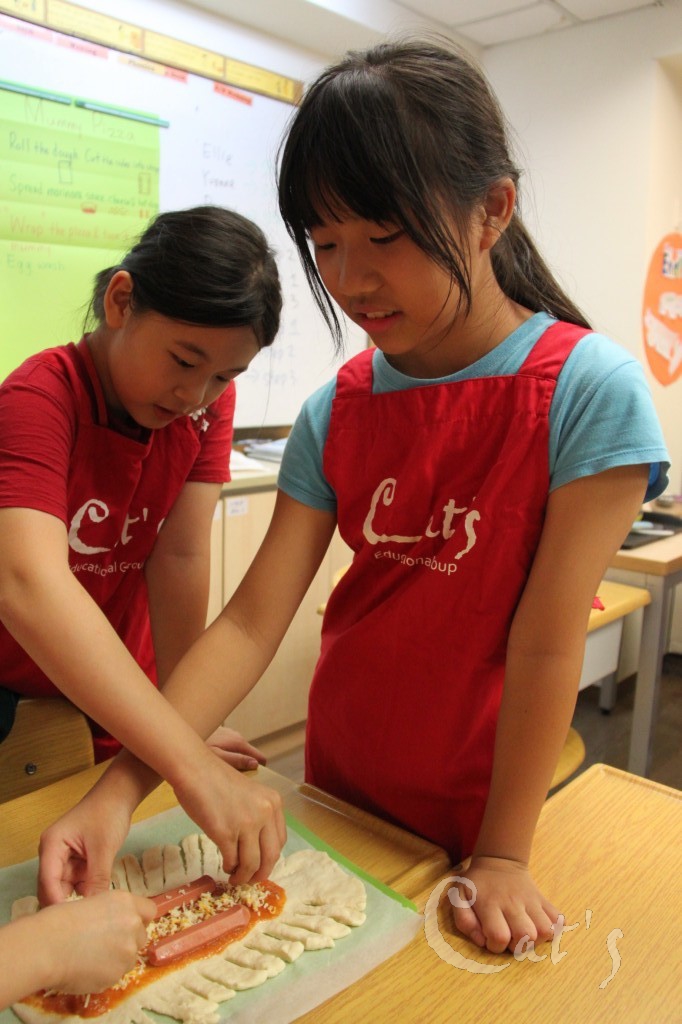
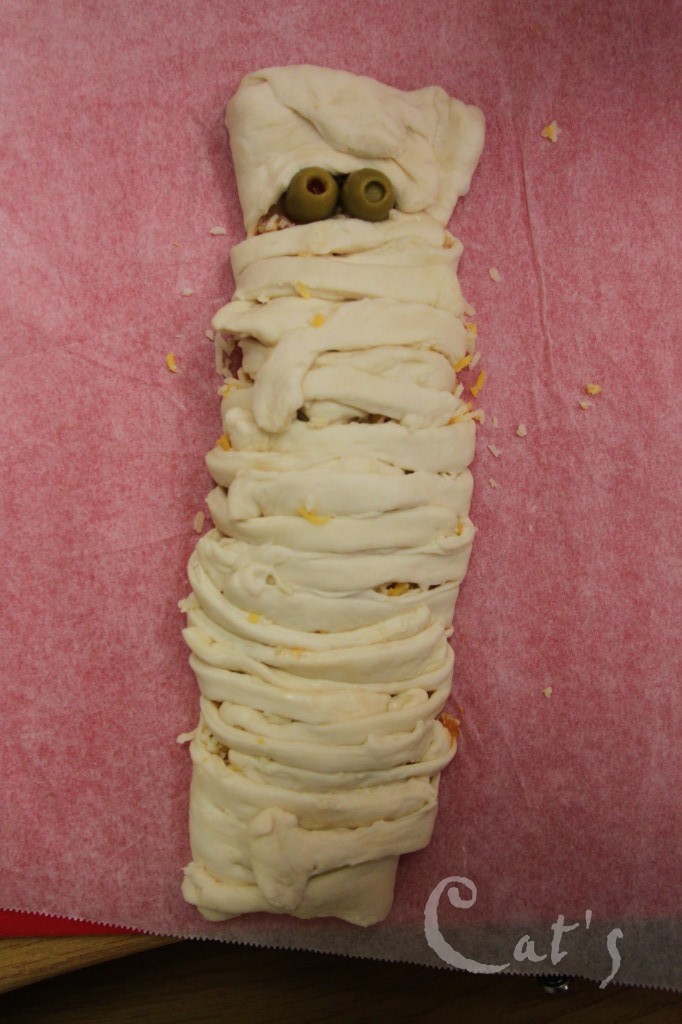
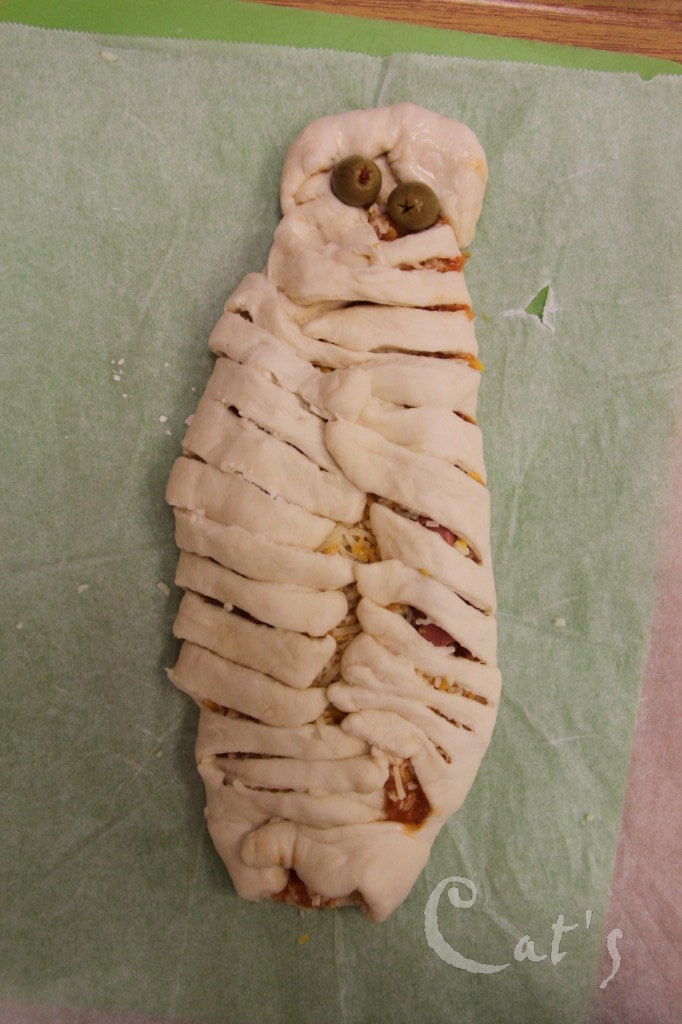
Fold the strips toward filling.
-
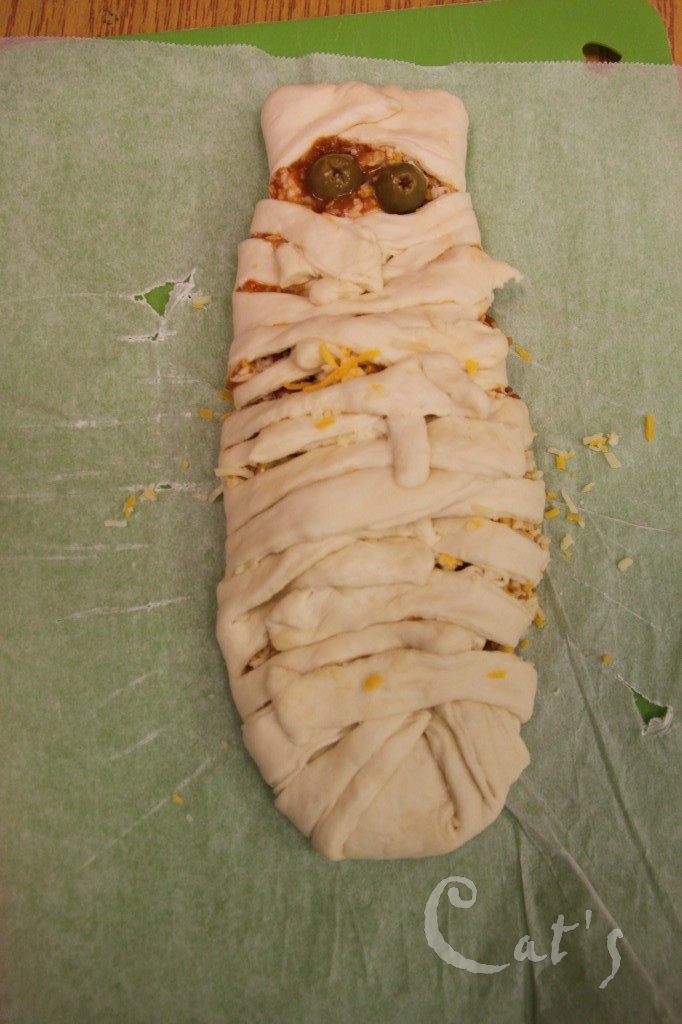
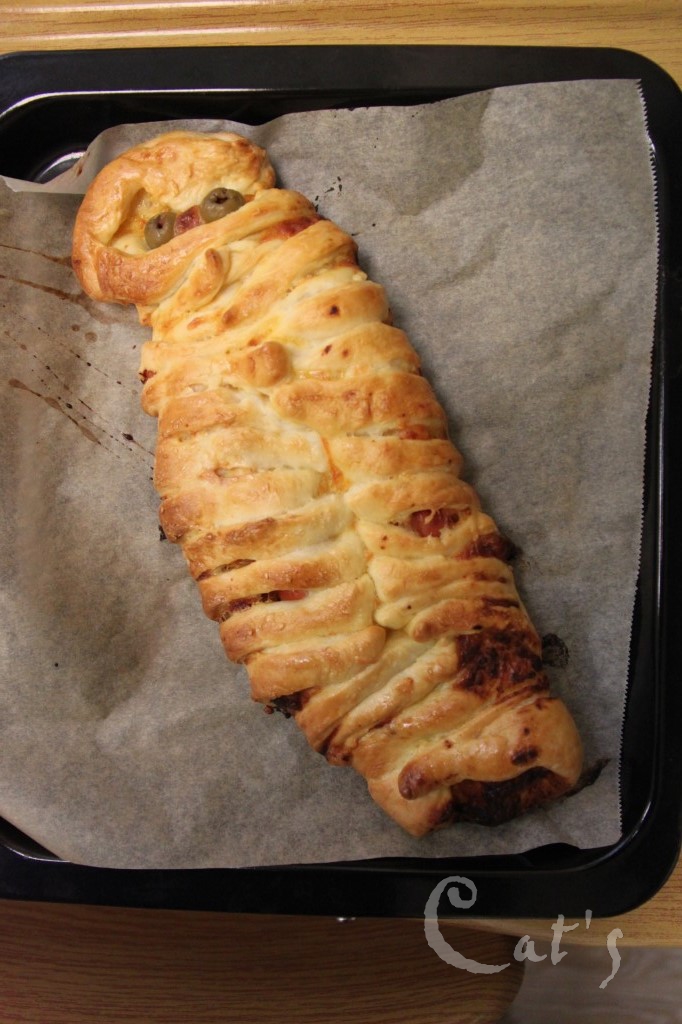
Braid the strips for a messy mummy look.
-
Work your way from the top.
-
-
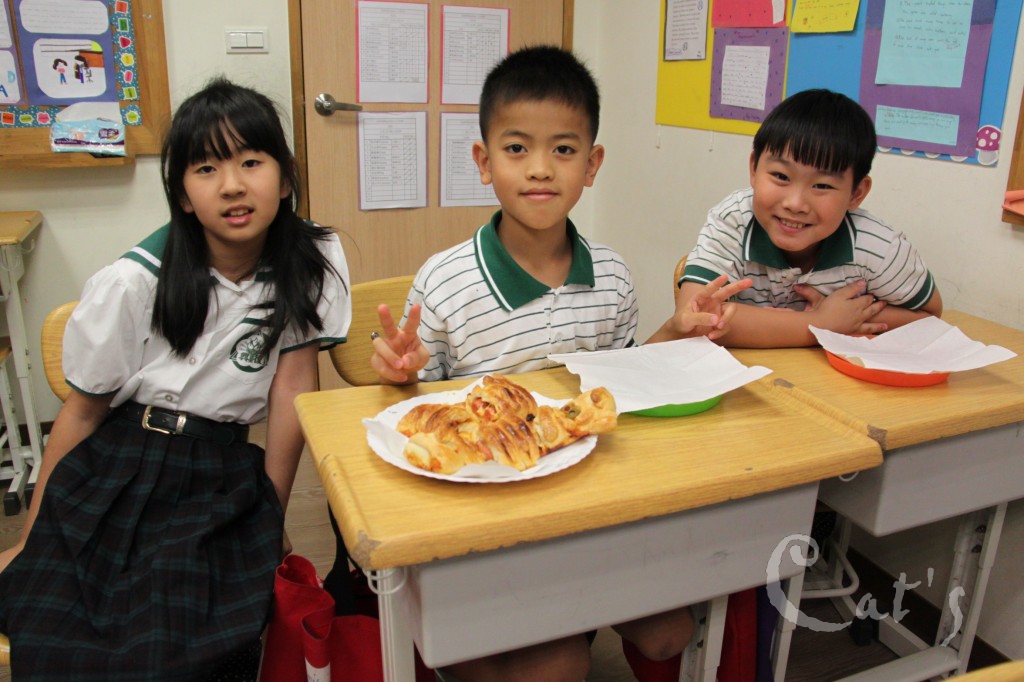
Hey guys, I'm oven ready!
-
Me too!
-
Me third!
-
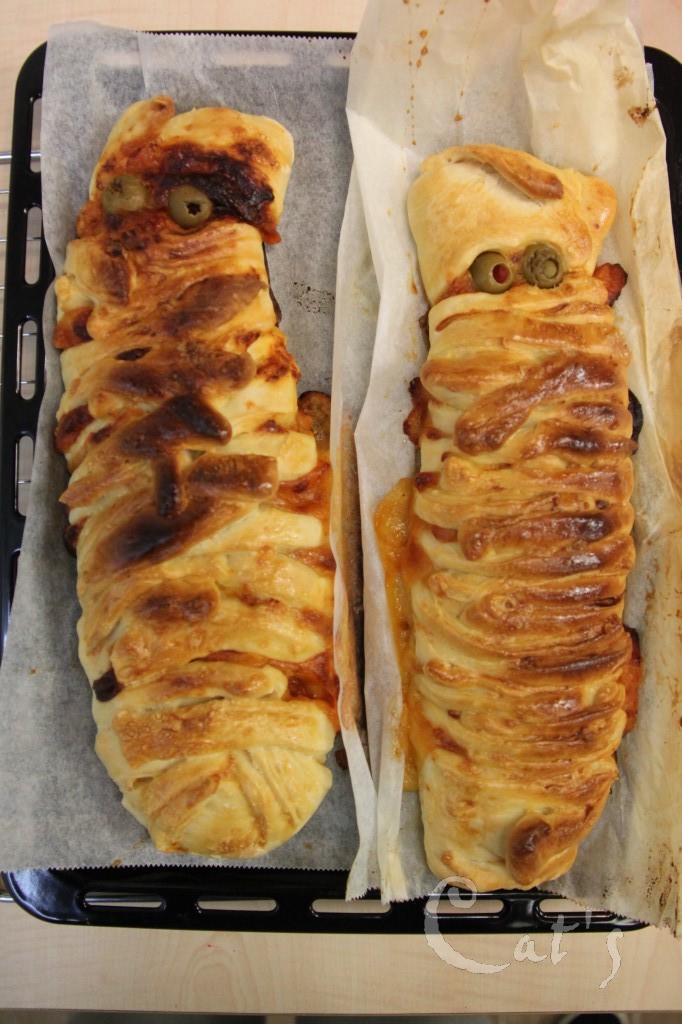
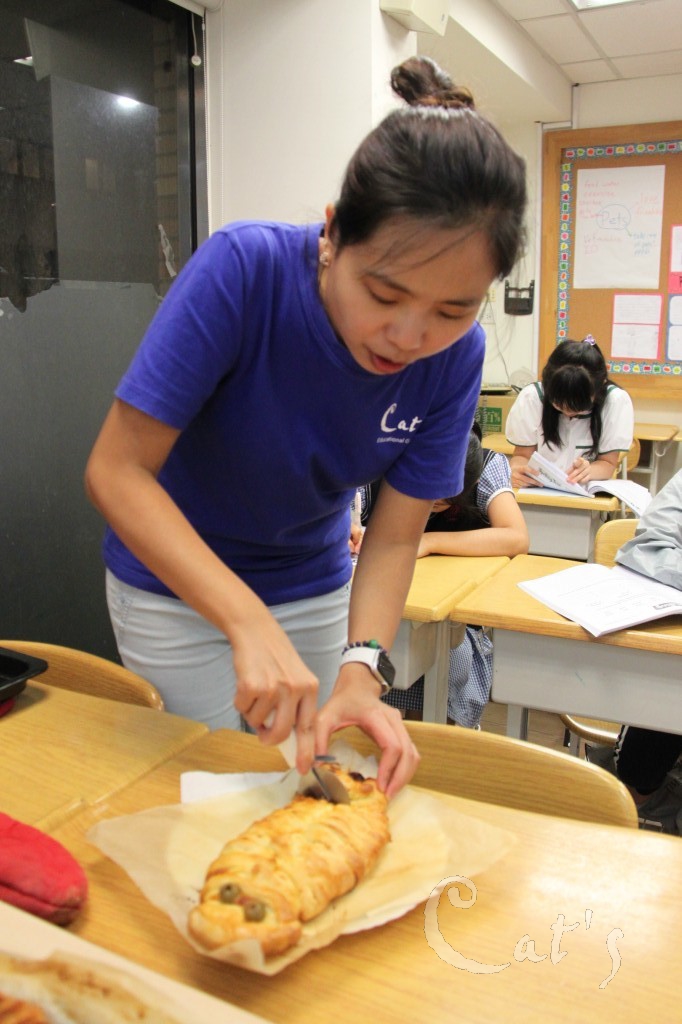
Carefully lifting up the parchment paper.
-
Deliciously golden brown!
-
Spooooky!
-
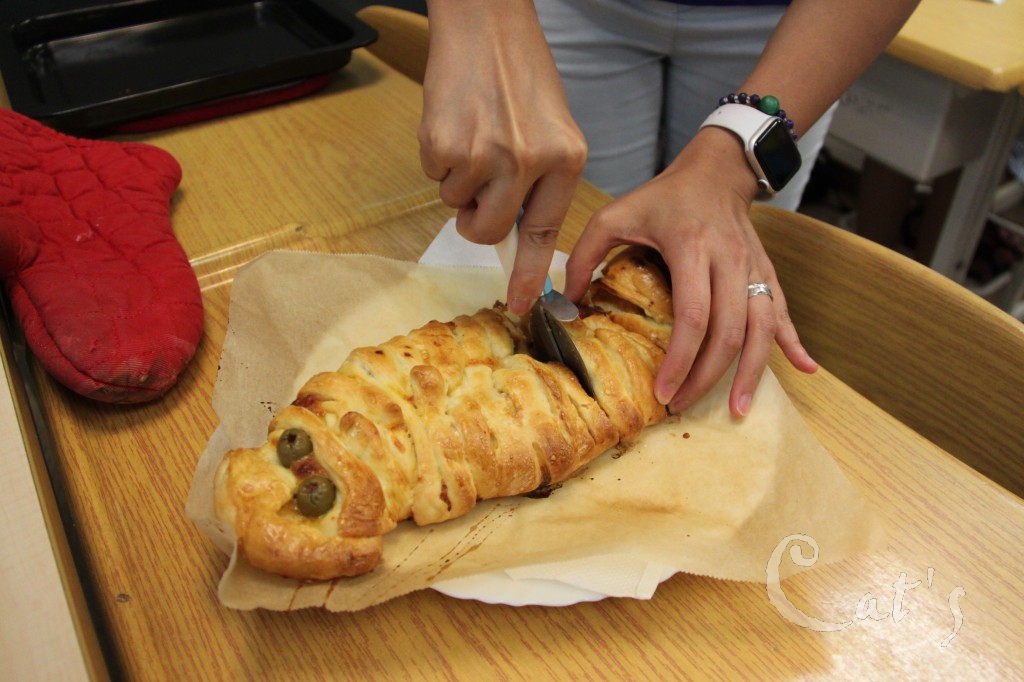
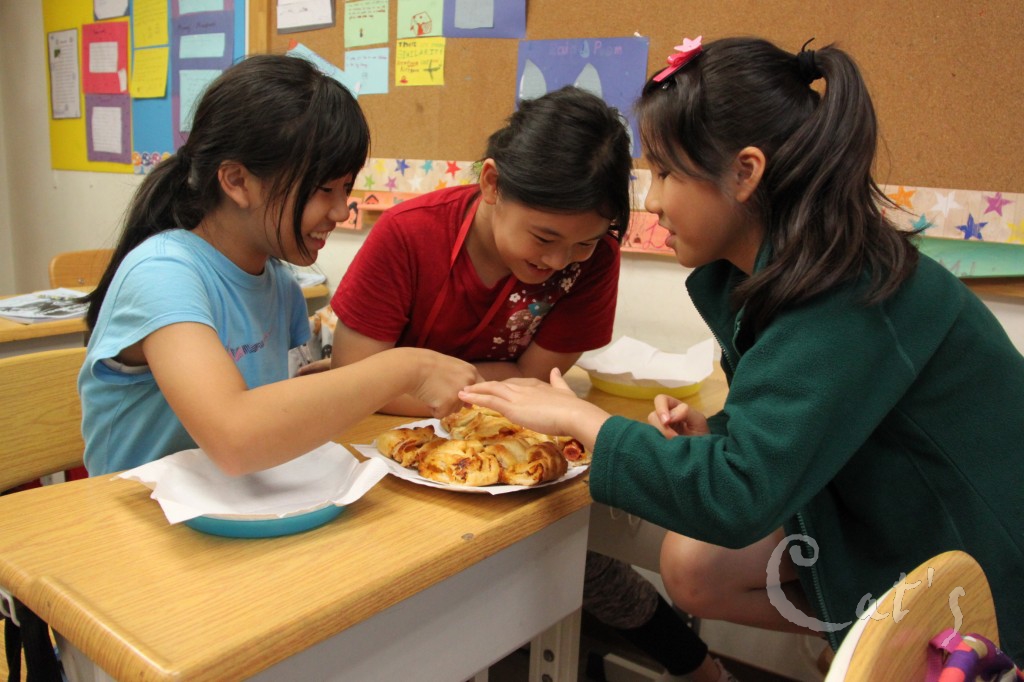
Ms. Tiffany slices the pizza mummies evenly for her students.
-
The sound of the crispy crust crunching is the best!
-
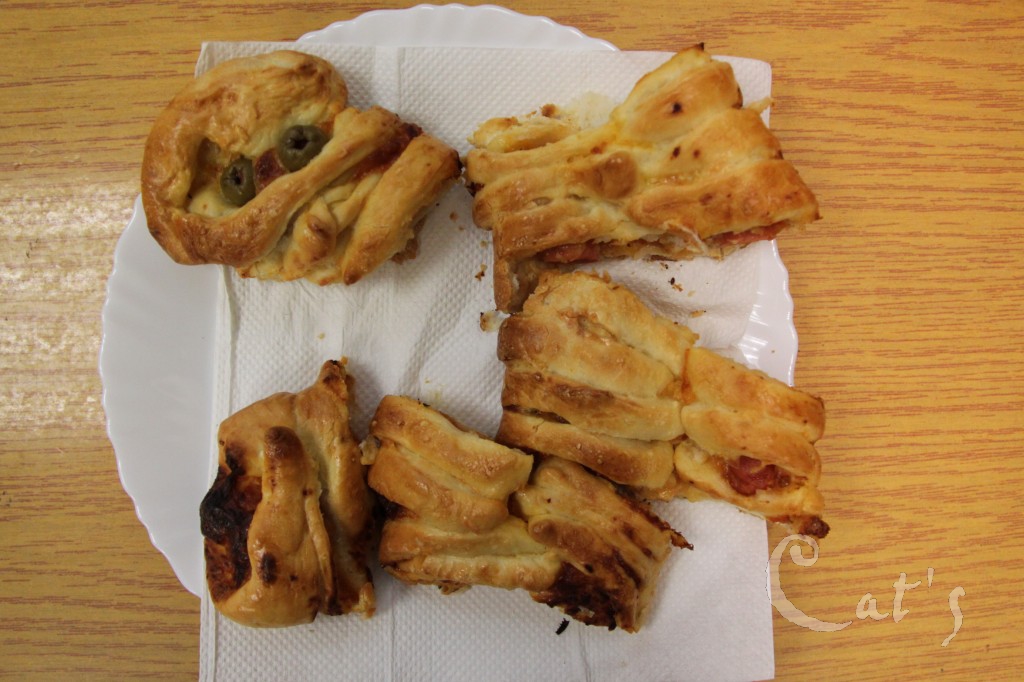
Dig in guys!
-
I want this piece!
-
Say "Mummy"!
-
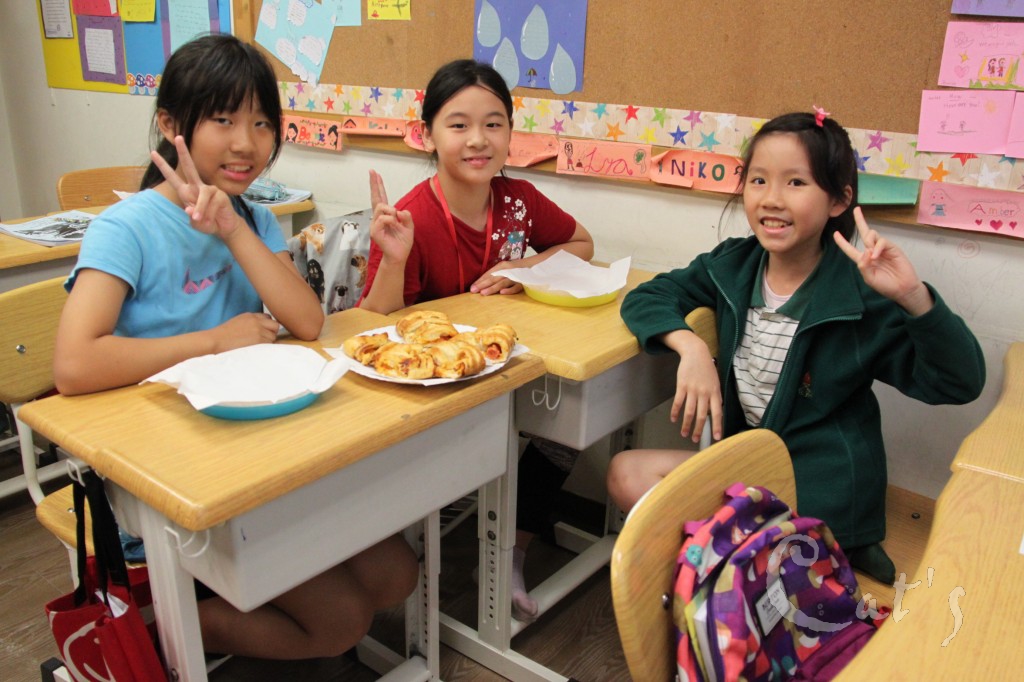
Yay!
-
We made our very first pizza mummy!
-
I want the crispiest bits!
-
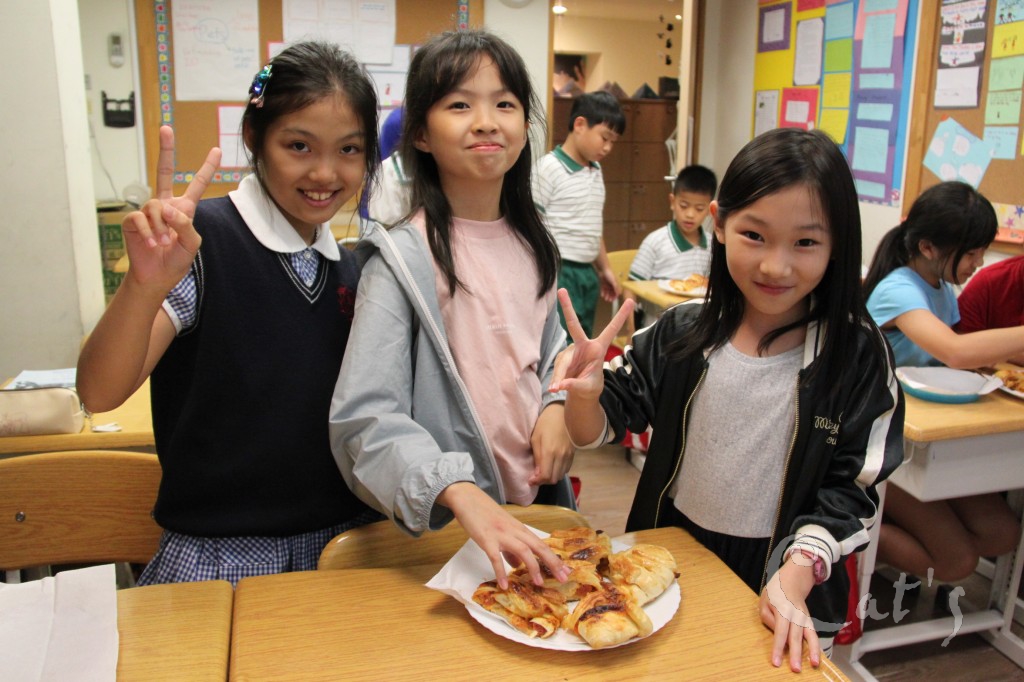
This smells so good!
-
Munch!
-
Then roll out the dough.
-
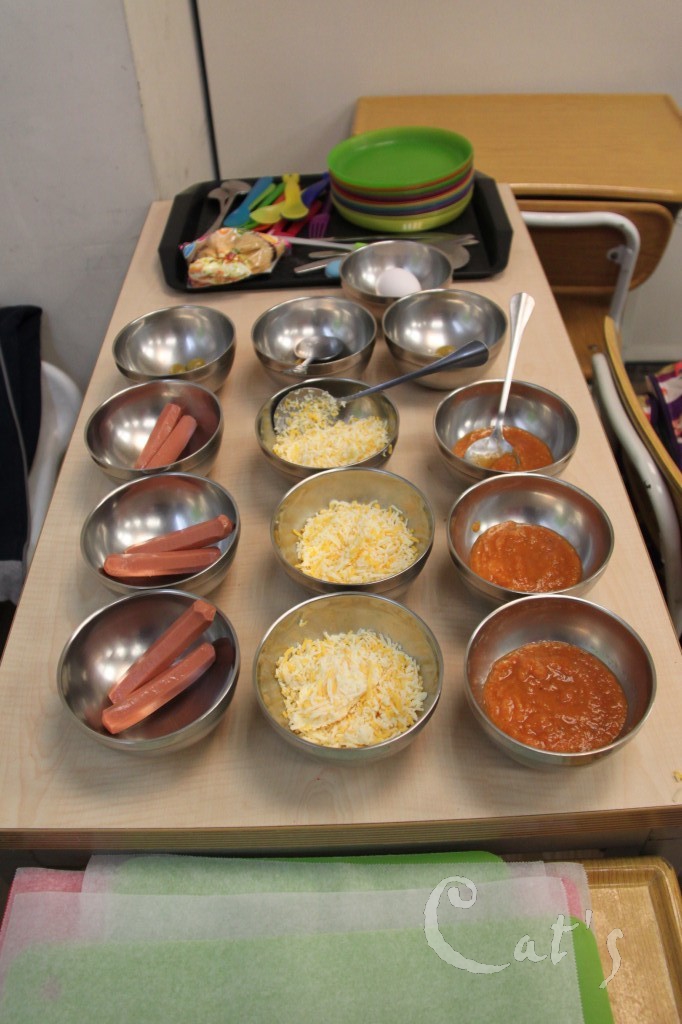
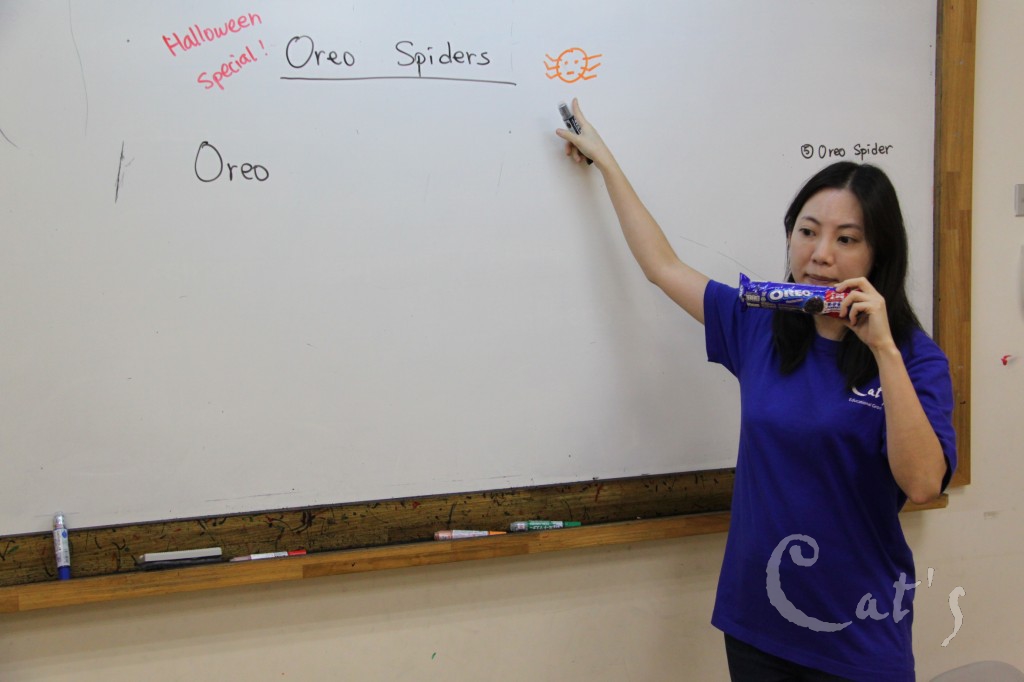
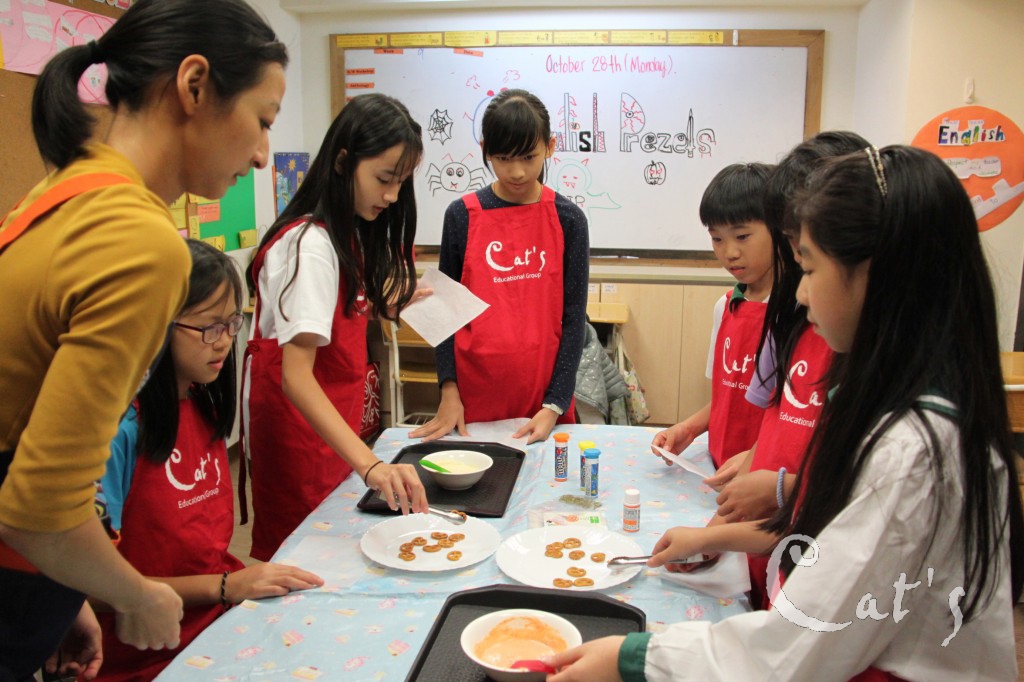
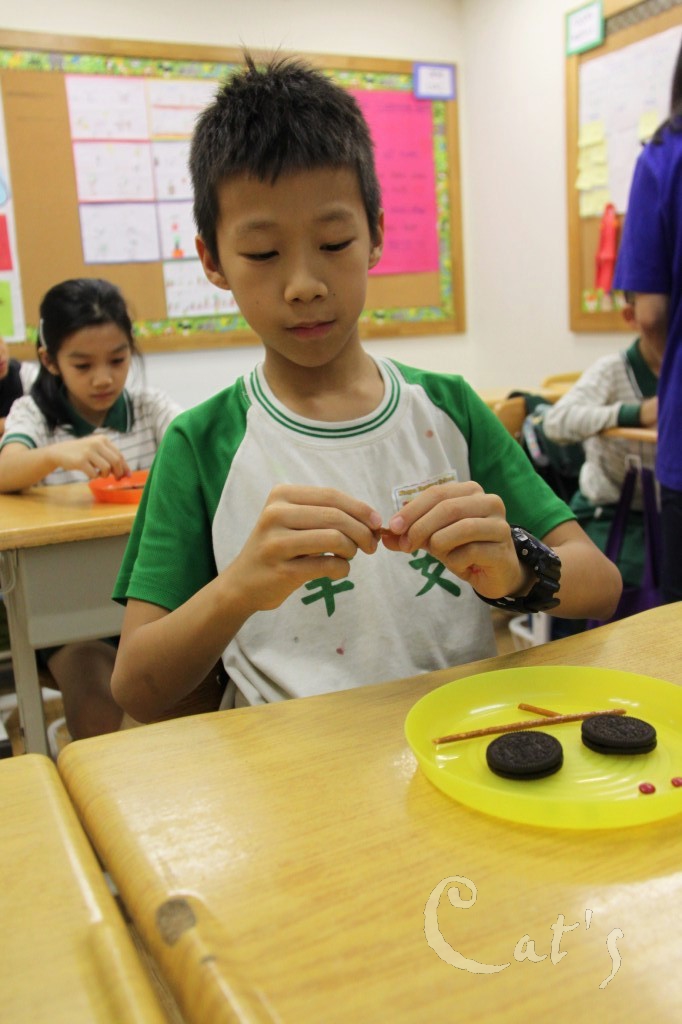
What are we making today?
-
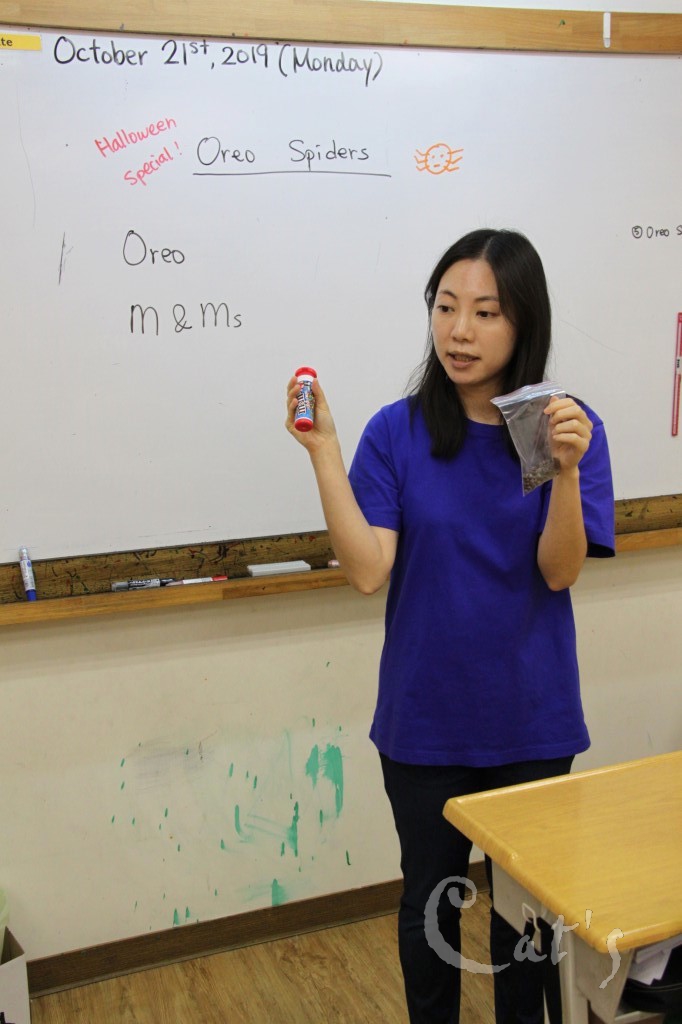
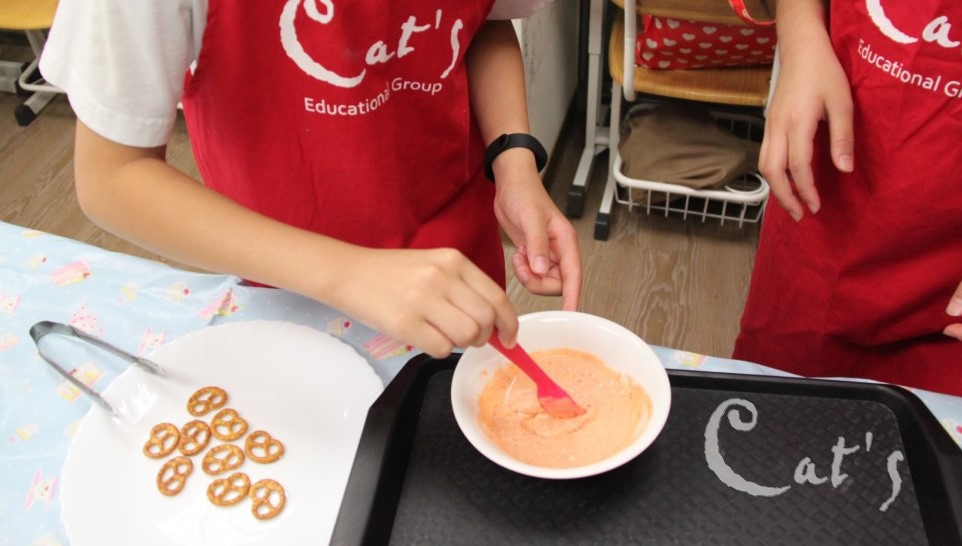
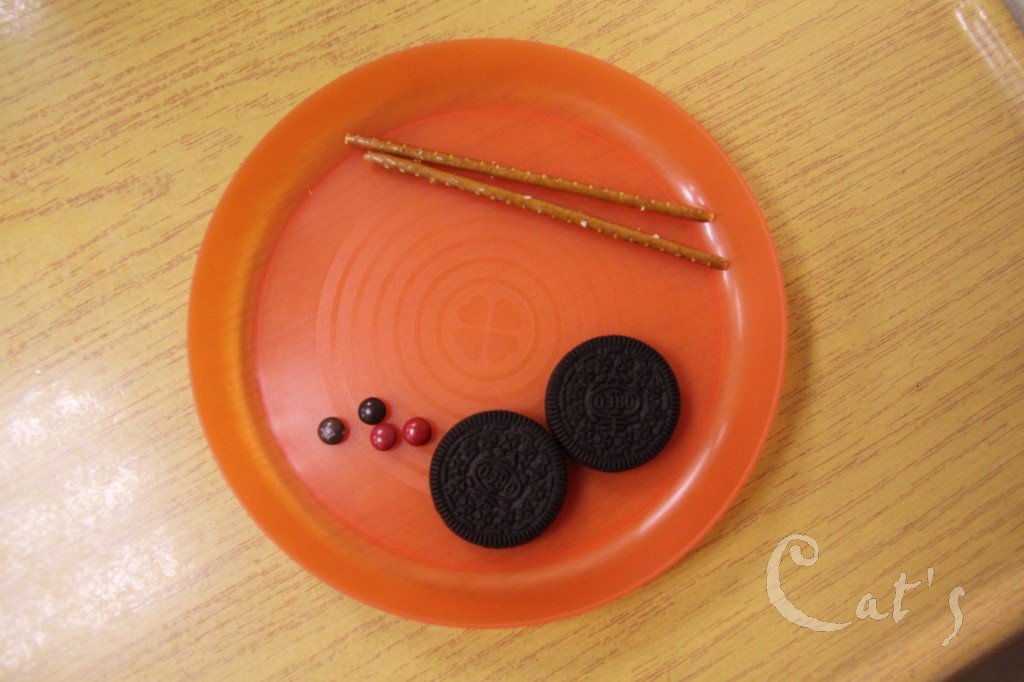
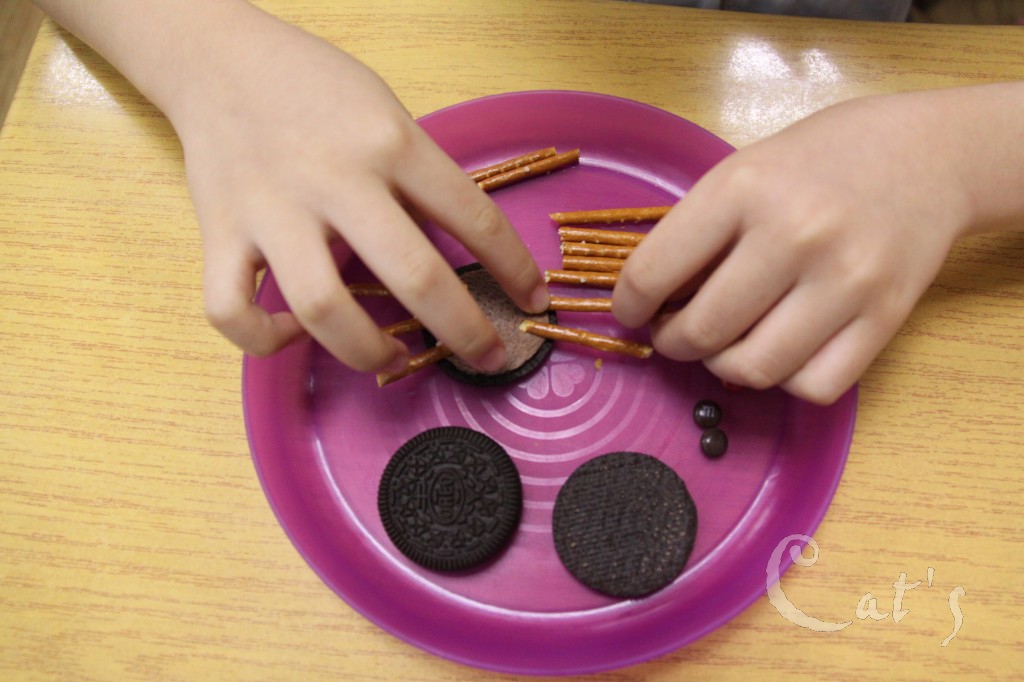
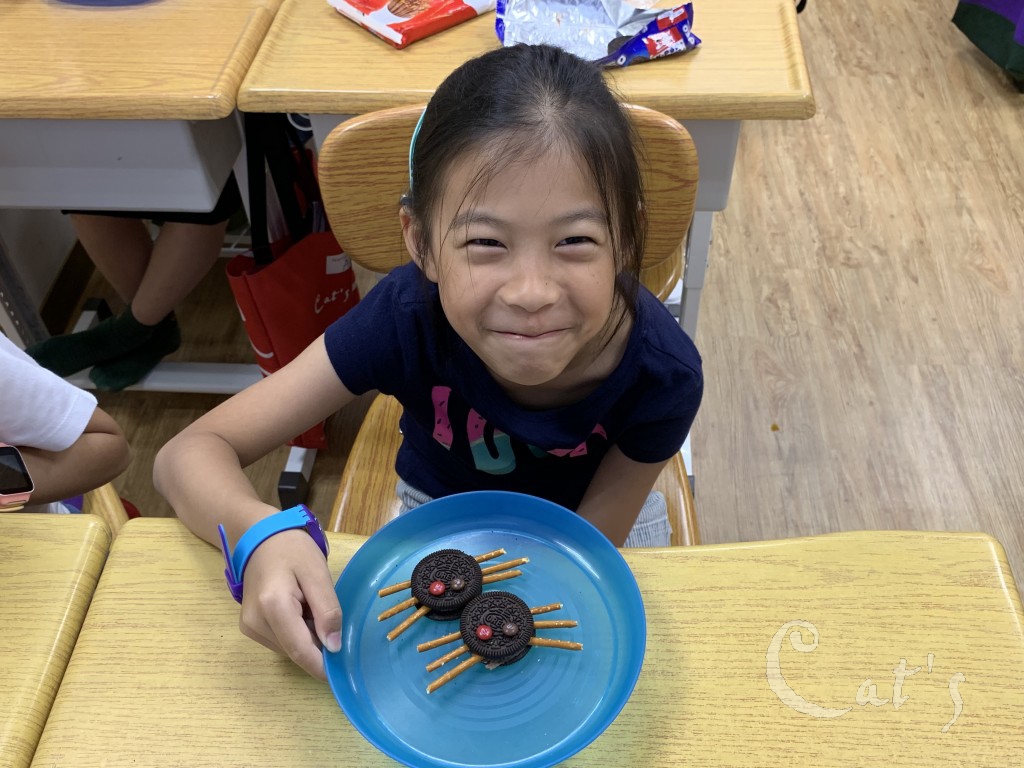
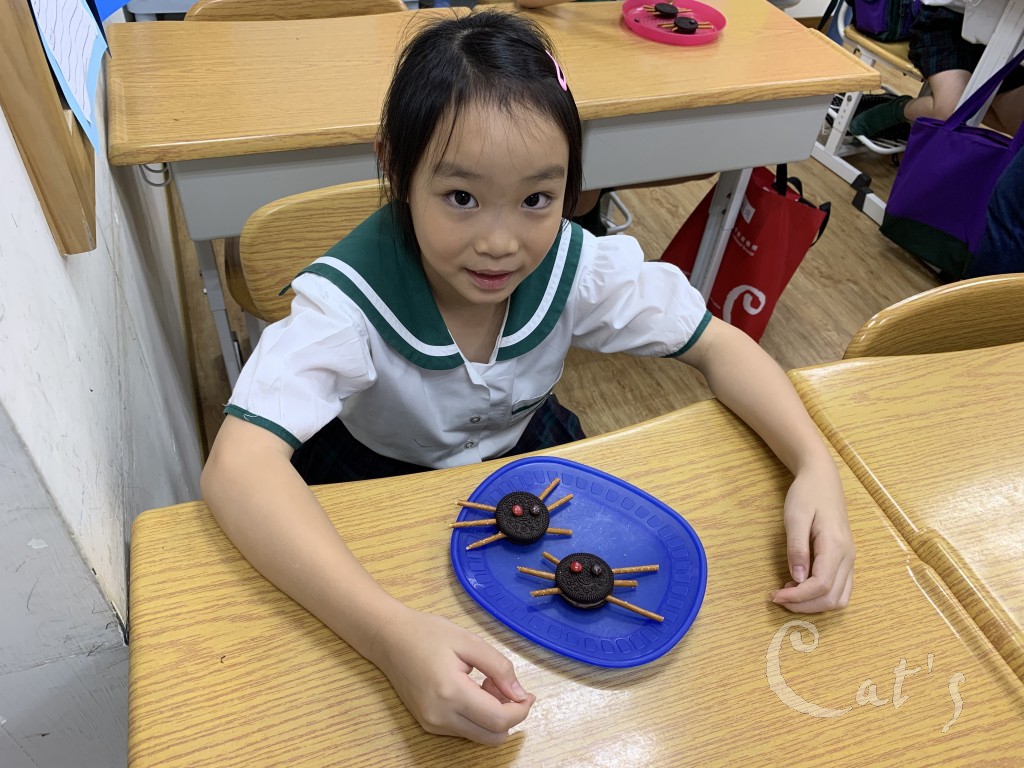
We are using M&M, Oreos and Pretzel sticks to make "Oreo Spiders"!
-
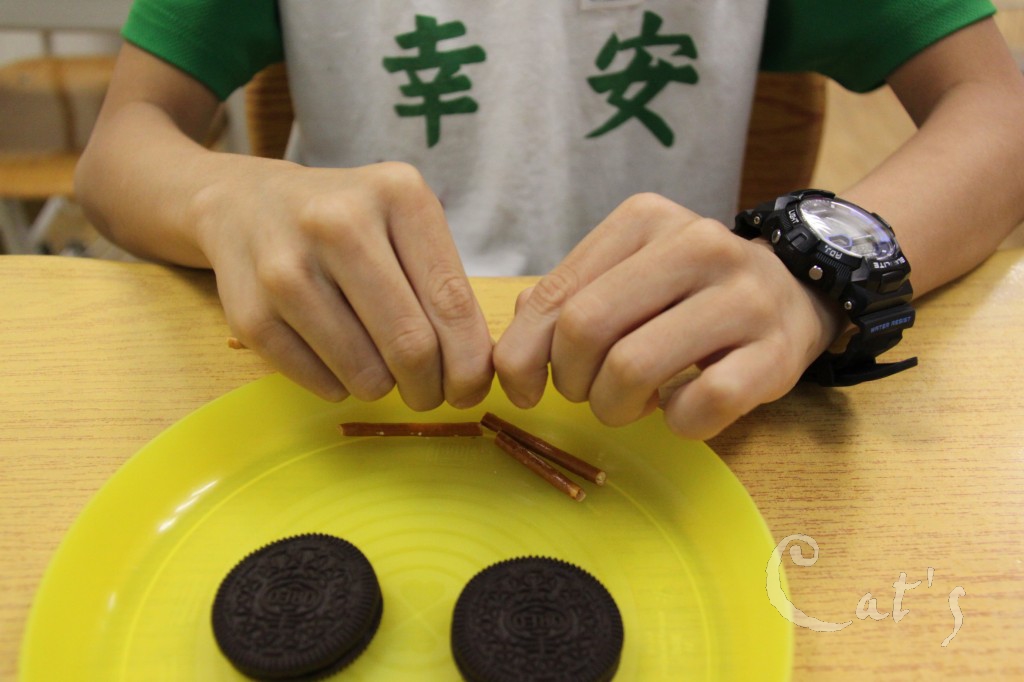
First, break the pretzel sticks into three parts.
-
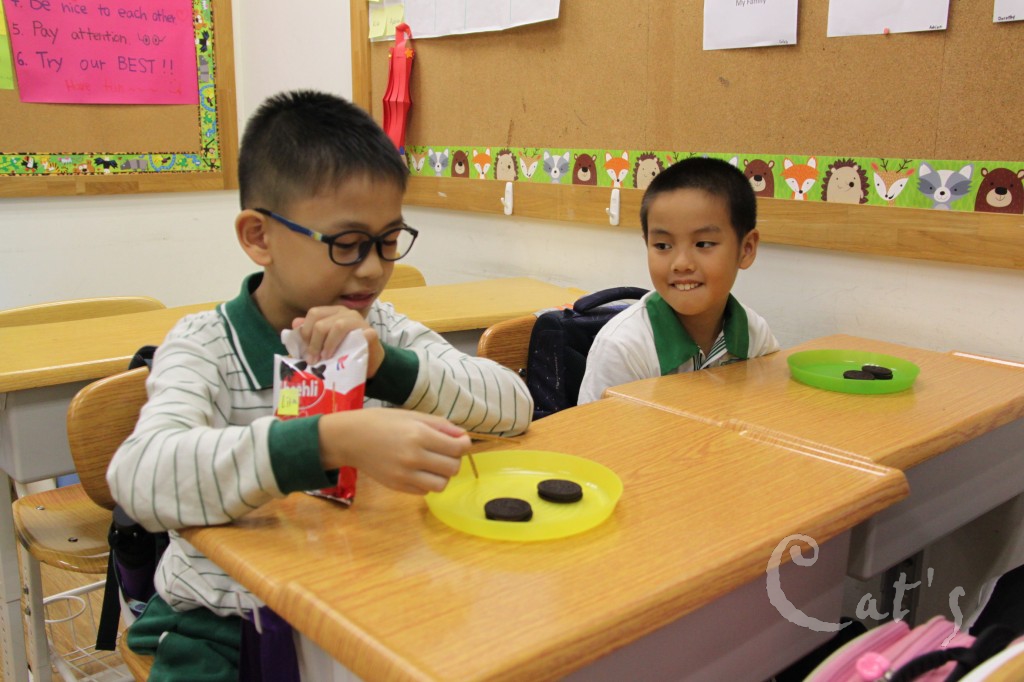
Everyone gets two Oreos!
-
Everyone gets four pretzel sticks.
-
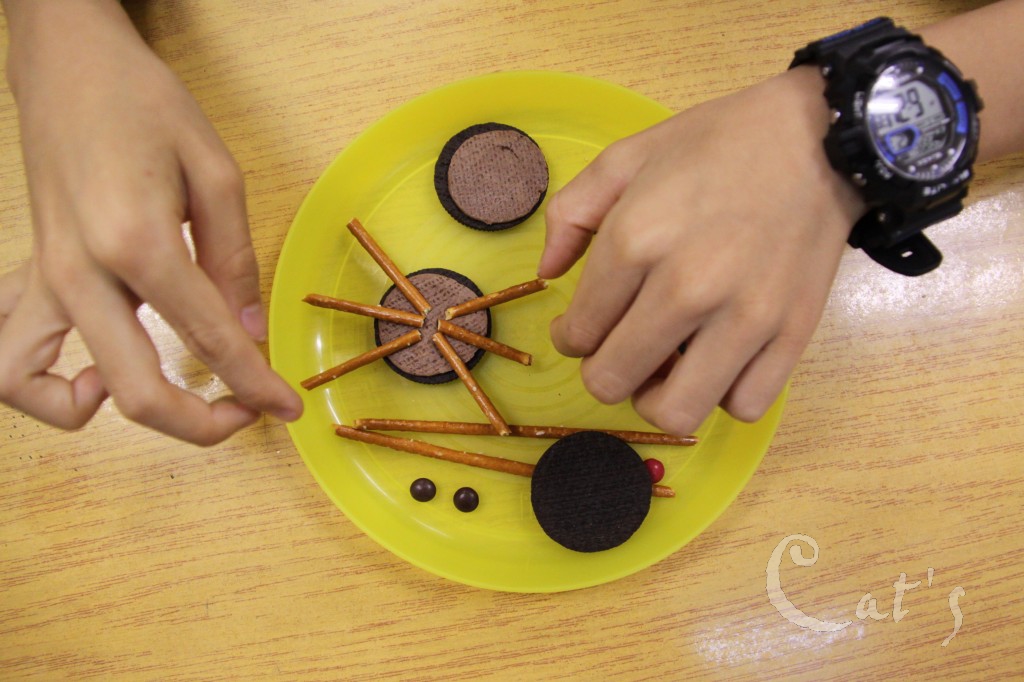
Pretzel sticks are the legs on our Oreo spiders.
-
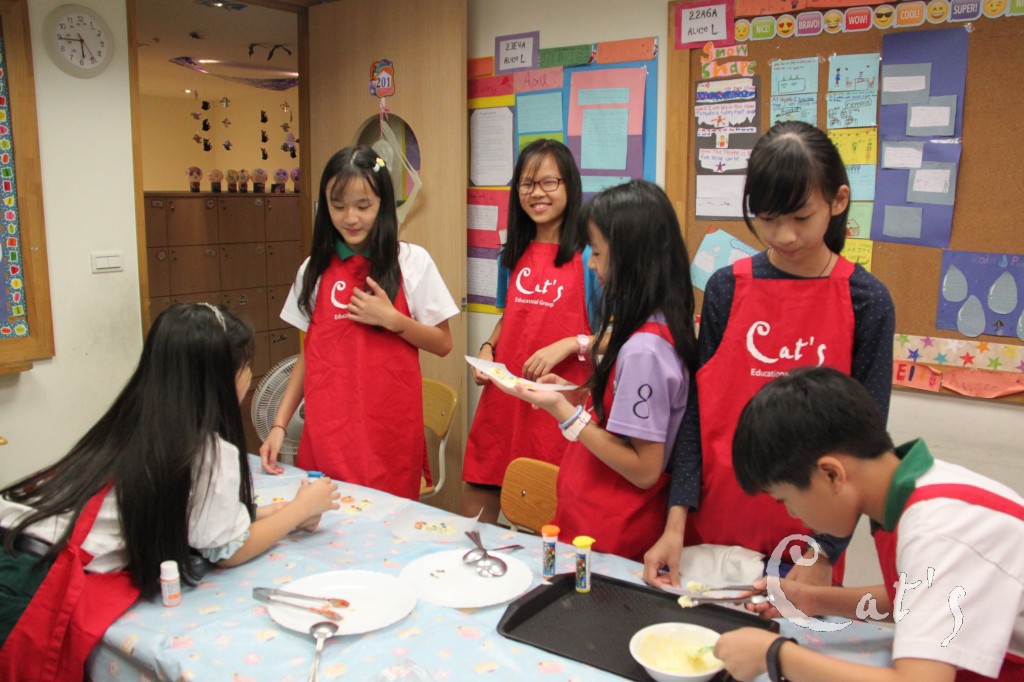
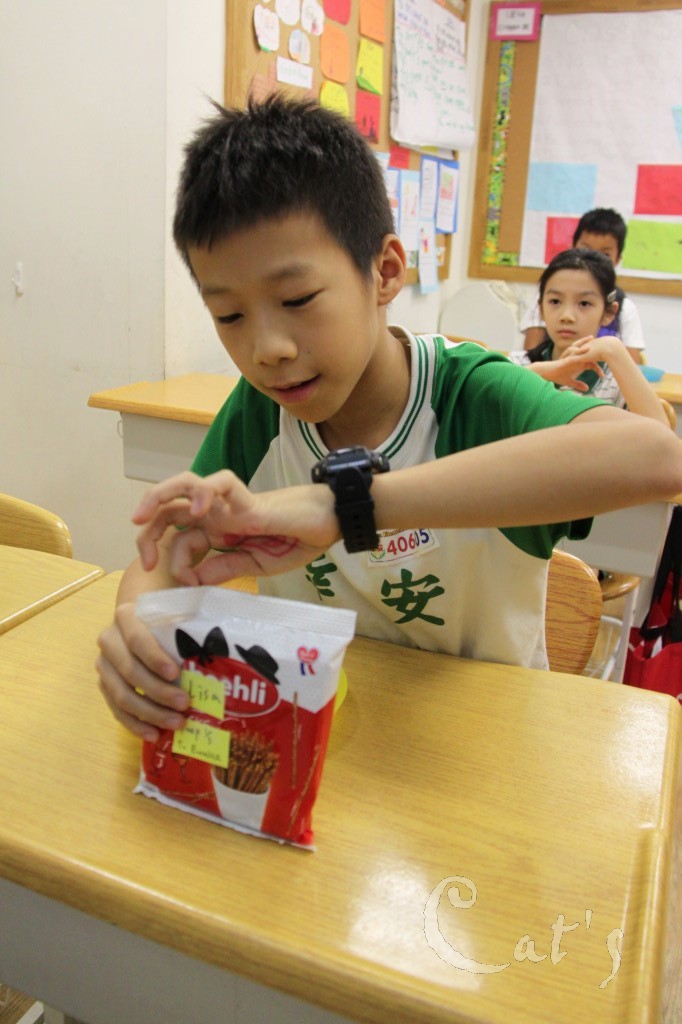
Do you have all the ingredients on your plate?
-
I'm ready to make Oreo Spiders!
-
Breaking the pretzel sticks into three parts.
-
Great work at getting even lengths!
-
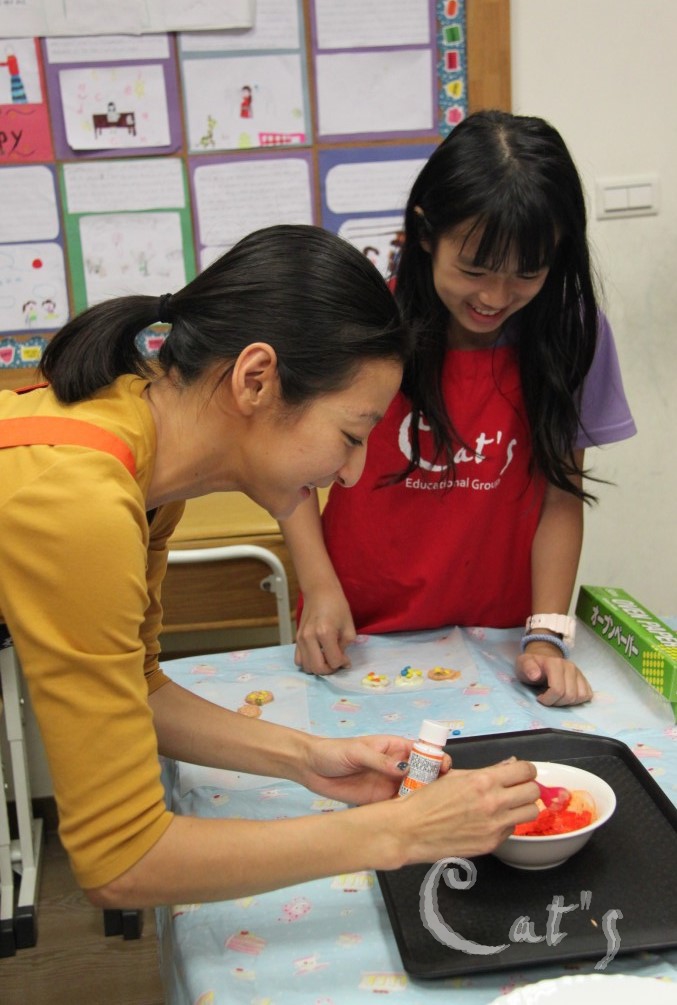
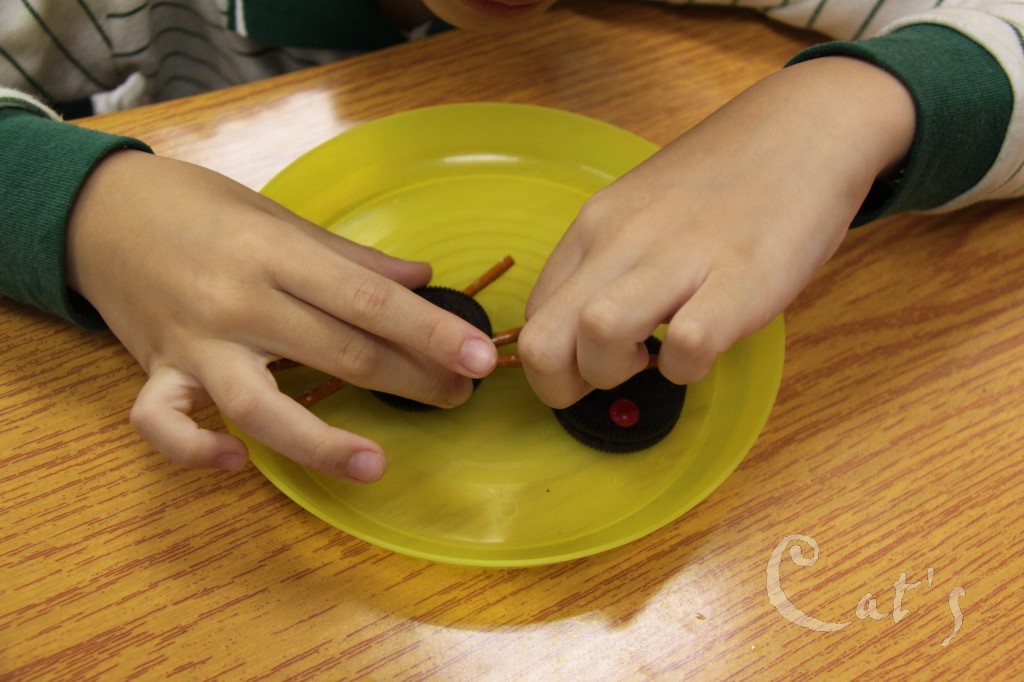
Separate the Oreo cookies first, then add the pretzel sticks onto the filling.
-
Making sure the pretzels don't fall out.
-
Pressing the pretzel sticks down securely.
-
-
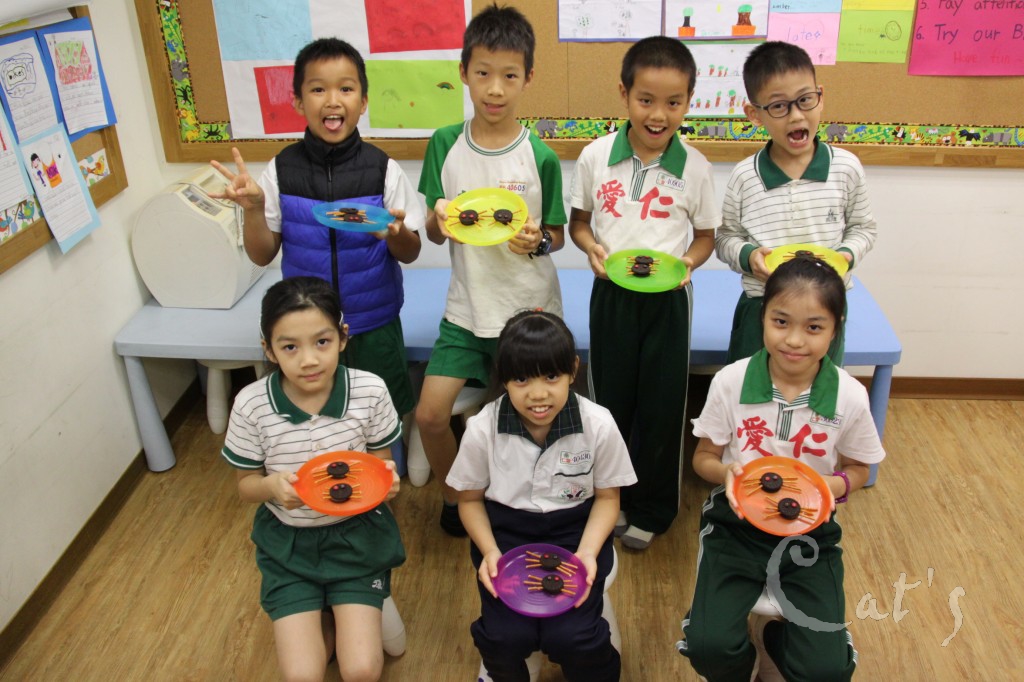
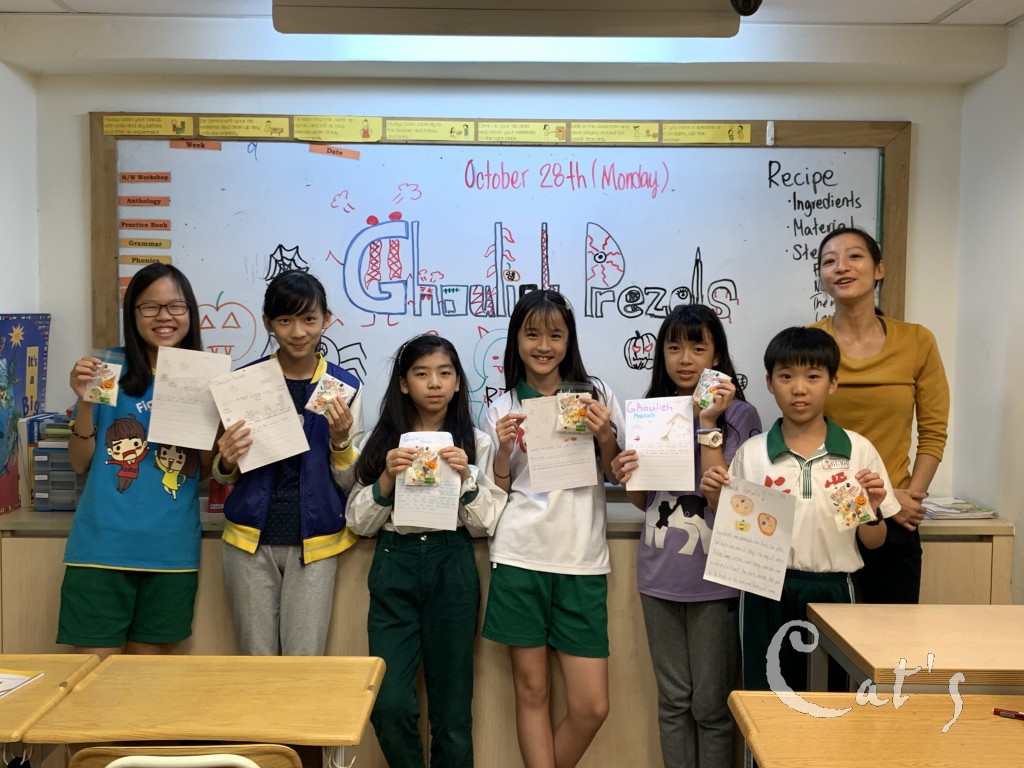
Look how cute my Oreo Spiders are!
-
-
Yum!
-
Have a faboooooolous Hall-o-weeeeen!


